26
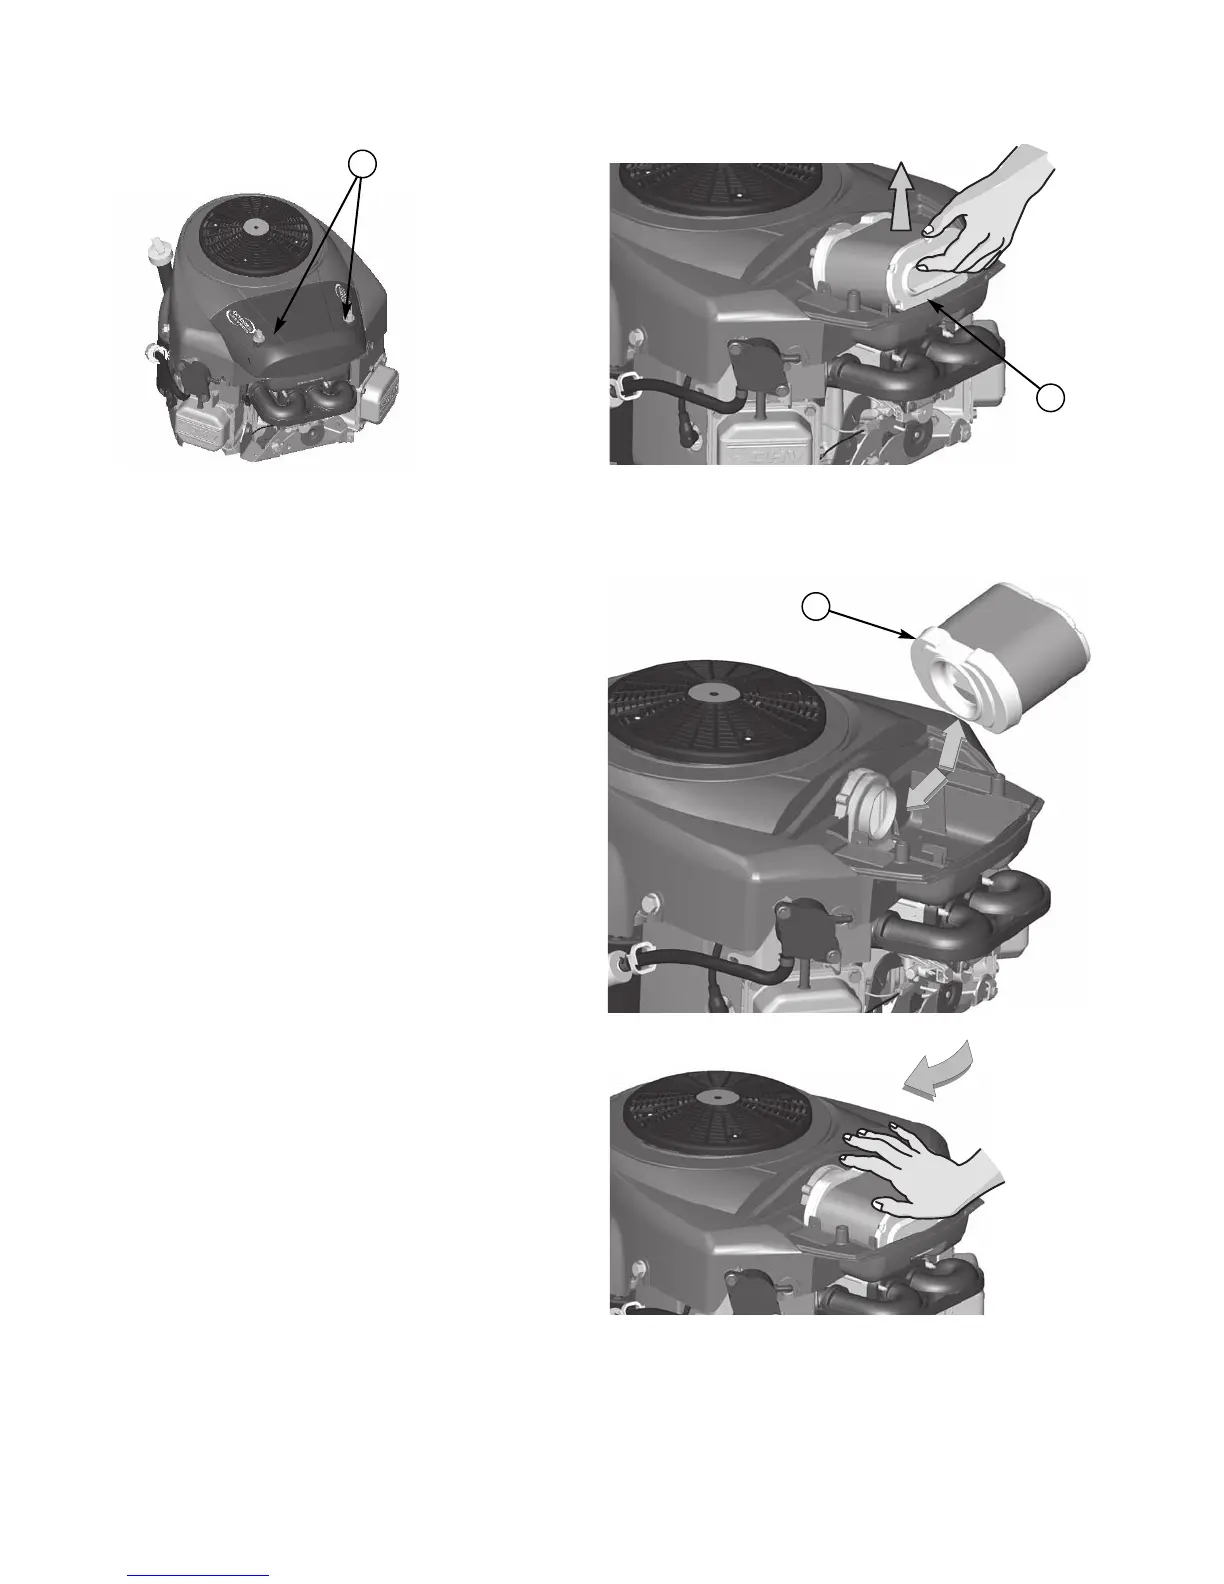
Figure 37. Air Filter Cover
A. Air Filter Cover Screws
A
SERVICE AIR FILTER -
24 & 26HP ENGINES
NOTE: Air filter configuration may differ from shown.
Consult engine manual for further information.
Service Interval: Every 25 hours or as required.
1. Loosen the air filter cover screws (A, Figure 37) and
remove the air filter cover.
2. Locate the air filter cartridge (A, Figure 38). Pull up
on the front edge of the cartridge until it snaps out of
place.
3. Inspect the cartridge for dirt or damage.
If the thin foam sleeve surrounding the filter is
damaged, replace the filer. DO NOT oil the foam
sleeve or cartridge. If there is oil of heavy dirt on the
cartridge, replace it.
DO NOT use pressurized air or solvents to clean the
filter cartridge.
Remove any dirt from the air filter housing.
4. Replace the cartridge by aligning the hole of the
cartridge with the air vent (A, Figure 39).
5. Push the cartridge in toward the engine until it snaps
into place.
6. Reinstall the air filter cover and tighten the screws (A,
Figure 37).
Figure 38. Air Filter Removal
A. Filter Cartridge
A
A
Figure 39. Air Filter Installation
A. Filter Cartridge