The document is a Safety Instructions & Operator's Manual for the Snapper Series 14 Rear Engine Riding Mowers.
Function Description
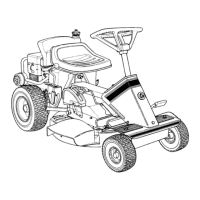
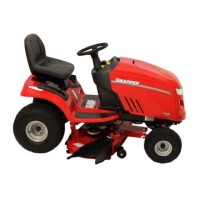
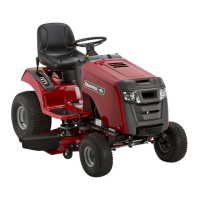
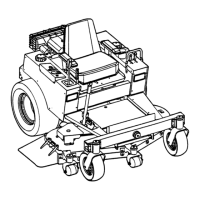
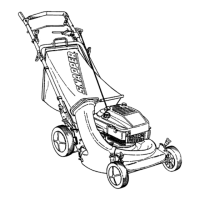
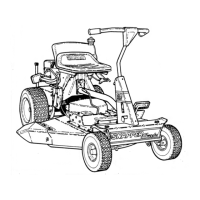
The Snapper Series 14 Rear Engine Riding Mower is a powerful cutting machine designed for residential, non-commercial, and commercial/rental use. Its primary function is to cut grass and maintain lawns. The mower is equipped with a rear engine and a cutting deck, and it can be operated with various attachments.
Important Technical Specifications
The Series 14 Rear Engine Riding Mowers come in several models, distinguished by cutting width, engine horsepower, and engine type.
Models:
- 250814B
- 250814BE
- 280914BE
- 281014BE
- 300914BE
- 301014BE
- 301214BE
- 331314BE
- 331414KVE
Prefix Explanation (Cutting Width):
- 25: 25" Cutting Width
- 28: 28" Cutting Width
- 30: 30" Cutting Width
- 33: 33" Cutting Width
Body Explanation (Engine HP & Series Designation):
- 08: 8hp Engine
- 09: 9hp Engine
- 10: 10hp Engine
- 12: 12hp Engine
- 13: 13hp Engine
- 14: 14hp Engine
- 14: Series Designation
Suffix Explanation (Engine and Options):
- B: Briggs & Stratton Engine
- K: Kohler Engine
- V: Overhead Valve Engine
- E: Electric Start
Tire Pressure:
- Front tires: 15 psi
- Rear tires: 10 psi
Blade Mounting Bolt Torque:
- 45-55 ft. lbs. (for 25", 28", 30", 33" decks)
- 70-80 ft. lbs. (for 33" deck, Figure 3.2) - Note: There is a discrepancy in the manual regarding the blade mounting bolt torque. Figure 3.2 shows 70-80 ft. lbs. for a 33" deck, while the text states 45-55 ft. lbs. for all decks.
Mower Drive Belt Tension:
- Distance between belt at idler pulley: 1-1/4" but no less than 1".
Blade Brake Stopping Time:
- Blade should stop rotation in 3 seconds or less.
Blade Tip to Deck Lip Measurement (Hi-Vac decks):
Blade Sharpening Angle:
Clutch/Brake Cable to Cotter Pin Distance:
- No less than 3/16" and no greater than 7/16".
Battery Charging:
- Slow charge at 1 amp for 10 hours.
Usage Features
The Snapper Series 14 Rear Engine Riding Mower is designed for ease of use with several operational features:
- Controls: Includes a steering wheel, operator's seat, fuel tank, fuel filler cap, vent, rear bumper, transmission shift lever, chute deflector, control panel (with ignition switch, engine speed control, park brake lever), mower deck, deck lift lever, mower belt cover, blade pedals, and blade lever.
- Starting: Electric start models (8hp, 9hp, 10hp, 12hp, 13hp, 14hp) require the ignition key to be turned to "START." Manual start models (8hp recoil start) require pulling a starter rope. All interlock switches must be engaged for the engine to run.
- Engine Speed Control: Allows adjustment for starting (choke position for cold engine) and operation (FAST position for mowing).
- Transmission Shift Lever: Used to select forward speeds or neutral. The clutch/brake pedal must be depressed halfway to activate the clutch for shifting.
- Clutch/Brake Pedal: Depressing it all the way down applies the brake and stops wheel motion. Halfway depression activates the clutch for shifting.
- Park Brake: Engaged by pushing the clutch/brake pedal down and moving the park brake lever to the "ON" position.
- Mower Blade Control: The blade lever moves to "ON" to engage the blade (with blade pedals depressed) and to "OFF" to stop it. The blade should stop within 3 seconds.
- Cutting Height Adjustment: Six positions available using the deck lift lever. Lowest position gives 1" to 3-1/2" cutting height; highest position gives 1-1/2" to 4" cutting height.
- Wheel Drive: To start forward motion, depress the clutch/brake pedal, place the transmission shift lever in first forward speed, and then release the pedal. The transmission shift lever can be moved to any desired forward speed during motion without depressing the clutch/brake pedal.
- Optimal Mowing: For best cutting results, use a slow forward speed with the transmission shift lever and a fast engine speed control setting. This combination helps the blades lift grass for a smooth, even cut.
- Safety Interlocks: The machine is equipped with interlock switches (and an interlock system module on some models) to prevent the engine from starting or running if safety conditions are not met (e.g., blade lever in "OFF" position, operator seated).
Maintenance Features
The manual outlines a comprehensive maintenance schedule to ensure the longevity and safe operation of the Snapper Series 14 Rear Engine Riding Mower.
Pre-Start Checklist (Before Each Startup):
- Check tire pressure (15 psi front, 10 psi rear).
- Verify guards, deflectors, and covers are in place and tightened.
- Check engine oil level and add as needed (refer to engine owner's manual for specifications).
- Adjust operator's seat for comfort.
- Check blade control for free movement; blade lever should snap from "ON" to "OFF" when pedals are released.
- Clean exterior surfaces of the cutting deck and engine, including the air intake screen and cooling fins.
- Add fuel outdoors, ensuring the fuel cap is tight, vent is open, and fuel valve is "ON."
After First 5 Hours (Initial Service):
- Change Engine Oil:
- Lower the rear of the engine by placing blocks under the front wheels.
- Loosen/remove oil fill cap and oil drain plug.
- Drain oil into a 2-quart container.
- Close drain, wipe spilled oil.
- Refill crankcase with new oil (refer to engine owner's manual).
- Change oil filter on 14hp engines.
- Check Mower Blade:
- Close fuel filler cap vent and apply park brake.
- Stand the rider on its rear bumper (with help).
- Check blade mounting bolt torque (45-55 ft. lbs., or 70-80 ft. lbs. for 33" deck as per Figure 3.2).
- Inspect blade for sharpness, wear, and damage (refer to blade wear limits).
- Check blade for straightness.
After Every 25 Operating Hours:
- Engine: Change engine oil and service air filter (refer to engine owner's manual).
- Mower Drive Belt: Check belt for proper tension (1-1/4" but no less than 1" at idler pulley).
- Mower Blade: Check for sharpness, wear, damage, and torque.
- Mower Deck Level: Check and adjust as required.
- Cleaning Mower Deck:
- Remove key, spark plug wire, and close fuel filler cap vent.
- Stand rider on rear bumper.
- Clean underside of the deck, removing grass clippings and debris.
- Lower rider and clean the top of the deck.
- Mower Blade Spindle Lubrication: Lubricate with one shot of GP grease from a grease gun while the rider is on its rear bumper.
- Mower Deck Linkage Lubrication: Lubricate all pivot points with a light coat of 30 wt. motor oil.
- Rear Engine Rider Lubrication:
- Front Wheel Bearings: Lubricate with five shots of GP grease while the rider is on its rear bumper.
- Left Rear Axle Bearing (8hp, 9hp, 10hp, 12hp engines): Lubricate with three shots of GP grease. (13hp and 14hp engines do not require this lubrication).
- Right Rear Axle Bearing: Lubricated by the differential lubricant.
- Differential: Check fill and level plugs for cracks/wear. Visually inspect for lubricant on internal parts; if none, contact a dealer.
- Chain Case: Check fill/level plug for damage. Visually inspect for lubricant on internal components; if none, contact a dealer.
- Axle Boots: Check for signs of wear or cracks; if visible, contact a dealer.
Annually (End of Each Season):
- Perform all maintenance described in "After Every 25 Operating Hours."
- Engine: Service according to engine owner's manual.
- Fuel Filter: Remove hose clamps, replace filter (part number 1-4359), and reinstall tank.
- Mower Deck: Clean all grass clippings and debris.
Every Two Years:
- Inspect and replace worn/damaged parts with genuine Snapper replacement parts:
- All bushings and pivot areas.
- King pin/Axles.
- Transmission shift lever and detent.
- Clutch disc.
- Yoke.
- Mower deck linkage and pivot areas.
Storage (Out of Season):
- Thoroughly clean the rider.
- Perform maintenance and lubrication as described in "After Every 25 Operating Hours."
- Drain fuel from the fuel tank.
- Start the engine and allow it to run until it runs out of fuel to clean the carburetor and fuel system.
- Remove the battery (see Battery Storage instructions).
- Close the vent on the fuel filler cap.
- Carefully stand the rider on its rear bumper in the desired storage location.
Adjustments & Repairs:
- Engine: Refer to the engine owner's manual.
- Mower Drive Belt: Adjust tension by removing hair pin and flat spacers, pulling the front frame forward until the belt distance is 1-1/4", then reinstalling spacers.
- Blade Brake (Early Series 14): Adjust by loosening jam nut on eye-bolt, turning "T"-nut clockwise, and ensuring the distance between the front of the blade lever and latch plate is no greater than 1/4".
- Blade Brake (Late Series 14): Adjust by removing cotter pin, rotating eye-bolt swivel clockwise, and ensuring the distance between the front of the blade lever and latch plate is no greater than 1/4".
- Mower Blade: Adjust by loosening jam nuts on the blade bar and adjusting jack screws "IN" or "OUT" until blade tip measurements are within 1/16" of each other and 3/8" from the deck lip (for Hi-Vac decks).
- Mower Deck Level (Side-To-Side): For 30" and 33" decks, loosen the shoulder bolt retaining the left side of blade pedals and turn the eccentric "UP" or "DOWN" until blade tips are within 1/8" of each other. (25" and 28" decks do not require this adjustment).
- Mower Deck Level (Front to Rear): Adjust rear hanger chains until the rear blade tip is the same or 1/8" lower than the front.
- Mower Deck Timing Rod: Pre-adjusted at the factory; contact a dealer if adjustment is suspected.
- Cutting Height: Adjust by loosening lift quadrant mounting bolts and raising or lowering the lift quadrant.
- Clutch-Starting Motion: Adjust by moving the spring on the yoke arm to a different hole (first hole for positive clutch action, fourth hole for increased slippage).
- Clutch-Shifting: Adjust by pulling the clutch/brake pedal towards the operator's seat and sliding a ferrule from the cable through the eye in the pedal arm until clearance is visible between the clutch disc and drive disc.
- Wheel Brake: Adjust by using jam nuts on the brake cable until the distance between the end of the cable and the top of the cotter pin is between 3/16" and 7/16".
- Blade Sharpening/Replacement: Inspect for wear/damage. Sharpen at 25° (±3°). Replace blades and air lifts (for grass catcher attachments) as per the Blade Replacement Chart.
- Mower Drive Belt Replacement: Cut and remove the old belt, remove the idler, route the new belt (part number 2-2252) through guides and around pulleys, then reinstall the idler.
- Battery Removal/Installation: Carefully pull the battery cover, slide the battery out, disconnect/connect cables (red to positive, black to negative), and reinstall.
- Battery Service: Refill cells with distilled water to 3/16" above cell plates.
- Battery Charging: Remove the battery, place it in a well-ventilated area, remove cell caps, check fluid level, connect charger (red to positive, black to negative), and slow charge at 1 amp for 10 hours. Do not use "BOOST" chargers.
- Battery Storage: Remove the battery, service it, fully charge it, and store it on a wood surface (not concrete) away from the rider.
General Safety Precautions:
- Always remove the key, spark plug wire, and secure it away from the spark plug before performing any service or adjustments.
- Do not operate the machine on slopes exceeding 15 degrees.
- Exercise extreme caution on slopes above 10 degrees.
- Keep children and pets away from the machine during operation.
- Wear appropriate protective clothing.
- Ensure all safety devices are in proper position and functional.
- Use only genuine SNAPPER replacement parts.
- Never use a cutting blade that shows signs of excessive wear or damage.
- Do not attempt to start the engine with the mower drive belt cover removed.
- Never attempt to service or charge the battery while it is installed on the Rear Engine Rider.