Do you have a question about the Snapper 16 Series and is the answer not in the manual?
Keep children away from the mower and supervised by an adult during operation.
Exercise caution on slopes, mow across, not up/down, and avoid steep or uncertain slopes.
Detailed steps for performing an engine oil change, including safety precautions.
Procedures for replacing the mower blade, including wear limits.
Instructions on how to properly sharpen the mower blade.
Further details and angle specifications for sharpening mower blades.
Common problems affecting mower propulsion and their initial checks.
Steps to adjust the driven disc to correct drive system slippage.
Detailed steps for adjusting the driven disc position for optimal performance.
How to replace the rubber ring on the driven disc hub.
Continuation of steps for replacing the rubber ring on the driven disc hub.
Procedure for replacing the bearing in the driven disc assembly.
Steps to replace the bearing on the pulley end of the hex shaft.
Instructions for replacing the stretch-type engine drive belt.
Continuation of steps for replacing the engine drive belt.
Steps for replacing the transmission Poly-V belt.
Common causes and corrective actions for engine starting issues.
Troubleshooting steps for when the engine stops unexpectedly after running.
Diagnosing and fixing issues causing the engine to lose power.
Troubleshooting traction problems on self-propelled models.
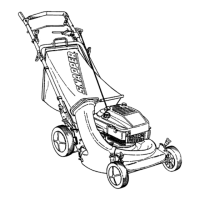
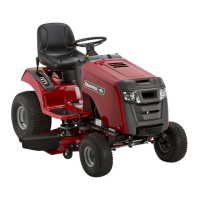
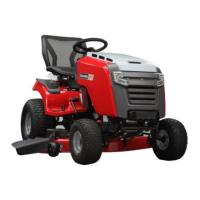
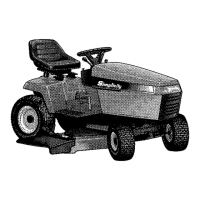
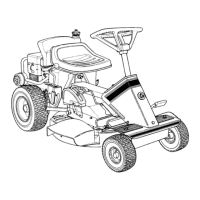
This document is an operator's manual for Snapper 21" Steel Deck Walk Mowers, Series 16, specifically for propelled models with the model number FRP216016. It provides comprehensive instructions for safe operation, maintenance, and adjustments.
The Snapper 21" Steel Deck Walk Mower is a powerful cutting machine designed for residential and light commercial lawn care. It is a self-propelled walk-behind mower, meaning it moves forward on its own, reducing the effort required by the operator. The mower features a 21-inch steel deck, which houses the cutting blade, and is powered by an engine, typically around 6.0 HP. Its primary function is to cut grass efficiently and can be configured for recycling (mulching) or bagging grass clippings. The self-propelled feature, adjustable cutting height, and various safety mechanisms are designed to make lawn maintenance easier and safer for the operator.
The manual emphasizes safety as paramount, beginning with "IMPORTANT SAFETY INSTRUCTIONS" that warn of the machine's capability to amputate hands and feet and throw objects. Operators are urged to read, understand, and follow all instructions and warnings.
Pre-Operation Checklist: Before starting, operators must check that all guards, deflectors, grass bag, adapter, and covers are securely in place. Blade and wheel drive controls should move freely. The cutting height needs to be adjusted to the desired level, and engine oil should be checked and topped off if necessary. Fuel should be added outdoors with the engine off and cool, and any spilled fuel or oil must be cleaned. The mowing area should be cleared of objects like toys, wire, rocks, and limbs, and potential hazards like holes and stumps should be noted.
Starting and Stopping: To start the engine (primer models), the engine speed control is moved to "Fast." The primer button is pressed three times for a cold engine (not for warm engines). The blade control is pulled against the handle, and the rope start handle is pulled to crank the engine. After starting, a brief warm-up is recommended. To stop the engine and blade, the blade control is simply released. For self-propelled models, the ground speed control is moved to the desired speed position, and the wheel drive control is engaged against the handle to propel the mower forward. Forward speed can be adjusted while mowing. Releasing the wheel drive control stops forward motion.
Handle and Cutting Height Adjustment: The handle height can be adjusted by loosening lower nuts on each lower handle, moving the upper handle to the desired position, and then retightening the nuts. Cutting height is adjusted by pulling the height adjusting latch outward and moving it to one of six notches, with Notch 6 being the highest and Notch 1 the lowest. All wheels should be set to the same cutting height.
Recycling Operation: For best mulching results, grass should be cut when dry, removing no more than 1/3 of the blade length. All wheels are set to the highest cutting position (Notch 6), engine speed control to "FAST," and ground speed control to the slowest setting. If grass is dense, rear wheel latches can be lowered one notch below the front latches to improve performance.
Front Deck Baffle Adjustment (for models with "F" prefix): The front deck baffle is adjustable. For grass bagging, it should be secured in the lowest position. For mulching, it should be in the highest position. Wing nuts are loosened to adjust and then retightened. If mulching causes grass to blow out, the baffle can be lowered slightly.
Grass Catcher Installation: The grass catcher is installed by sliding its connector over the adapter flange and attaching its hooks over the middle handle cross bar.
Safety Precautions: The manual stresses keeping children and pets out of the mowing area, stopping the machine if anyone enters. Operators should never pull the mower backward unless absolutely necessary, and always look behind for children, pets, and hazards. Extra care is needed around blind corners, shrubs, and trees. Mowing across slopes is recommended, never up-and-down, with extreme caution when changing directions. Steep slopes or areas with uncertain stability should be avoided. Operators should wear safety glasses, long pants, and substantial footwear, never mowing barefoot or with sandals. The machine should not be operated under the influence of alcohol or drugs. If a foreign object is struck or the mower vibrates abnormally, the engine must be stopped, the spark plug wire disconnected, and the mower inspected for damage. The mower should not be operated without the entire grass catcher or guards in place, and discharge should not be pointed at people, cars, windows, or doors.
The manual outlines a detailed maintenance schedule to ensure the mower's longevity and safe operation, emphasizing the use of genuine Snapper replacement parts.
Storage Procedure: The engine owner's manual should be consulted for engine storage. For the mower, drain the fuel tank and run the engine until the carburetor is empty. Disconnect and remove the spark plug wire. Tape all openings to prevent water entry during washing. Tilt the mower on its rear wheels and thoroughly clean the underside of the deck. Lubricate exposed metal parts. On self-propelled models, loosen wing nuts on the ground speed control rod and handle knobs, then carefully fold the handles to prevent cable damage. Store the mower in a dry, weather-protected area.
Troubleshooting: A dedicated section provides a table of common problems, probable causes, and corrective actions, covering issues like engine not starting, stalling, losing power, excessive vibration, loss of traction, improper grass cutting, poor grass discharge, and oil leaking.
Primary Maintenance Philosophy: The manual includes an illustrated section emphasizing that "Dirt is your engine's enemy number 1!" It explains how dirt can damage the engine and how proper maintenance, especially of the air filter, can prevent issues like increased fuel consumption, power loss, hard starting, carbon build-up, and premature wear. It also highlights the importance of clean fuel and proper engine lubrication, warning against false oil level readings. The manual stresses that damage caused by poorly serviced air cleaners or improper lubrication is not covered under engine warranties.
| Engine Type | Briggs & Stratton |
|---|---|
| Cutting Width | 21 in |
| Deck Material | Steel |
| Weight | 78 lbs |
| Number of Blades | 1 |
| Grass Disposal | Bag |
| Wheel Size | 8 in Rear |
| Drive Type | Manual Push |
| Cutting Height | 1.25 - 4 in |