8
ENGLISHENGLISH
WIRING INSTRUCTIONS FORD RANGER SNUGTOP CH
PLEASE FOLLOW THESE STEPS IN PROPER SEQUENCE
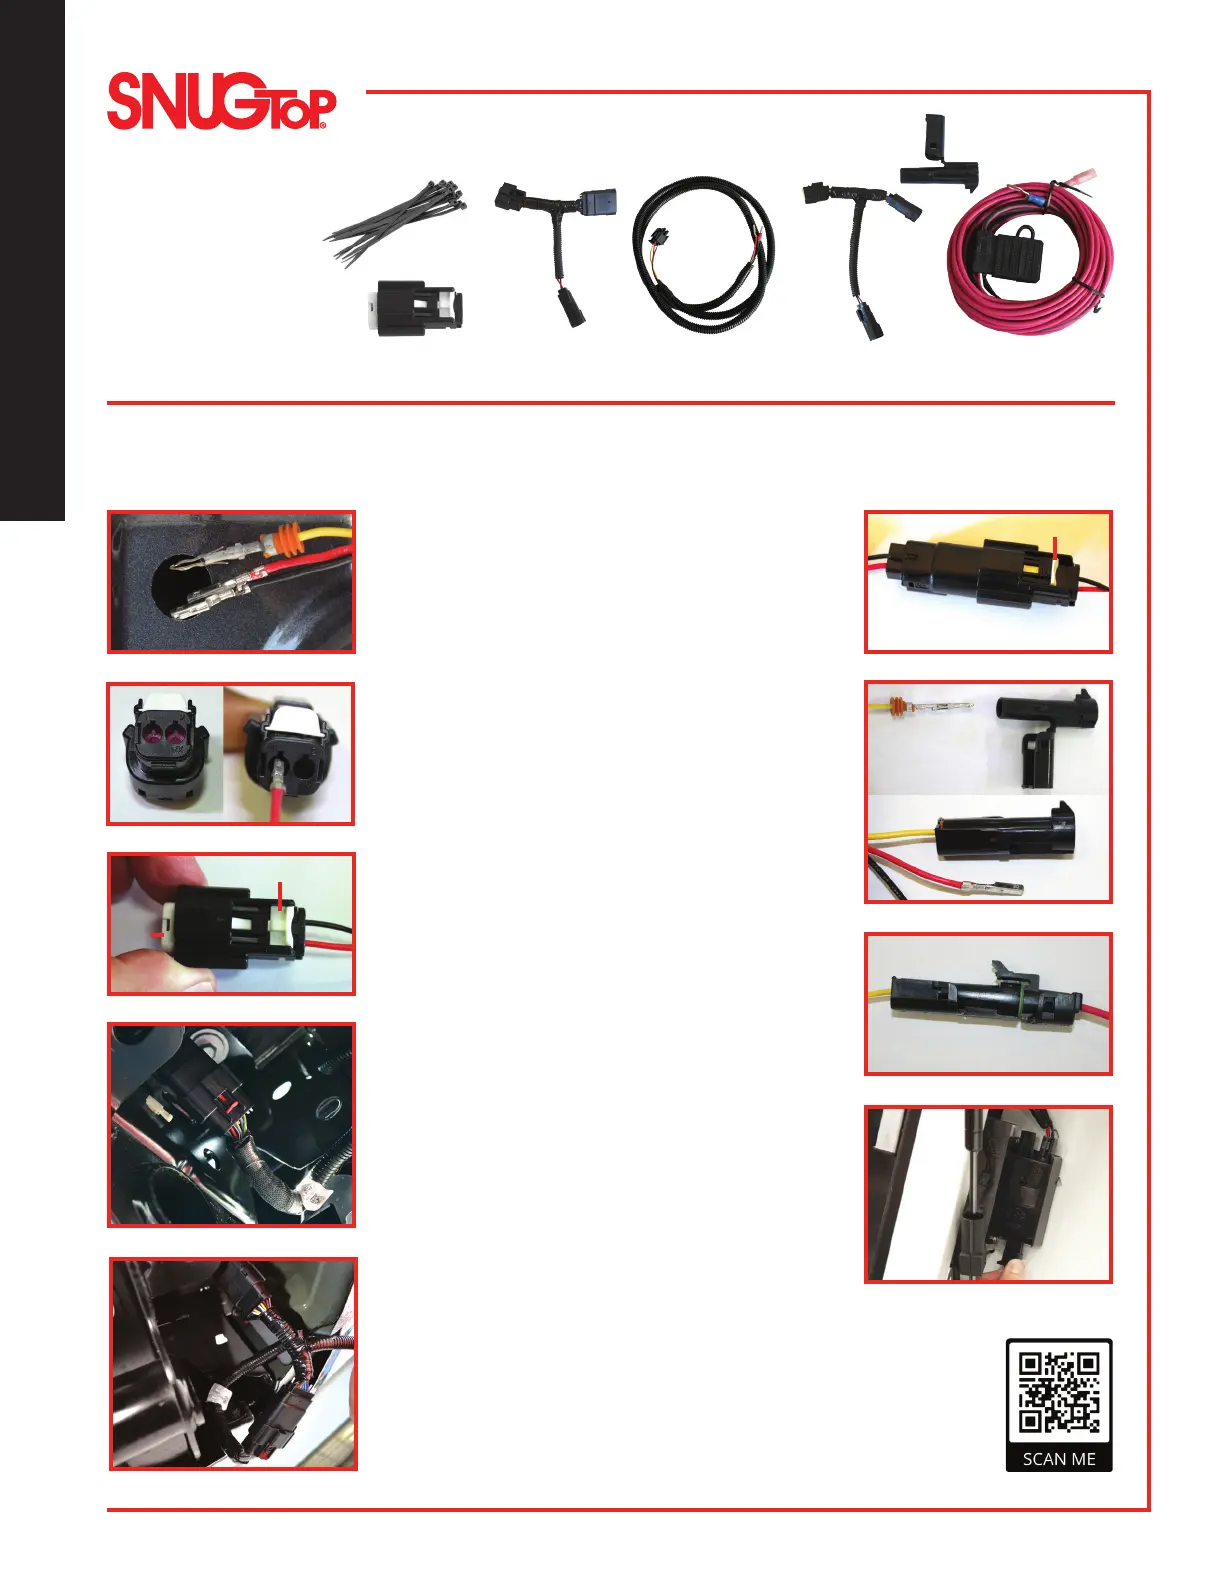
WIRING HARNESS COMPONENTS
CHECKLIST
q 6” Nylon Cable Ties
q 16-Pin T-Harness
q 6-Pin T-Harness
q Fuse Box Harness
q 2-Pin Connector
q 1-Pin Connector
q Battery Harness
6” Nylon
Cable Ties
Battery
Harness
16-Pin
T-Harness
Fuse Box
Harness
2-Pin
Connector
6-Pin
T-Harness
1-Pin
Connector
Fig. 3
Fig. 1
Fig. 2
TPA
CPA
Fig. 4
Fig. 5
Fig. 6
Fig. 8
Fig. 9
CPA
Fig. 7
1. Insert the separate end of the fuse box harness through
the access hole on the driver side rear of the truck bed,
until the harness extends below the truck fender.
See Fig. 1.
2. Assemble the 2-pin connector to the fuse box harness.
See Fig. 2. Insert the red wire into pin position 1,
aligning the key slot in the connector with the key on
the terminal. Insert until it clicks. Insert black wire into
position 2, following the same steps as described
above. Secure wires to the connector by pushing the
TPA into the connector. See Fig. 3.
3. From under the truck on the drivers side, between the
rear tire and tail light, locate and disconnect either
the 16-pin BLIS connector, or the 6-pin NON-BLIS
connector. See Fig. 4. Insert and connect the proper
T-harness provided. See Fig. 5. Secure T-harness to
truck frame using zip ties provided. No wires should
be visible or hanging below the truck.
4. Insert the 2-pin connector end of the T-harness into
the 2-pin connector of the fuse box harness. See
Fig. 6. Lock harnesses to connector by pushing the
CPA forward.
5. Insert the third wire in the fuse box harness into the
smaller diameter end of the 1-pin connector. The water
seal should be fully seated into the connector. See
Fig. 7. Rotate the locking feature of the connector
until it secures the terminal in the connector.
6. Insert the battery harness terminal into the opposite
end of the 1-pin connector until it clicks. See Fig. 8.
7. Route the battery wire harness to the truck battery,
following the main truck wiring harness. Secure the
battery harness with zip ties as you go. Connect the
ring terminal to the positive terminal on the truck battery.
8. Pull fuse box harness back into the truck bed, inside
the cap. Insert the fuse box harness connector into the
truck bed fuse box. See Fig. 9. Push remaining fuse box
harness wire back into access hole in truck bed. Dress
harness inside cap. Secure harness under truck using
zip ties provided. No wires should be visible or hanging
below the truck.
9. Check for proper functions of truck and cap lights.
The unused T-harness can be discarded.
Scan to
See Wiring
Installation
Video
 Loading...