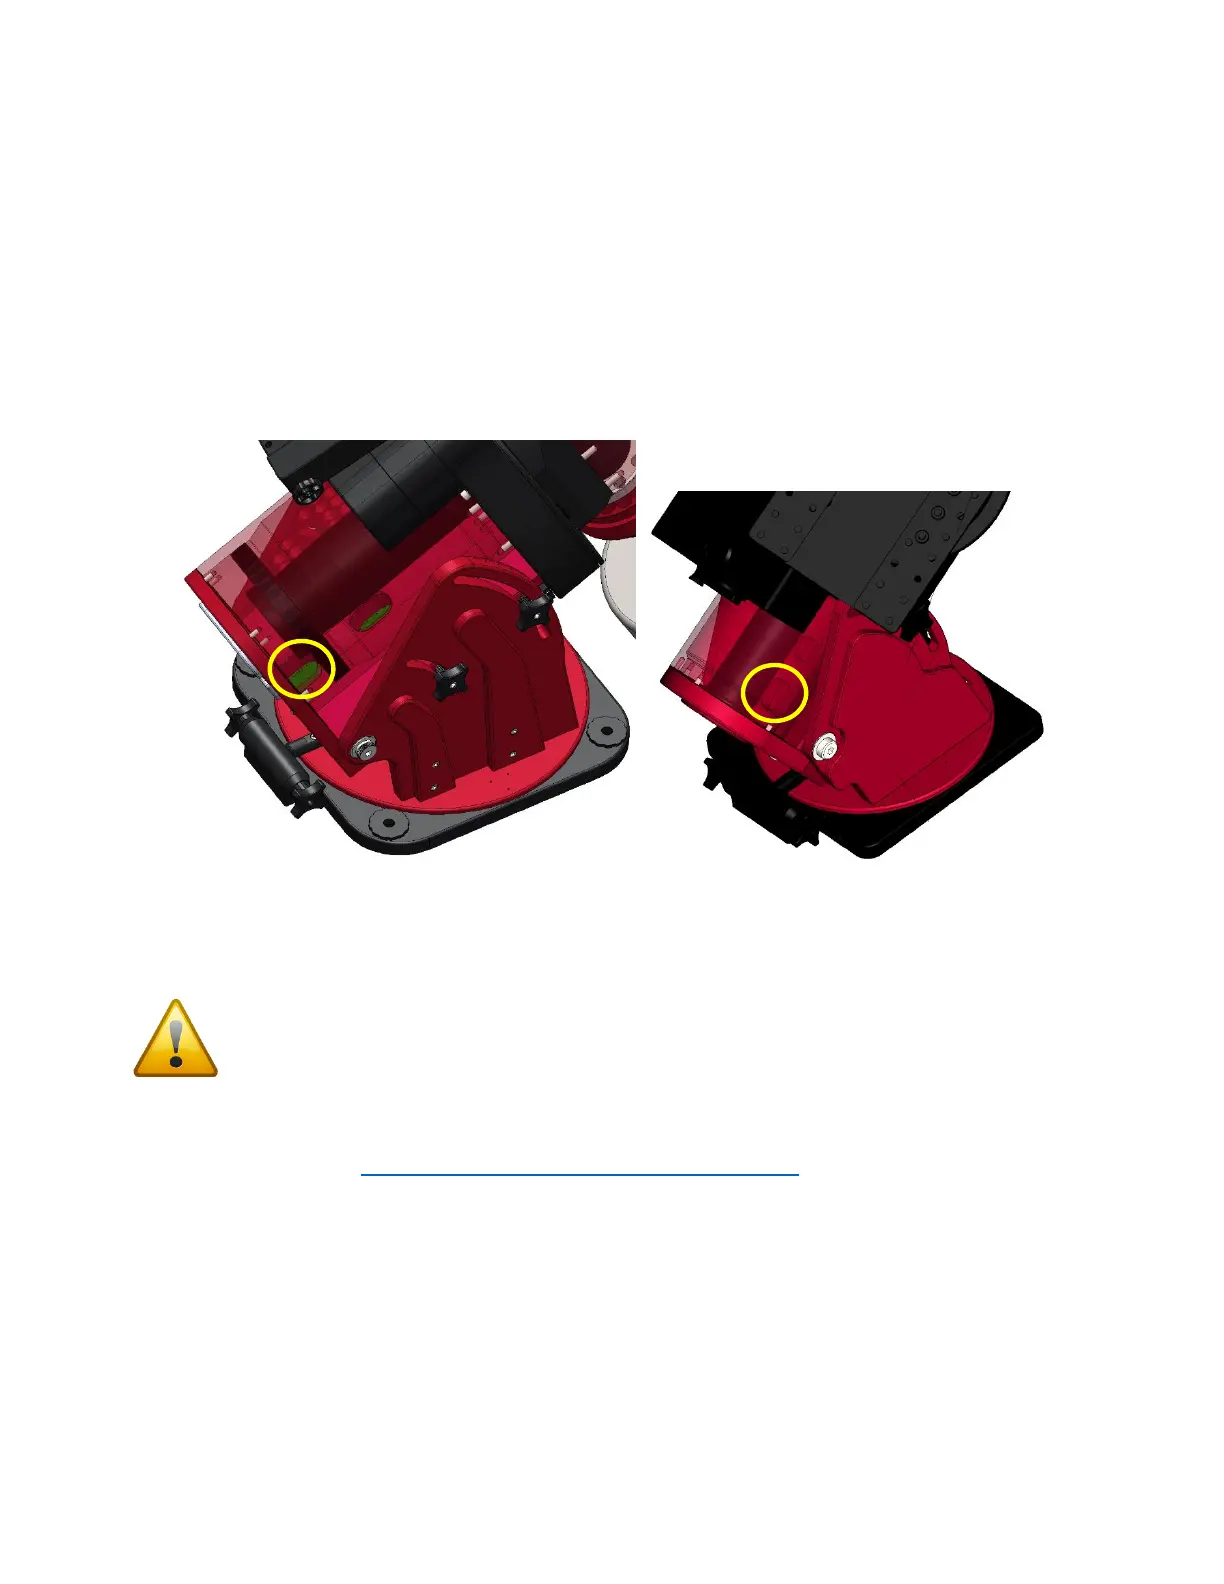
This cable gets fed through the front hole in the right ascension base (circled in yellow in Figure 13), and
follows same route as the other cables in the right ascension shaft: into the declination tube and up,
around the declination shaft, finally to be fed up into the motor hole.
If you have trouble getting the zip tie to go around the declination shaft, then feed the zip tie partially
through the holes in the declination shaft while simultaneously rotating the declination axis by hand.
The most critical step in this process is to avoid feeding the sensor cable into any holes in center
declination shaft.
Figure 13: RA Base, Declination wiring hole (Paramount ME II on left, Paramount MX/MX+ on right).
Once you have fed the sensor cable through the motor hole and can plug it in to the homing sensor
(long tab from the connector on the right), the worm block cover can be replaced.
Be careful to not pinch cables when replacing the cover or tightening screws! Pinched cables
can cause electronic issues or erratic behavior.
Replacing Electronics Box
Refer to this document: http://www.bisque.com/sc/media/p/63292.aspx to plug all cables in and
replace the Electronics Box.