4. Installation
4. Installation
26
27
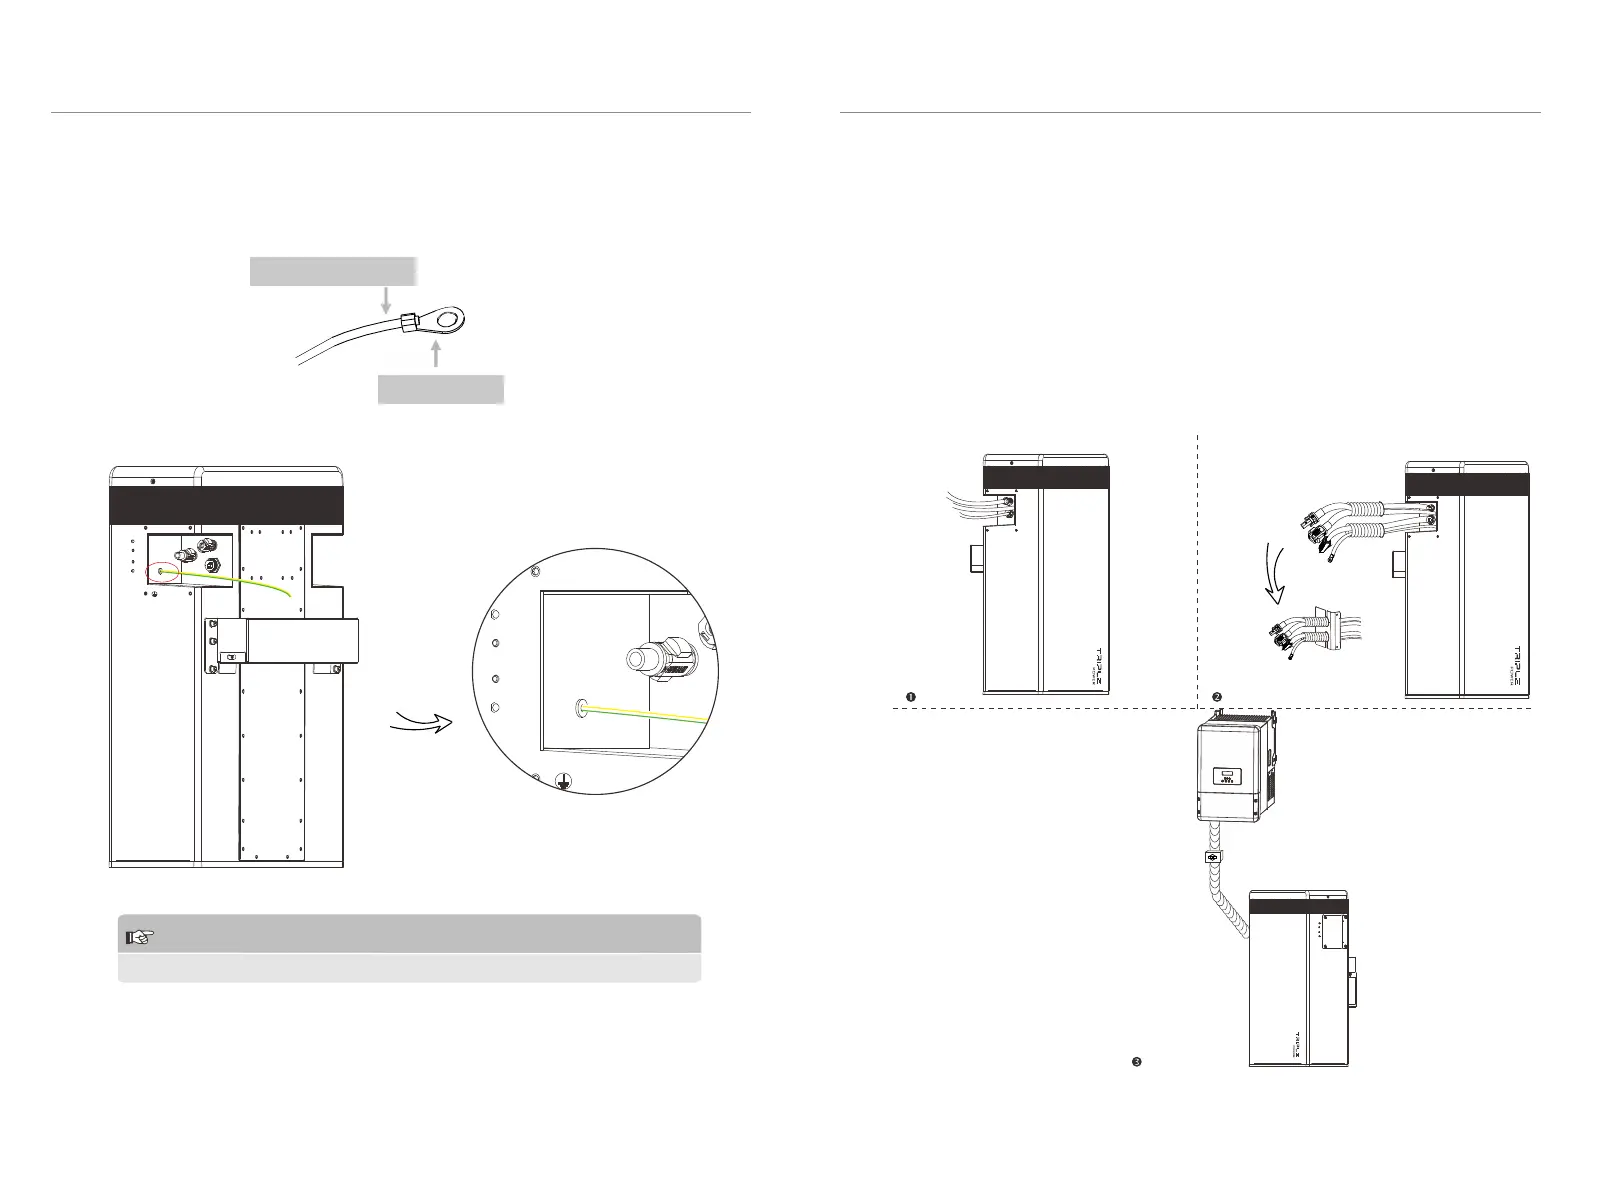
4.5.5 Connecting Ground Wire
CAUTION!
GND connection is mandatory!
The terminal point for GND connection is on the side of grooves as shown
below:
-
YPLUG
RS485 II
Cable size: 10AWG.
Ring terminal
-
YPLUG
RS485 II
4.5.6 Overall Installation
It is recommended to protect the cables with corrugated pipe.
For T-BAT H 5.8:
1. Connect all the cables on the left side of T-BAT H 5.8.
2. Run the cables through the corrugated pipe.
3. Do remember to insert the series-connected cable at “-” and “YPLUG” on the
right side of the last battery pack to complete the internal circuit.
4. Set the cables into the groove of metal plates and screw them back to the
battery pack on both sides.
 Loading...