Quick Installation Guide
—— X1 Series 1.1kw-2.0kw
I
Packing List
Male DC unit×1
Female DC unit×1
Product manual×1
Quick installation guide×1
Warranty card×1
AC terminal×3
Inverter ×1
Positive DC pin contact ×1
Male DC unit×1 Female DC unit×1
Negative DC pin contact ×1
Bracket ×1
Plug and Play Pocket WiFi×1
II
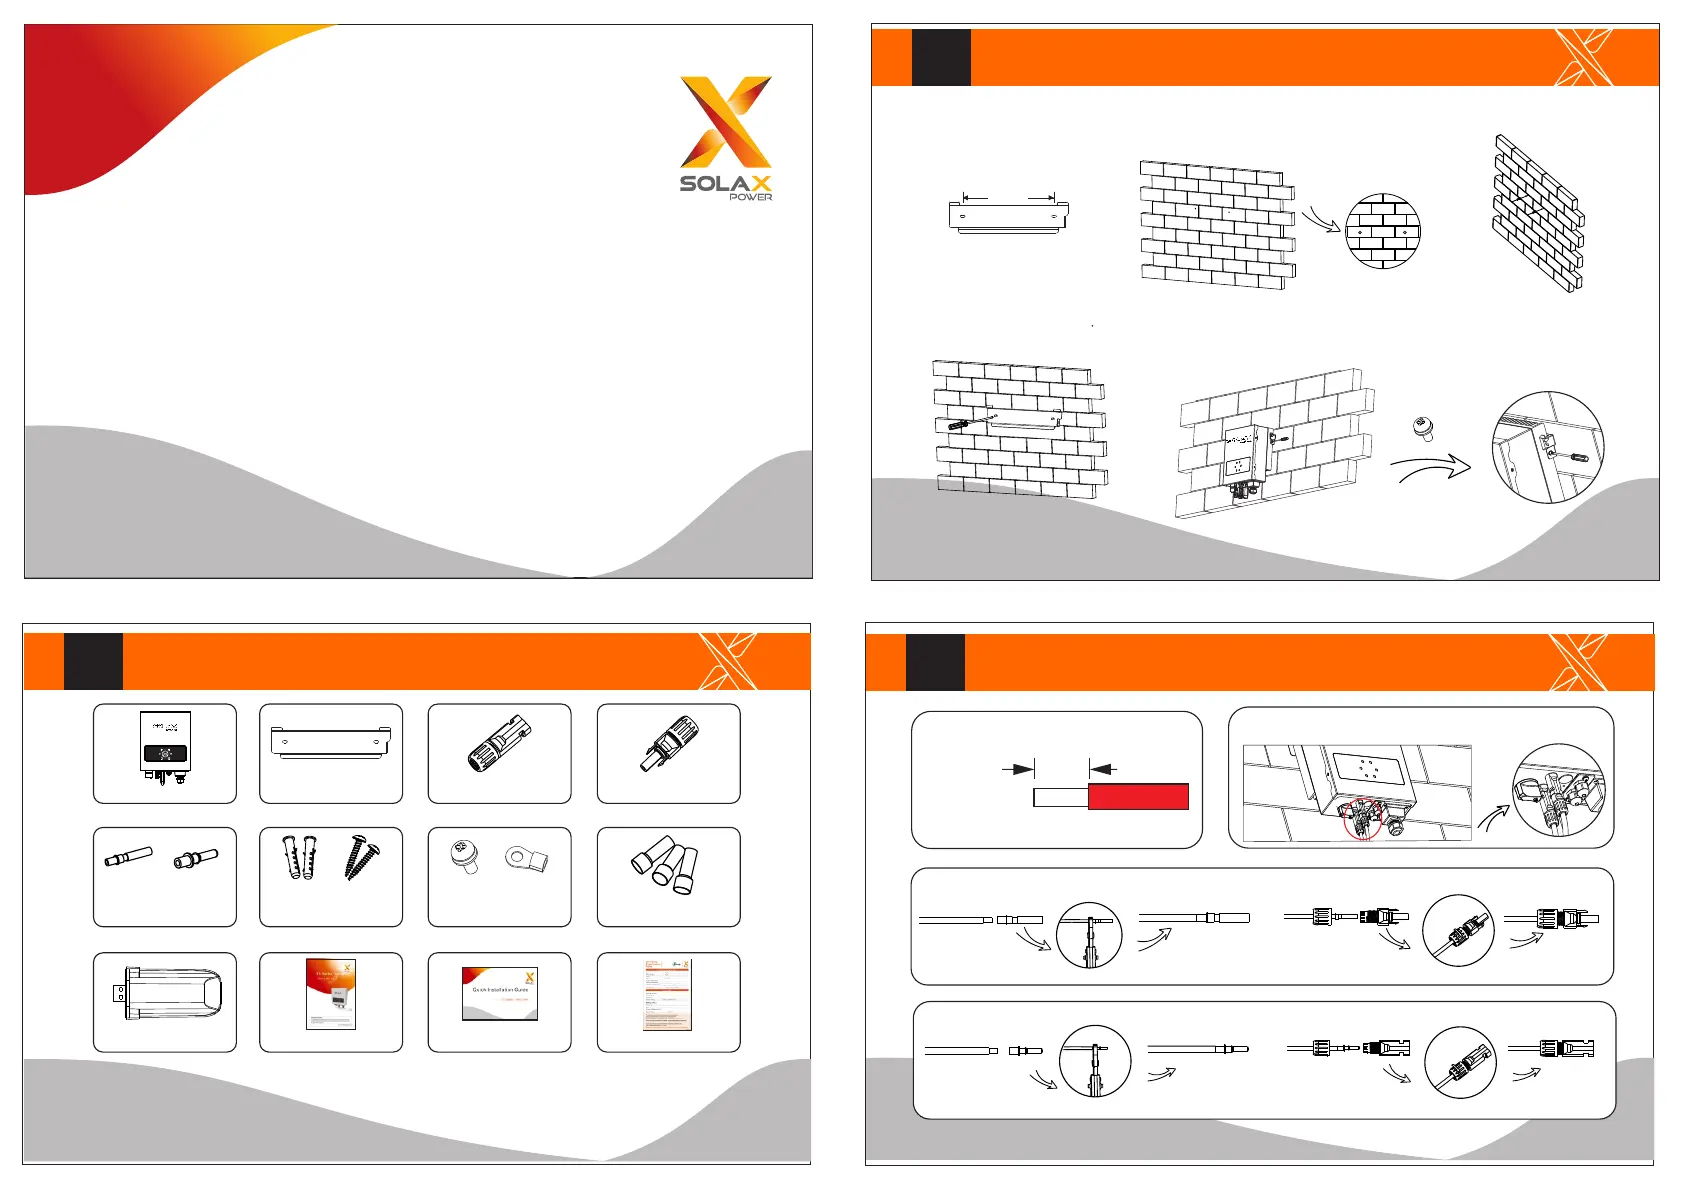
Inverter Installation
- Mark the position of the two holes.
- Screw the expansion screws.
- Match the inverter with the bracket.
- Screw the cross recessed screw on the right side.
- Drill holes with driller.
- Depth: at least 50mm.
- Tighten the expansion tubes.
205.5mm
III
12 AWG
PV Connection
Cable size: 12 AWG
-Align the two halves connectors.
positive DC
pin contact
negative DC
pin contact
clamp contact
nut
male plug
female plug
tight nut
cable
trip length:
6.0mm
Expansion tube×2
Expansion screw ×2
Cross recessed screw×1
Ring terminal ×1
(optional)

 Loading...


