IV
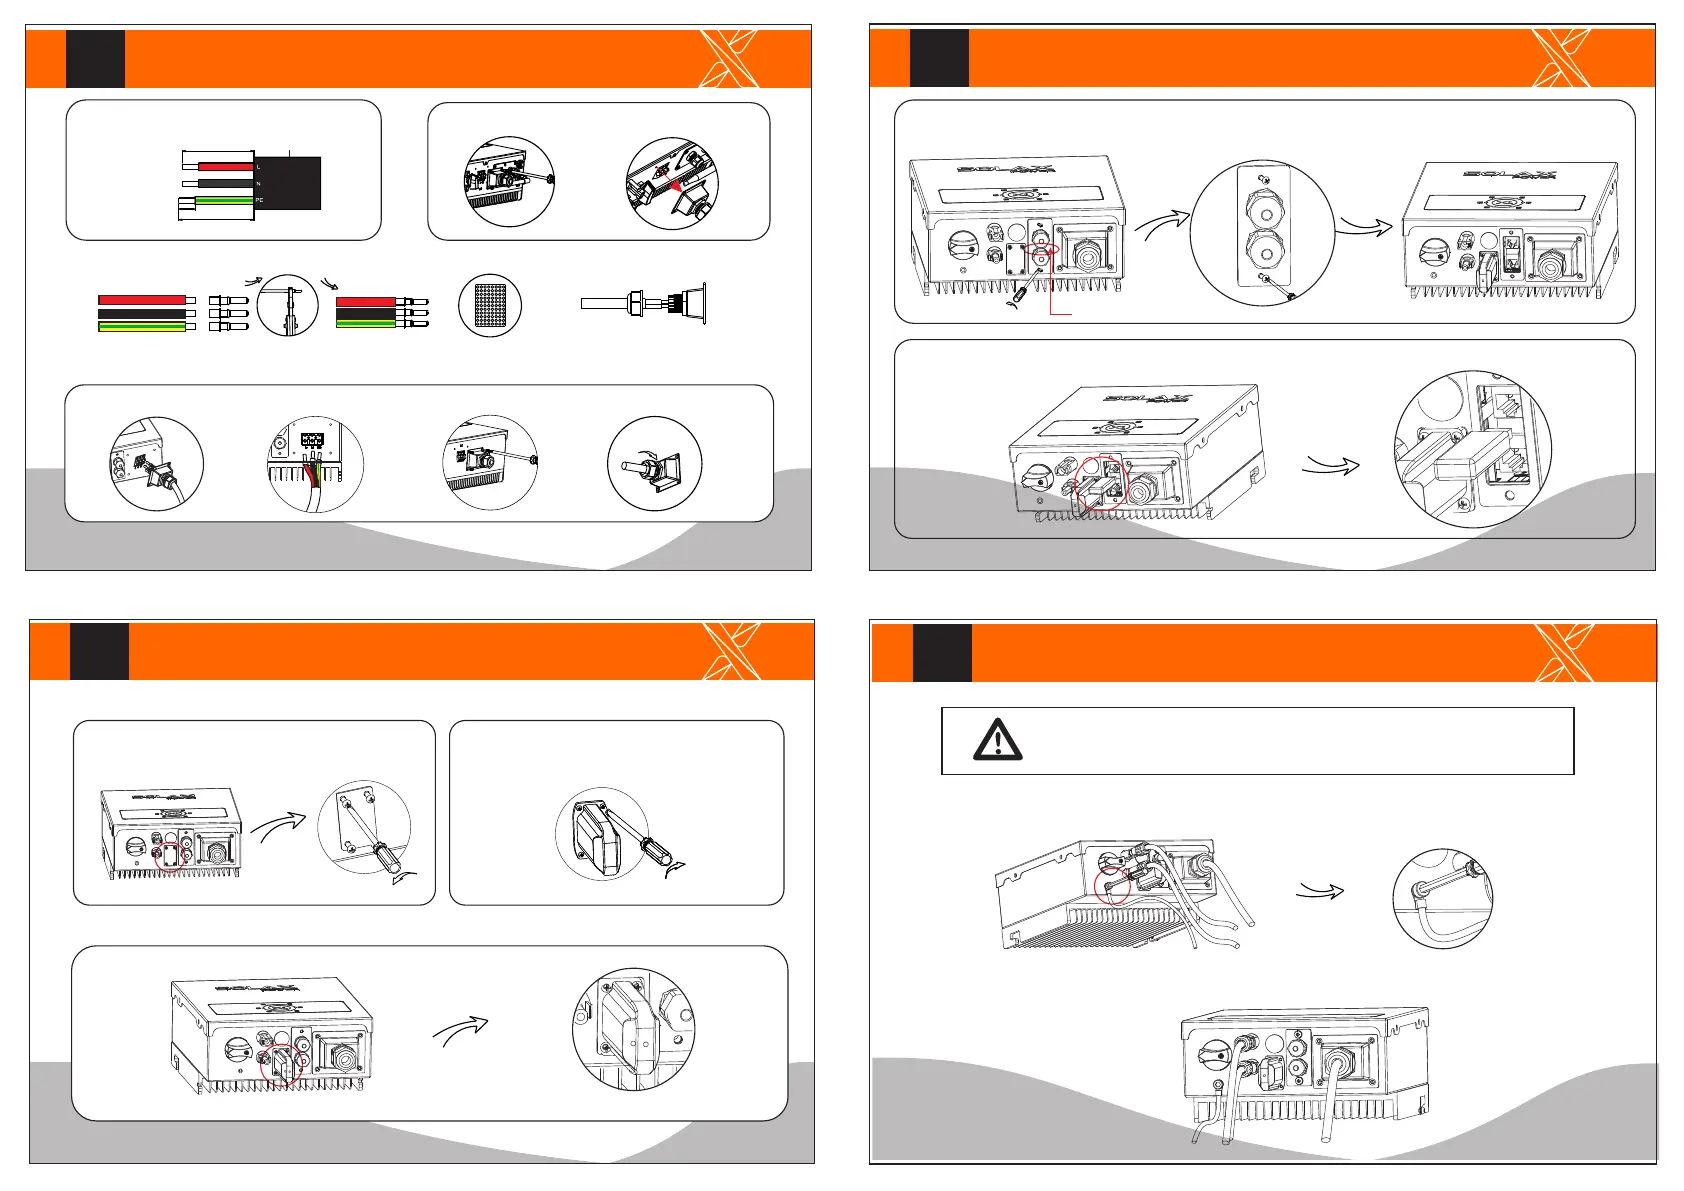
Cable size: 10 AWG
- Open AC lid
trip length
52.5mm
12mm
55mm
outer jacket
AC terminal
L
N
PE
clamp contact
- Insert the terminals into the corresponding holes and fasten them.
cable core section
through AC lid
L
N
PE
AC Connection
614.00118.01
V
- Open the WiFi lid on the bottom of the inverter.
- Open the communication lid on the bottom of the inverter as below.
- Insert the USB flash drive with program into the “USB” port on the bottom.
- Plug the Pocket WiFi (from Solax) into the port named
“WiFi” on inverter, and tighten the four screws as below.
- Screw the ground screw with allen wrench shown as follow.
- Overview for connection.
WiFi Connection(optional)
VI
Usb for Updating
VII
Overview for Connection
USB
Warning!
Be sure this ground wire must be connected !

 Loading...


