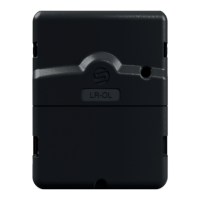
The SOLEM LR-OL is a connected irrigation expert, functioning as a Bluetooth®/LoRa™ controller designed to centralize the control of various garden equipment, such as lighting, swimming pools, and fountains, from a single application. It offers a simple and practical solution for managing garden illumination and other features.
Technical Specifications:
- Dimensions:
- Width: 11 cm
- Height: 14.3 cm
- Depth: 4.2 cm
- Installation: Intended for indoor or under-cover installation.
- Connection: Features 4 relays, each rated for 250VAC 16A, with a maximum capacity of 3500W per relay. The total distributed power across all 4 relays should not exceed 4000W to prevent overheating and device deterioration. For LED bulbs exceeding 150W, a power contactor (as per Schema No.3) is required.
- Operating Conditions:
- Temperature: -20°C to 60°C
- Humidity: 90% (relative humidity)
- Power Supply:
- Input: 230V ~ 50Hz
- Output: 24V ~ 0.75A 50Hz
- The power supply is Class 2 type dual insulation and has thermal protection of 130°C.
- Communication:
- Bluetooth® Smart 4.0 Low Energy [2400-2483.5]MHz
- LoRa™ radio communication
- Data Retention:
- Permanent backup of programs.
- Internal clock backup for breaks less than 30 seconds.
Usage Features:
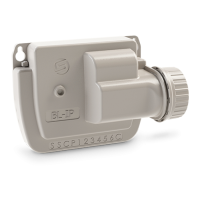
The LR-OL can be controlled directly via Bluetooth or paired with an LR-MB10 or LR-MB30 (Wi-Fi/LoRa relay) or an LR-BST for extended range and connectivity.
Downloading and Account Creation:
- Download the MySOLEM app from the App Store or Google Play.
- Search for "MySOLEM" in the app store.
- Install the MySOLEM application.
- Activate Bluetooth® on your smartphone or tablet.
- Launch the MySOLEM app.
- Navigate to "My account" by tapping the gear icon.
- Follow the in-app instructions to create a MySOLEM account.
Pairing the LR-OL (Step 2):
- Remove the lower hatch of the LR-OL to access the terminal block.
- Connect the provided 220V/24Vac power supply.
- Open the MySOLEM app.
- Press the "Add a Controller" or "+" button.
- Select "LR-OL" from the list of available controllers.
- (Optional) Assign a name and security key, then press "Validate."
- Complete the pairing process by following the app's instructions.
- Note: To identify your LR-OL among nearby controllers, check the "Default name" on its label on the back of the product.
- Security Key: A security key protects your controller and can be set during step 6 or accessed via the icon at the top right of the screen for more information.
Pairing with LR-MB (Step 3):
To optimize the LoRa™ connection, it's recommended to pair all LR-OL devices near the LR-MB before separate installation.
- Select the installed LR-OL controller in the app.
- Tap the pencil icon at the top right to access product information.
- Tap "Remote Access."
- Choose the LR-MB10/30 relay.
- Validate by pressing the "Send" button or the arrow icon at the bottom of the screen.
- To test the connection, return to the "Remote access" screen of the LR-OL.
- Press the Wi-Fi-like button to start the test.
- Note: "Established Connection" indicates a reliable connection. "No established connection" means the LR-OL needs to be moved closer to the LR-MB10/30, or vice versa.
Association with LR-BST:
- In the app, select your LR-BST and switch to pairing mode (pencil icon).
- Select the previously installed LR-OL controller.
- Tap the pencil icon at the top right to access product information.
- Press "Remote Access."
- Select the original LR-BST from the list.
- To test the connection, return to the "Remote access" screen of the LR-OL.
- Click the Wi-Fi-like button to start the test.
Installation Types (Step 4):
- 1. Single Line Used with Switch: Allows parallel connection of a back-and-forth switch with the programmer's relay. If the switch is in the "on" position, the programmer cannot control the line.
- 2. Simple Installation Without Power Contactor: Suitable for loads under 400W, such as lights or small pumps.
- 3. Simple Installation With Power Contactor: For higher power requirements (e.g., pool pumps over 400W), a power contactor or water heater delay can be integrated between the controller and the device. Follow the three-step connection diagram provided in the manual.
Maintenance Features (FAQ):
- Bluetooth® Requirements: Android 4.3+ phones/tablets with Bluetooth Smart 4.0+; Apple iPhone/iPad with iOS 9.0+.
- Resuming Association/Start-up: Unplug and reconnect the power supply.
- Program Retention: Programs are saved in memory even if the device loses power.
- Resetting Programming: Open the app, select the product, go to settings, and choose "Delete Programs and Durations."
- Green LED: Normal operation.
- Flashing Green LED: An active line is in use (number of flashes corresponds to the active line).
- Fixed Red LED: Product is in boot mode for 2 minutes.
- Flashing Red LED (2 times): Programmer has lost time; reconnect to re-synchronize.
- LED Off: Product is not powered.
- Always read safety instructions before installation or use.
- Install the LR-OL indoors or under cover.
- Ensure the socket outlet is easily accessible as a cutting device.
- The power outlet must have protection against over-intensities and short circuits (16A circuit breakers).
- Only use the provided power supply.
- The device complies with European standards (CE symbol) and is intended for sale in Europe.
- Do not dispose of the device with household garbage; use designated collection and recycling points.
- The symbol for alternating current is indicated.
- The power supply is for indoor use only.