Operating and maintenance instructions
ENGLISH 15
Spark plugs with resistor (thermal value 200) are
available in different brands under the following
description:
BOSCH WSR6F
CHAMPION RCJ-6Y or comparable.
The correct electrode gap is 0.5 mm.
Only use spark plugs, where the contact nut has
been firmly fitted. Loose connectors may produce
sparks, which can cause a fire.
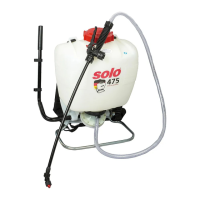
• Insert the spark plug into the cylinder head and
tighten it.
• Push the spark plug cap firmly over the spark plug.
• Push the spark plug cover back on again and lock
with tab (30).
Before restarting the engine, check the high-tension
ignition cable for any damage to its insulation and
ensure the cable is connected securely to the plug
cap.
10.4 Air Filter Maintenance
Dirty air filters cause a reduction in engine
performance and increase fuel consumption with
more pollutants in the exhaust gas. Engines are less
likely to start readily with a dirty and soiled air filter.
The following maintenance jobs should be carried
out frequently.
Before opening the air filter, close the choke to
prevent dirt entering the carburettor.
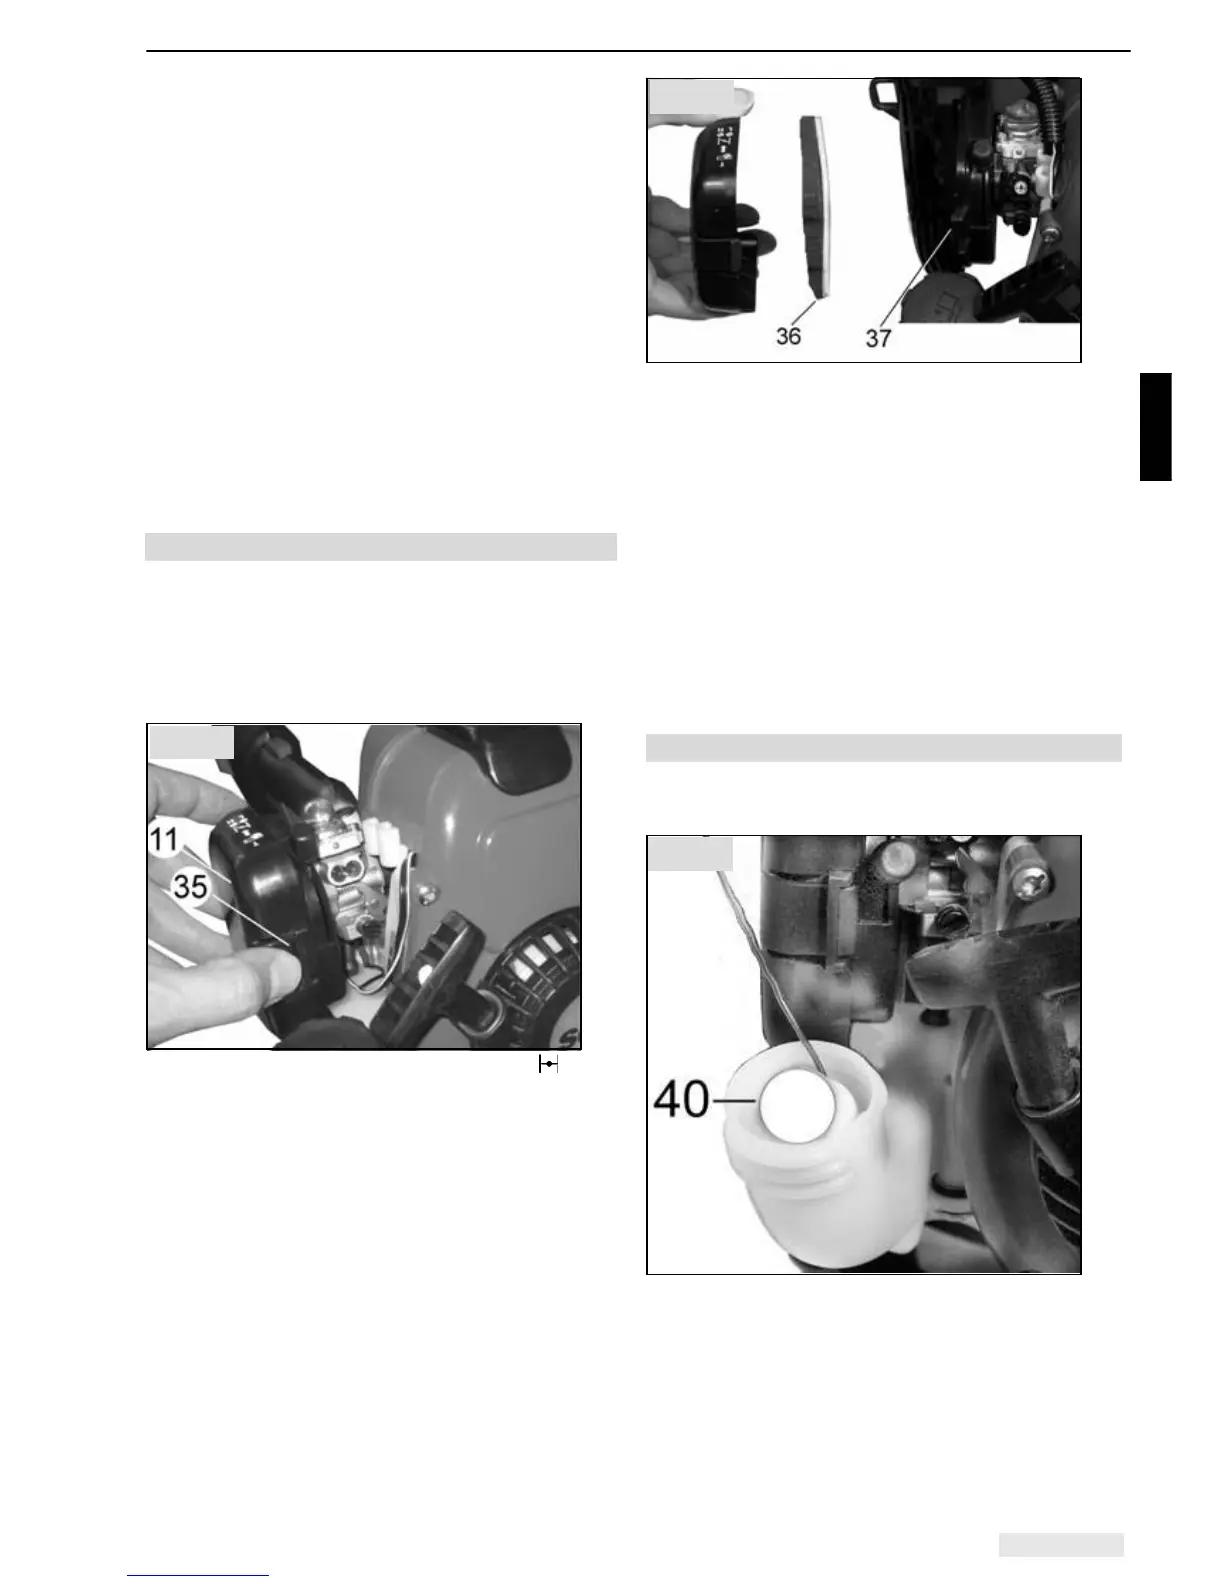
Press clip (35), tilt and remove the filter cover (11).
Clean around the filter.
Remove the assembled filter element (36) from the
filter retainer (37). Please note: Never separate the
filter element
Please note: Never separate the filter element. Clean
the filter more often in extreme dust conditions. For
daily cleaning jobs simply tap the filters against a
hard object or use compressed air. Damaged air
filters should be replaced immediately. Warranty does
not apply to engine damage caused by the lack of or
improper maintenance.
Insert the new or cleaned filter element in accordance
with Fig. 16 into the filter retainer. Then close the filter
cover and secure it by clicking it into position.
Never insert moist or wet filter elements!
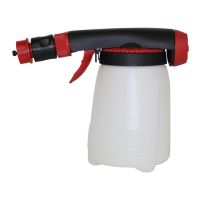
10.5 Replacing the fuel filter
We recommend having the fuel filter (40) changed
annually by a specialised service centre.
A trained mechanic can carefully remove the fuel filter
via a wire loop through the fuel tank filler. Ensure that
the thicker part of the fuel hose on the tank wall is not
drawn into the fuel tank.
Fig. 15
Fig. 16
Fig. 17