Preparing the equipment for use
ENGLISH 10
6. Preparing the equipment for use
Observe all safety instructions during assembly
and dismantling work!
6.1 Assembly - blower operation
The total pipe for the blower operation consists of
three parts:
Blower pipe (16) to be fitted to the standard
machine.
Round air nozzle (17) to be fitted to the blower
pipe.
Flat nozzle attachment (18) (optional use) to be
fitted to the round air nozzle.
These parts are fitted in the same manner. When
pushed together, the respective arrows must be
perfectly aligned, then secure the part by turning it
45°. For dismantling, initially turn the part again,
until the arrows are aligned, then pull the
components apart.
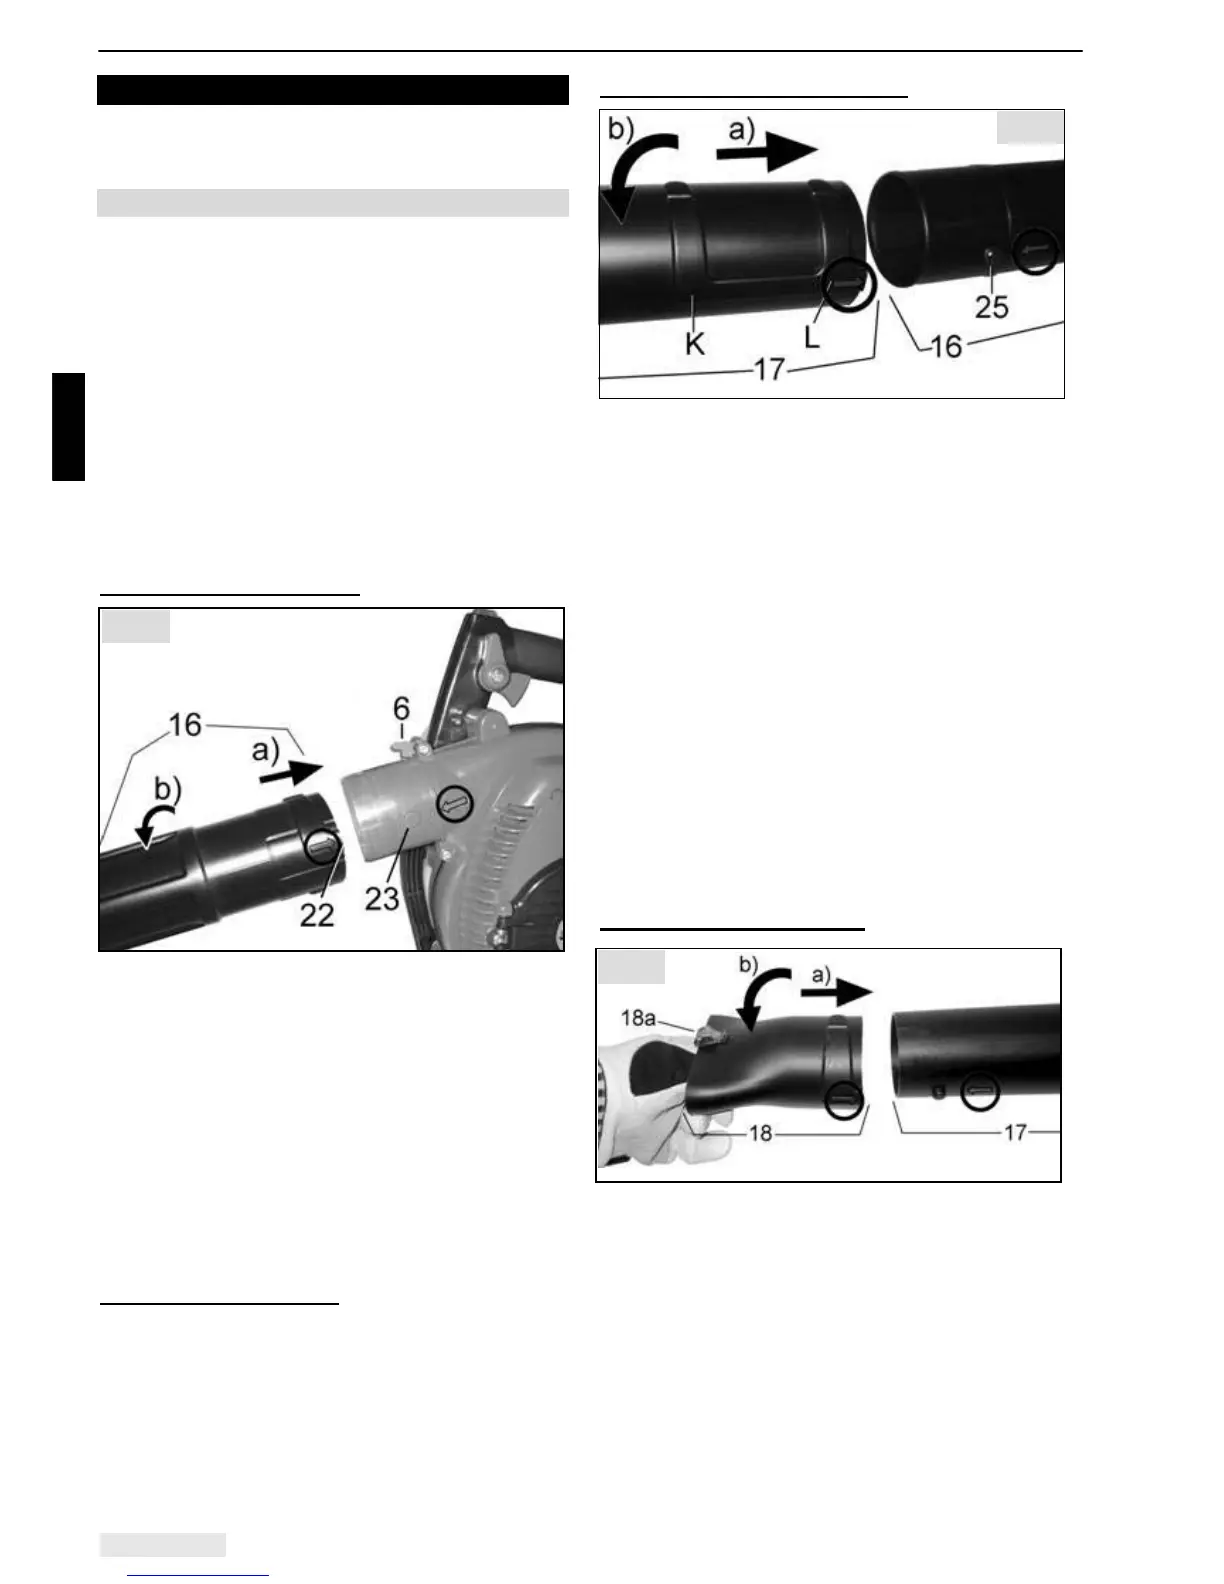
Blower pipe assembly (16)
a) Push blower pipe (16) with groove (22) over
cam (23) of the standard machine.
The arrows on the blower pipe and the standard
machine must be aligned accurately, when the
parts are pushed together (the wide groove (22)
over the large cam (23), and the narrow groove
over the smaller cam).
b) Rotate the blower pipe through 45º so that the
arrow on the blower pipe is rotated downwards
until the blower pipe is clearly felt to engage and
the lock (6) engages behind the groove on the
blower pipe.
Blower pipe dismantling
• Gently lift up the lock (6) and rotate the blower
pipe back at the same time until the arrows on
the blower pipe and the standard unit are
exactly lined up again.
• Pull the blower pipe from the standard
equipment.
Round air nozzle assembly (17)
a) The round air nozzle (17) has two longitudinal
adjustments.
Push the nozzle either into pos. L (long) or in
pos. K (short) up to cam (25) on blower pipe (16)
(when the nozzle is pushed onto the blower pipe,
on the round air nozzle and on the blower pipe
must be aligned accurately).
b) Turn the round air nozzle 45º, so that arrow on
the round air nozzle is turned down, until it
audibly clicks into place.
To modify the overall length of the pipe, initially
turn the round air nozzle back, so that the arrows
are again aligned accurately. Then move the round
air nozzle into alternative longitudinal position, and
secure by turning it.
To disassemble the round air nozzle, initially turn
it back, so that the arrows are aligned again
accurately. Then pull the round air nozzle from the
blower pipe.
Flat nozzle attachment (18)
a) Push the flat nozzle attachment onto the round
air nozzle in accordance with the arrows on the
flat nozzle attachment and on the round air
nozzle.
b) Turn the flat nozzle attachment 45°, so that edge
protector clip (18a) is turned down into its
operating position. Edge protector clip (18a)
protects the plastic pipe, when it contacts the
ground during operation.
To dismantle the flat nozzle attachment from the
round air nozzle, turn it back and pull it off, after
aligning the arrows.
Fig. 5
Fig. 4
Fig. 3