ENGLISH 6
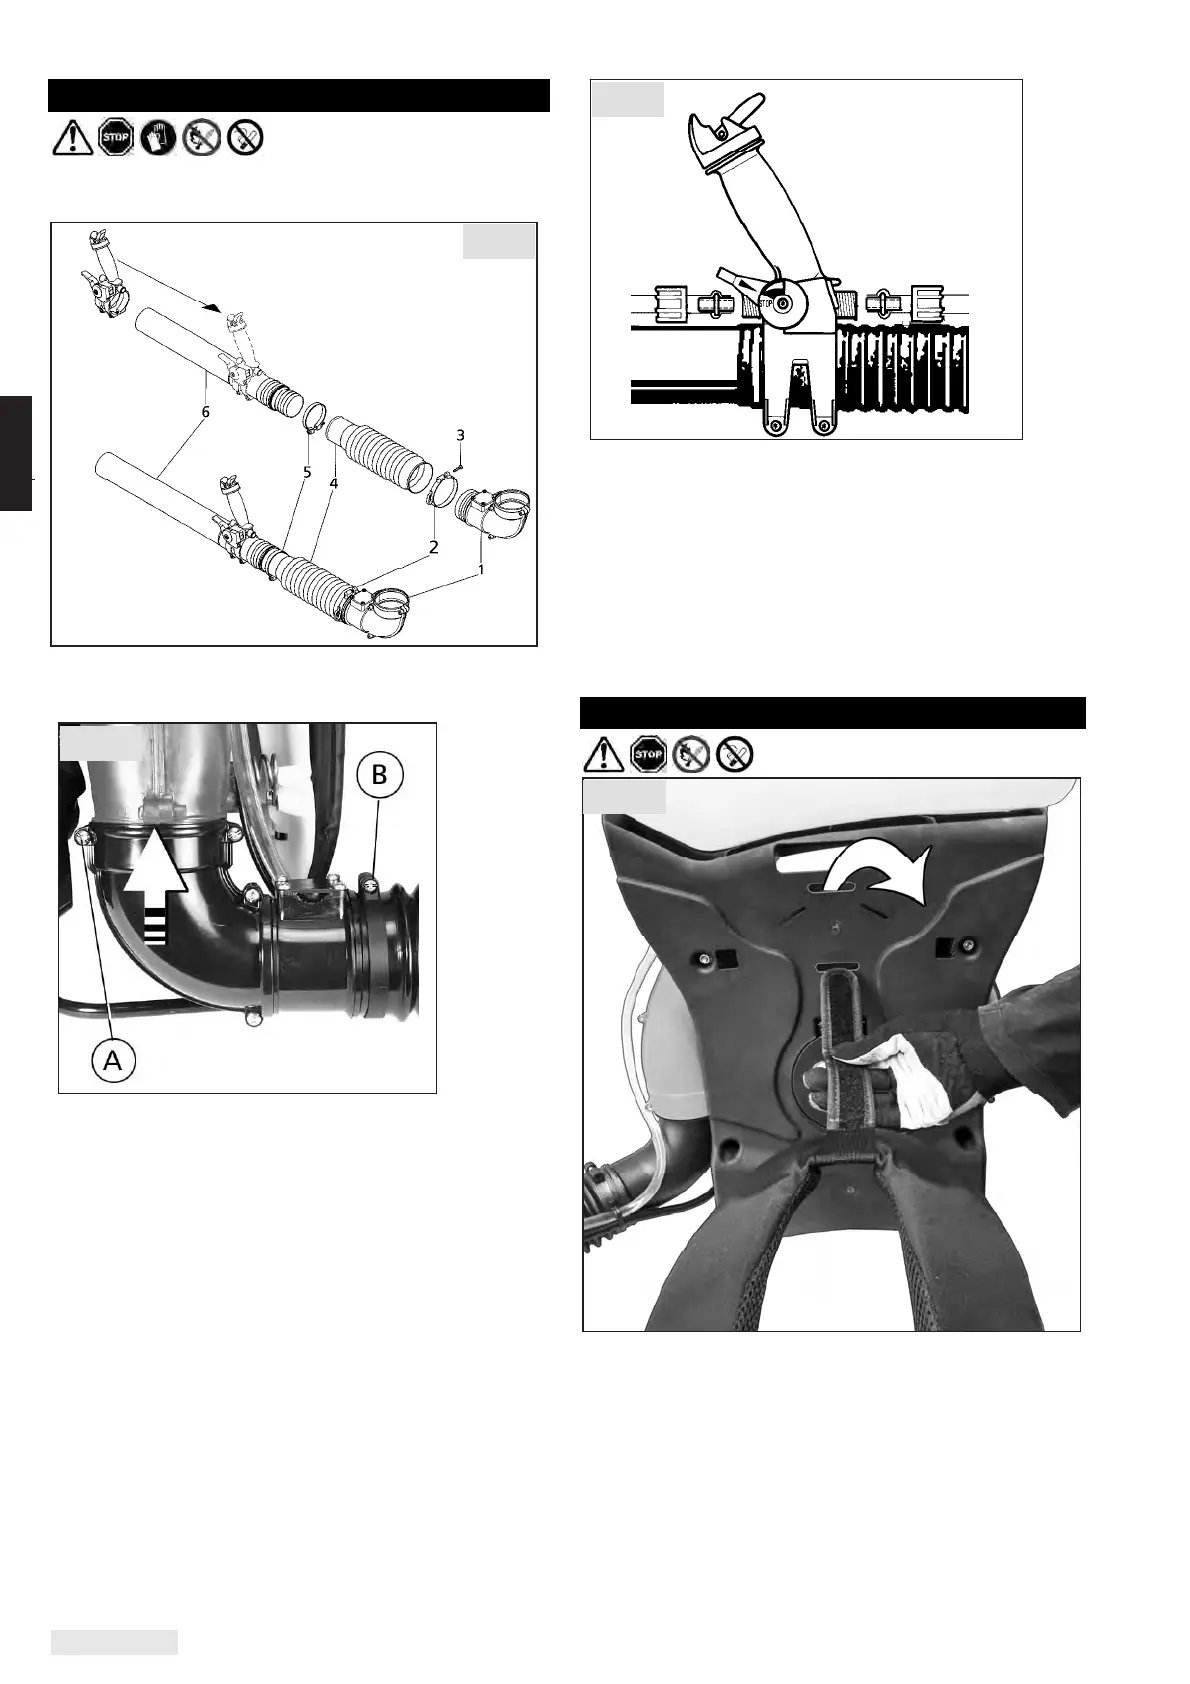
7. Assembly of misting equipment
Completely assemble the mistblower before its
first use.
Affix spraying-attachments to unit as shown in Fig.
2 and 3. (Installation sequence from 1 to 6)
Make sure the elbow of the pleated hose is
pushed all the way over the welt on the blower
outlet. Then tighten the clamp securely
(Fig. 3, Pos. A).
Secure pleated hose to elbow with clamp
(Fig. 3, Pos. B).
Check hose connection to on/off tap and retighten
cap nut if required.
Shut on/off tap, fill some plain water in formula tank
and check for any leakage.
Note: The spray tube can be twisted and turned in
the pleated hose with the handle. Ensure that all
hose and cable connections are safe and without
sharp bends.
8. Carry straps
Thread the Velcro-strap through the provided slots
of the device backplate as illustrated to attach the
carry strap system.
Fig. 2
Fig. 4
Fig. 3
Fig. 5