8
Issue 02 DEC.20
1. Take the three ‘Wall Post
Screw Caps’ from the Door
Installation Pack and place
over the ‘Wallpost Screw
Mouldings’ previously tted
in step 10. The ‘Wall Post
Screw Caps’ can be easily
removed if you ever need
to make an adjustment of
the Door position.
The screw caps maybe
fitted after step 25 to make
silicone process easier.
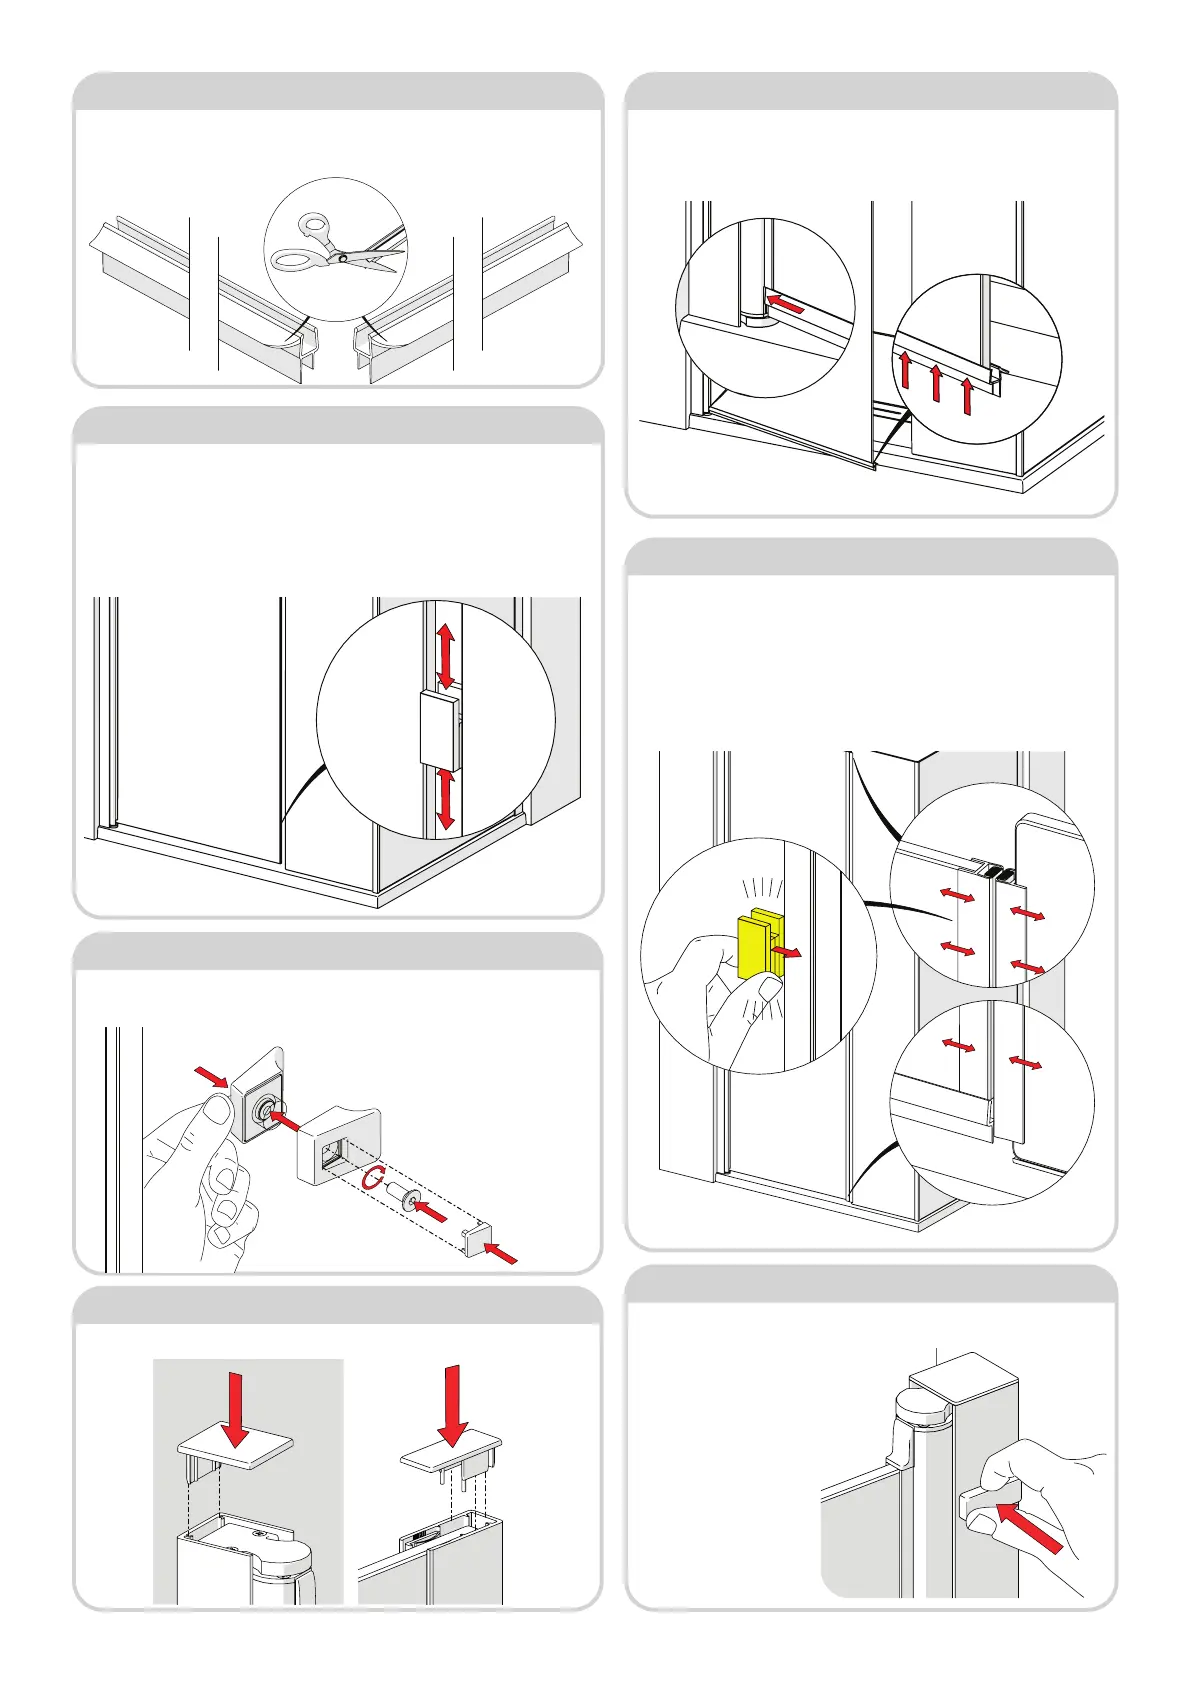
Step 23 - Insert Screw Mouldings
Inside view
1. Acquire the ‘BLOCK’ previously removed in step 11. Insert between glass door
and in-line panels to ensure there is an adequate gap between the two (18mm),
as shown. ‘BLOCK’ needs to be able to freely move up and down inbetween the
two glass panels. If the gap needs to be adjusted, simply adjust the door postion
by adjusting the screws, see step 10. Be careful as to not let the door fall
into the in-line panel when adjusting the screws. Remove ‘packer’ when
satised.
Step 19 - Check Glass Spacing
1. Acquire 2 X PLEXRF-102 magnet seals from pack and add to the door
glass and xed panel glass, as shown below. Both seals need to be in line
with the top edge of the door glass, as shown. Magent seals should
attract and sit flush together. If not, you’ll need to rotate one of
the seals 180 degrees. Adjust the seals like the arrows shown below
to set the magnet strength to your preference. Use the previously used
‘BLOCK’ (highlighted yellow) to adjust the seal by tapping the edge of the
seals on the glass.
Step 20 - Add Magentic Seals
1. Acquire the Handle (940-HNDL-40) out of the Door Installtion Pack. Seperate
the handle halves by removing the screw, using 4mm allen key provided.
Step 21 - Fit Handle
Inside view
1. Add the End Caps (M503-01 & M502-01) to the Wallposts as shown
below.
Step 22 - Insert Wallpost End Caps
1. Acquire PLEXRF-052 from the Door Pack. Cut the corners of the rigid ipper
at 45 degree angle, as shown below. Using adequate scissors. Make sure
there are no sharp corners. Cut a smooth curve.
Right Hand
Configuration
Left Hand
Configuration
Step 17 - Prepare Door Seal PLEXRF-052
1. Add the prepared Door Seal PLEXRF-052 to the bottom edge of the
Door. Orientation as shown, with the water ramp on the inside of the
enclosure. Makes sure the seal runs right up to the Pivot Barrel. The seal will
over hang the end of the door glass, as shown.
Step 18 - Add Door Seal PLEXRF-052
Outside view
2. Add the handle to the door glass using
the screw previously removed, as shown
below. Make sure screw is facing the
inside of the enclosure. Once the handle
is secure add the screw
cover cap found with
handle assembly.
 Loading...