Commissioning
20
Radio receiver
HOMELINK-COMPATIBLE!
If your vehicle is equipped with a HomeLink system
(Version 7), our operator and radio receiver with
868.6 MHz are compatible. Another radio frequency
(40.685 or 434.42 MHz) must be used with older
HomeLink systems. For information see:
http://www.eurohomelink.com
Safety instructions
The operator is not protected against interference caused by other
telecommunications equipment or devices (e.g. wireless systems
which are being operated properly in the same frequency range).
Replace the hand-held transmitter unit's batteries if you experience
reception problems.
Display and button explanation
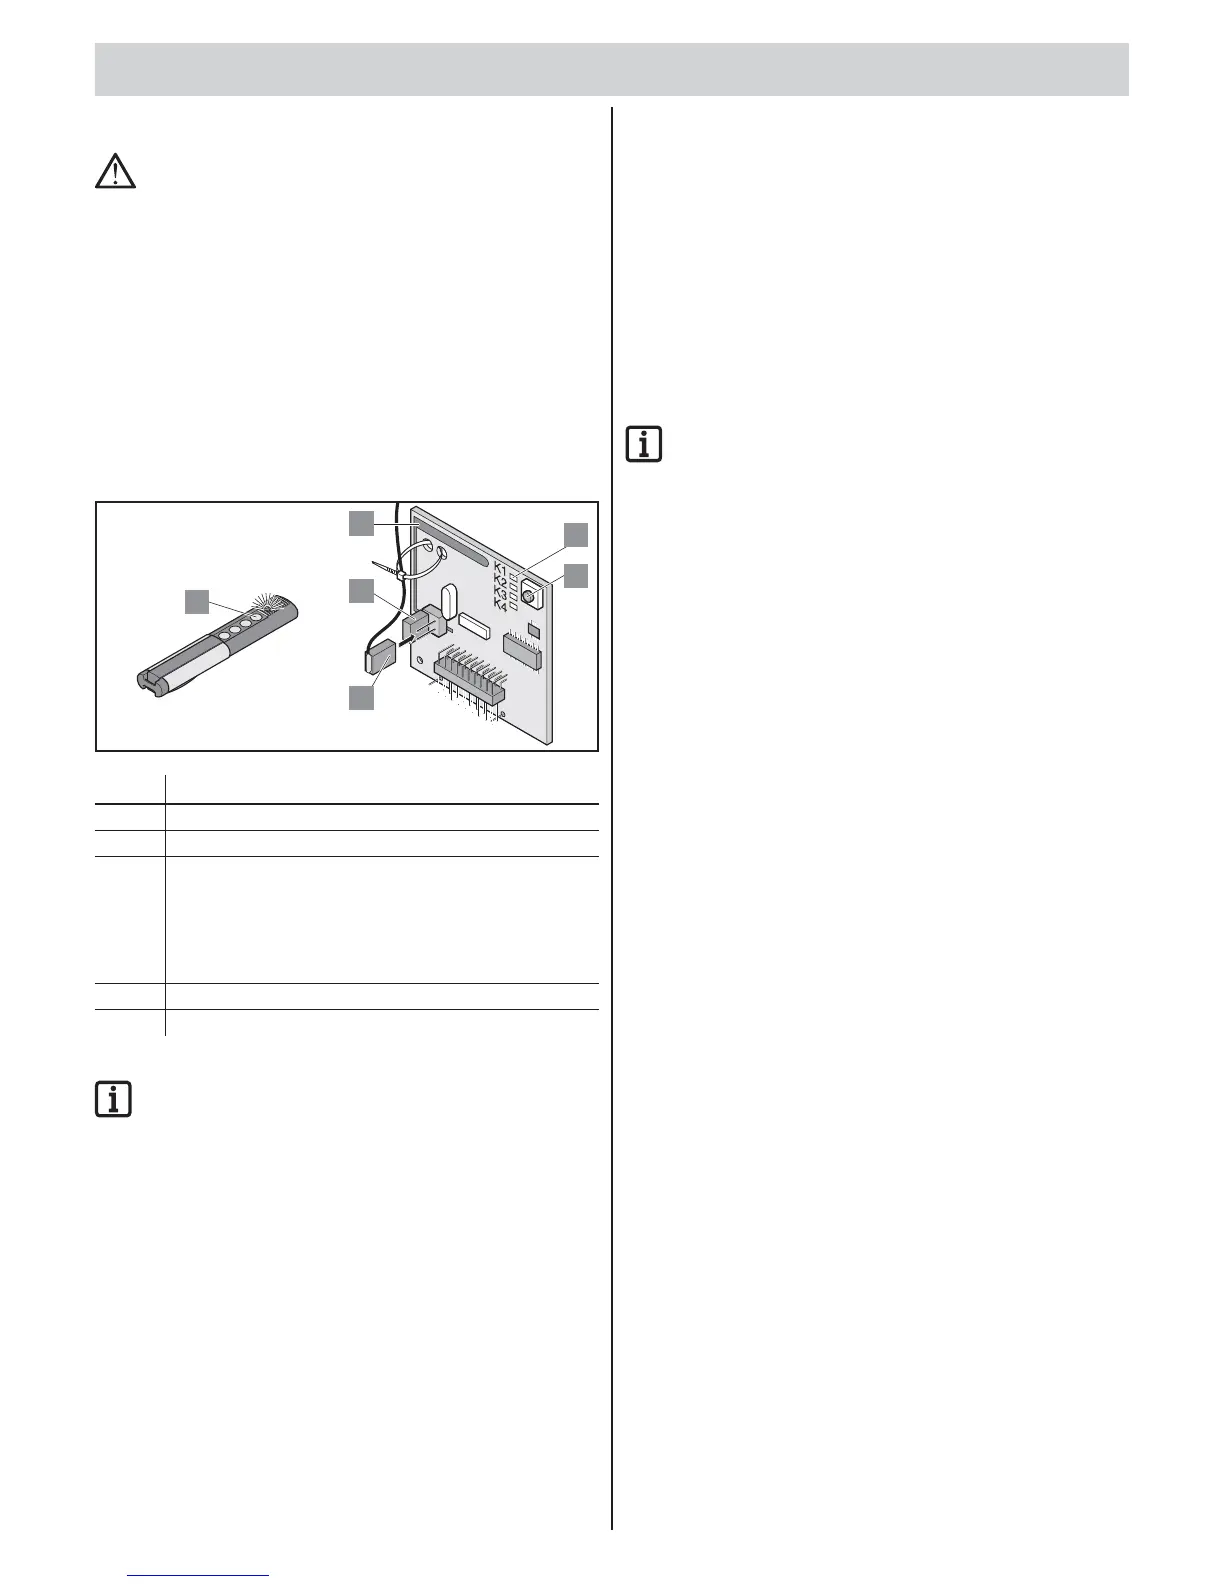
Pos
1
Pos
2
6
2
3
1
4
5
No. Description
1 Teach-in button
2 internal antenna
3 LED: shows selected channel
• K1 = radio channel 1 -> same function as “Start 1” button *
• K2 = radio channel 2 -> same function as “Start 2” button *
• ! K3 = channel 3 -> no function
• ! K4 = radio channel 4 -> no function
4 Connection of the external antenna (6)
6 External antenna
* See chapter “Opening and closing gate”.
IMPORTANT INFORMATION!
Before programming transmitters: Delete the radio receiver
memory.
Deleting the radio receiver memory
• If a hand-held transmitter is lost, all transmitters in the radio receiver
must be deleted for security reasons!
After that, reprogram all hand-held transmitters in the radio receiver.
1. Press and hold the Teach-in button (1).
After 5 seconds, the LED fl ashes – after another 10 seconds,
the LED is lights up steadily.
After a total of 25 seconds, all LEDs light.
2. Release the Teach-in button (1).
All LEDs go off – memory clearing process complete.
Programming transmitter
1-leaf gate
• Button 1 on radio channel 1.
2-leaf gate
• Button 1 on radio channel 1 (both gate leaves open).
• Button 2 on radio channel 2 (only the active leaf opens).
1. Press the learn button (1).
▫ 1 x for channel 1; LED “K1” lights.
▫ 2 x for channel 2; LED “K2” lights.
2. Press one of the transmitter buttons (5).
The transmitter has sent the radio code to the radio receiver.
LED fl ashes during programming.
When the radio code has been programmed, the LED goes out.
3. Cancelling the teach-in mode: Press the Teach-in button (1) several
times until no more LEDs are lit.
IMPORTANT INFORMATION!
If no radio code is sent within 10 seconds, the radio receiver
switches to normal operation.
Control
1. Press button 2.
Only the gate leaf with walk-through gate opens.
2. Press button 1.
Both gate leaves open.
3. Programming additional transmitters: Repeat “Programming
transmitter”.
• The radio receiver can save a maximum of 112 different radio codes
(transmitter buttons).
• If a user moves a mutually used gate system and also takes the
transmitter, all radio codes of the transmitter must be deleted from
the radio receiver.
Deleting radio code
1. Press Teach-in button (1) and keep it pressed for 5 seconds.
LED “K1” or “K2” fl ashes.
2. Release the Teach-in button (1).
The radio receiver is in Deletion mode.
3. Press the transmitter button of the radio code.
LED goes off – wipe procedure complete.
Deleting all radio codes of a channel
1. Press Teach-in button (1) and keep it pressed for 5 seconds.
▫ 1x channel 1
▫ 2x channel 2
The channel LED fl ashes.
2. Keep the Teach-in button (1) pressed for another 10 seconds.
The channel LED lights up.
3. Release Teach-in button (1) – the deletion procedure is ended.
Troubleshooting
All LEDs fl ashing
• All 112 storage locations of the radio receiver are occupied.
If additional transmitters are to be programmed, delete radio
codes from the radio receiver.
LED on
• Learn mode: radio receiver is waiting for a radio code from
a hand-held transmitter.
• radio receiver is receiving a radio code from a hand-held transmitter.
 Loading...