Commissioning
19
Enabling continuous operation
“WL” LED fl ashes until the force values, runtimes and closing delays
are learned and saved.
IMPORTANT INFORMATION!
2-leaf gate close sequence.
• Motor 1 (M1) on the gate leaf with the stop closes fi rst.
• Motor 2 (M2) on the gate leaf with walk-through gate
closes last.
1. Check the setting of the limit switches.
2. Open and close gate.
3. If the operator switches off correctly at both end positions:
Perform learning run.
Performing learning run
CAUTION!
Always perform learning run under supervision, because
the operators traverse at full power.
This is dangerous for persons, animals and object within
the range of motion of the gates.
1. Lock the operator, see chapter “Locking and unlocking the operator”.
T1
OFF
Geh.
Imp.
2
1
ON
DIP
3
4
5
6
8
7
F
2. Set DIP switch 8 to ON.
▫ Connect the DIP switch during the learning run and leave it in this
position during normal operation.
M1 M2
2. 1.
LED 1
L
E
D2
LED
6LED4
L
E
D5
L
E
D
3
LED 7
0
9
I
mp
.
Geh.
Netz
A
u
fZ
uS
H
WL
OF
F
6
IMPORTANT INFORMATION!
Checking direction of running: After the fi rst command,
the operator must traverse in the “Gate OPEN” direction.
If the operator moves to the “Gate CLOSE” position, reverse
the operator connector cable on the control unit, see chapter
“Connecting operator to the control unit”.
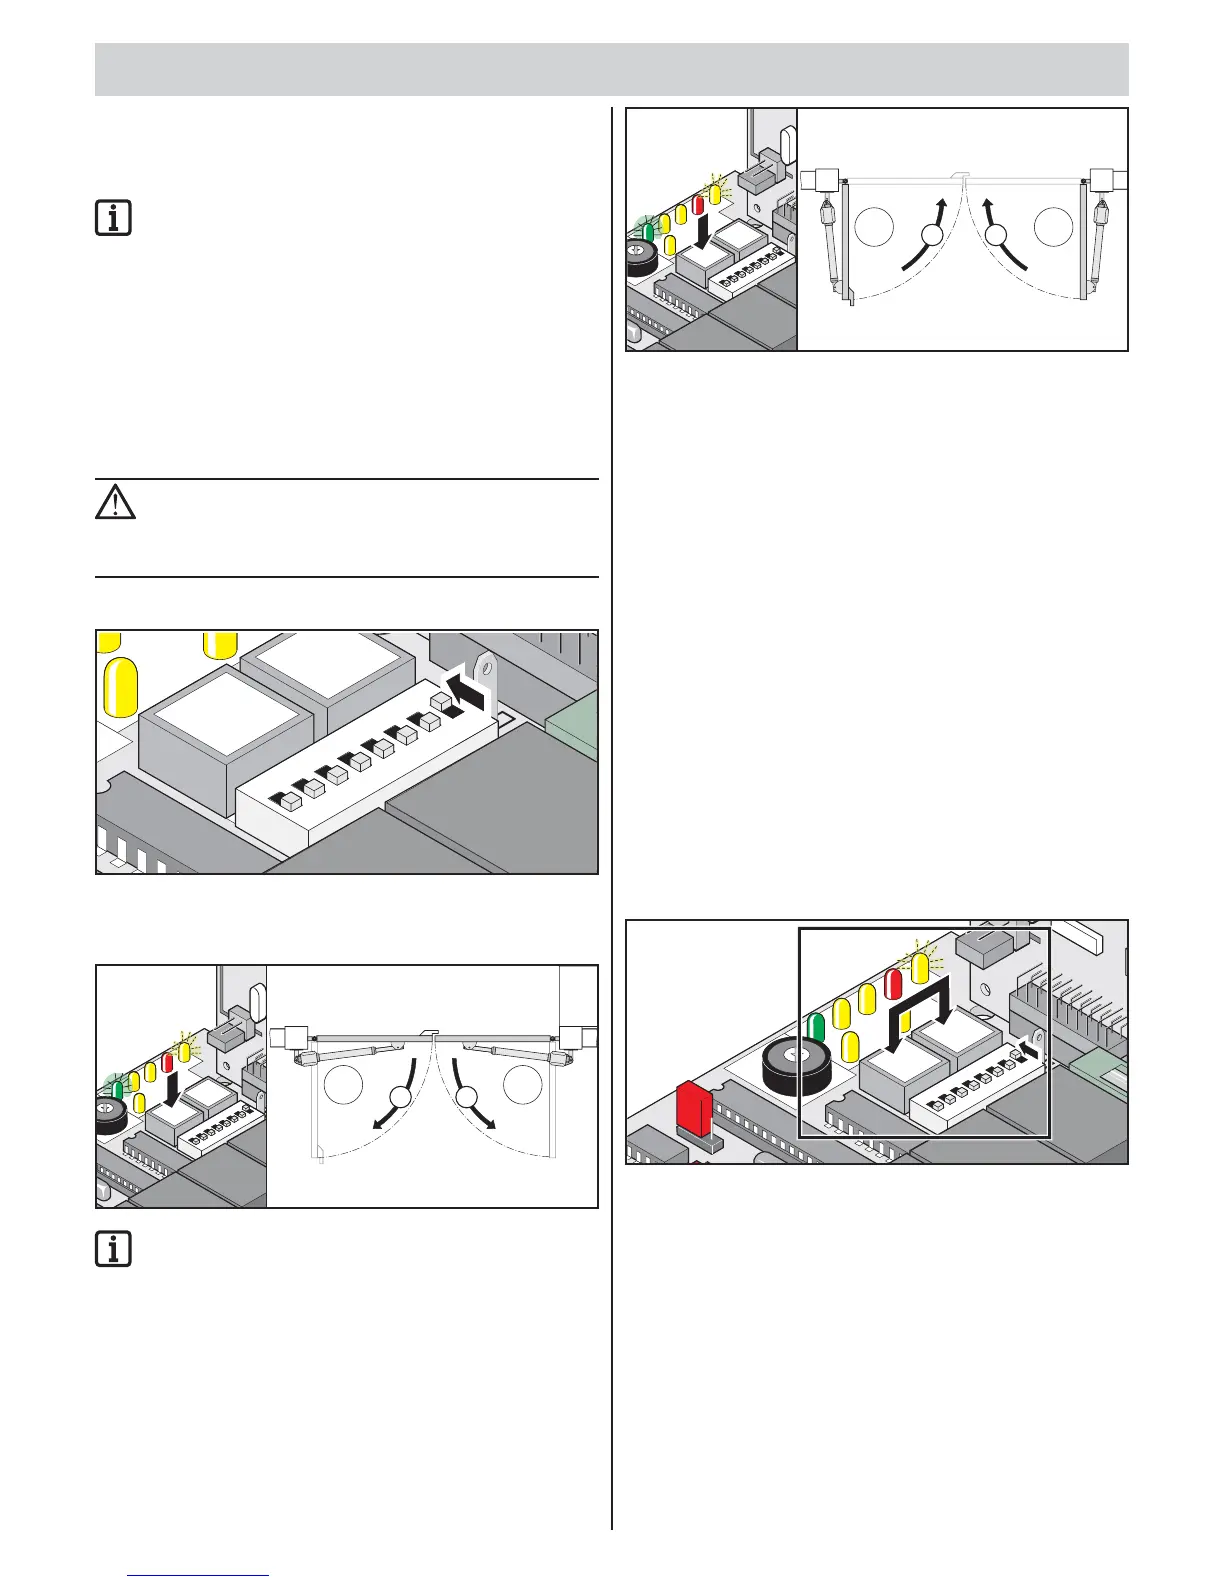
3. Press the button (imp.).
Operators move into the “Gate OPEN” end position.
“Mains” LED lights, “WL” LED fl ashes.
M1 M2
LED
1
L
E
D2
LED 6
LED 4
L
E
D
5
LE
D
3
LE
D7
0
9
I
mp
.
Geh.
Netz Auf Zu S
HWL
OFF
6
4. Press the button (imp.).
Operators move into the “Gate CLOSE” end position.
“Mains” LED lights, “WL” LED fl ashes.
5. Repeat steps 1 and 2.
If all values are programmed: The “WL” LED goes out in both
end positions.
6. Give the next command.
The operators are started and stopped with soft running.
Every time the gates are opened, the control unit monitors
the force, runtime, and closing delay and adjusts them
incrementally when the end position is reached.
7. Leave DIP switch 8 “ON”.
Detecting faulty learning runs
• Operators run without soft running.
• The “WL” LED fl ashes in both end positions.
1. Reset the control unit.
2. Perform learning run.
Resetting the control unit
The control unit reset deletes all programmed values (e.g. force values:
force required by operator to open or close the gate, closing delay).
L
E
D1
L
E
D
2
L
E
D
6
L
ED
4
L
E
D
5
LED
3
L
ED
7
2-F
l.
1-Fl.
K
r
a
ft
3
0
9
I
mp
.
Geh.
Netz
Au
fZ
uS
H
WL
F
U
N
K
T1A
OF
F
6
P1
G
e
h
.
Im
p.
2
1
ON
DI
P
3
4
5
6
8
7
FUSE
1. Press and hold the button (imp. + walk-through)
“WL” LED fl ashes.
“WL” LED goes out after approx. 5 seconds.
All values deleted.
2. Release button.
“WL” LED fl ashes.
Clicking of relays can be heard.
3. Perform a learning run, see chapter “Performing learning run”.
 Loading...