22
FINAL ASSEMBLY
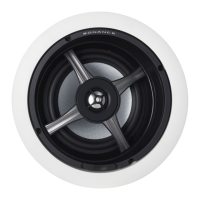
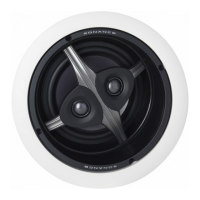
1.Strip 1/2" of insulation from each speaker wire. Attach the positive conductor to the red 5-way
binding post and the negative wire to the black post. To connect, loosen the nut on the binding post
until the hole in the post is visible. Insert the stripped end of the wire through the slot, then snug
the nut. Do not over tighten.
NOTE: Polarity of wiring is critical. All positive leads (+) must be attached to red
connectors throughout the system.
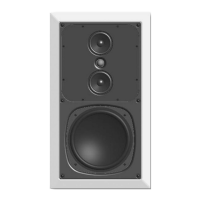
2.Rotate all Roto-Lock mounting fasteners around the speaker’s edge to their OPEN position.
3.Carefully lift the speaker into the wall opening.
4.Use a screwdriver to turn the Roto-Lock mounting fasteners visible in the channel of the extruded
aluminum frame into the CLOSED position. Sonance’s Roto-Lock mounting system firmly attaches
the Sonance Silhouette speaker to the wall by means of a foot that rotates into place, securely
clamping the baffle to the mounting surface.
5.Insert the grilles in the groove in the extruded frame starting at one of the short ends and working
the grille into the frame.
Figure 9: Two Wire Connection
 Loading...