SonicWALL SonicPoint Quick Start Guide Page 5
Configuring a WLAN Zone Interface on the SonicWALL Security Appliance
To configure an interface on the WLAN zone:
1. With a web browser, connect to your SonicWALL security appliance and open the SonicOS
management interface.
2. Click on Network in the left-navigation menu.
3. In the Network > Interfaces page, select a port or interface to assign to the WLAN zone. On a TZ 170
appliance, select the OPT port. On a PRO series appliance, select an unassigned interface
(X2 through X5). Click the edit icon .
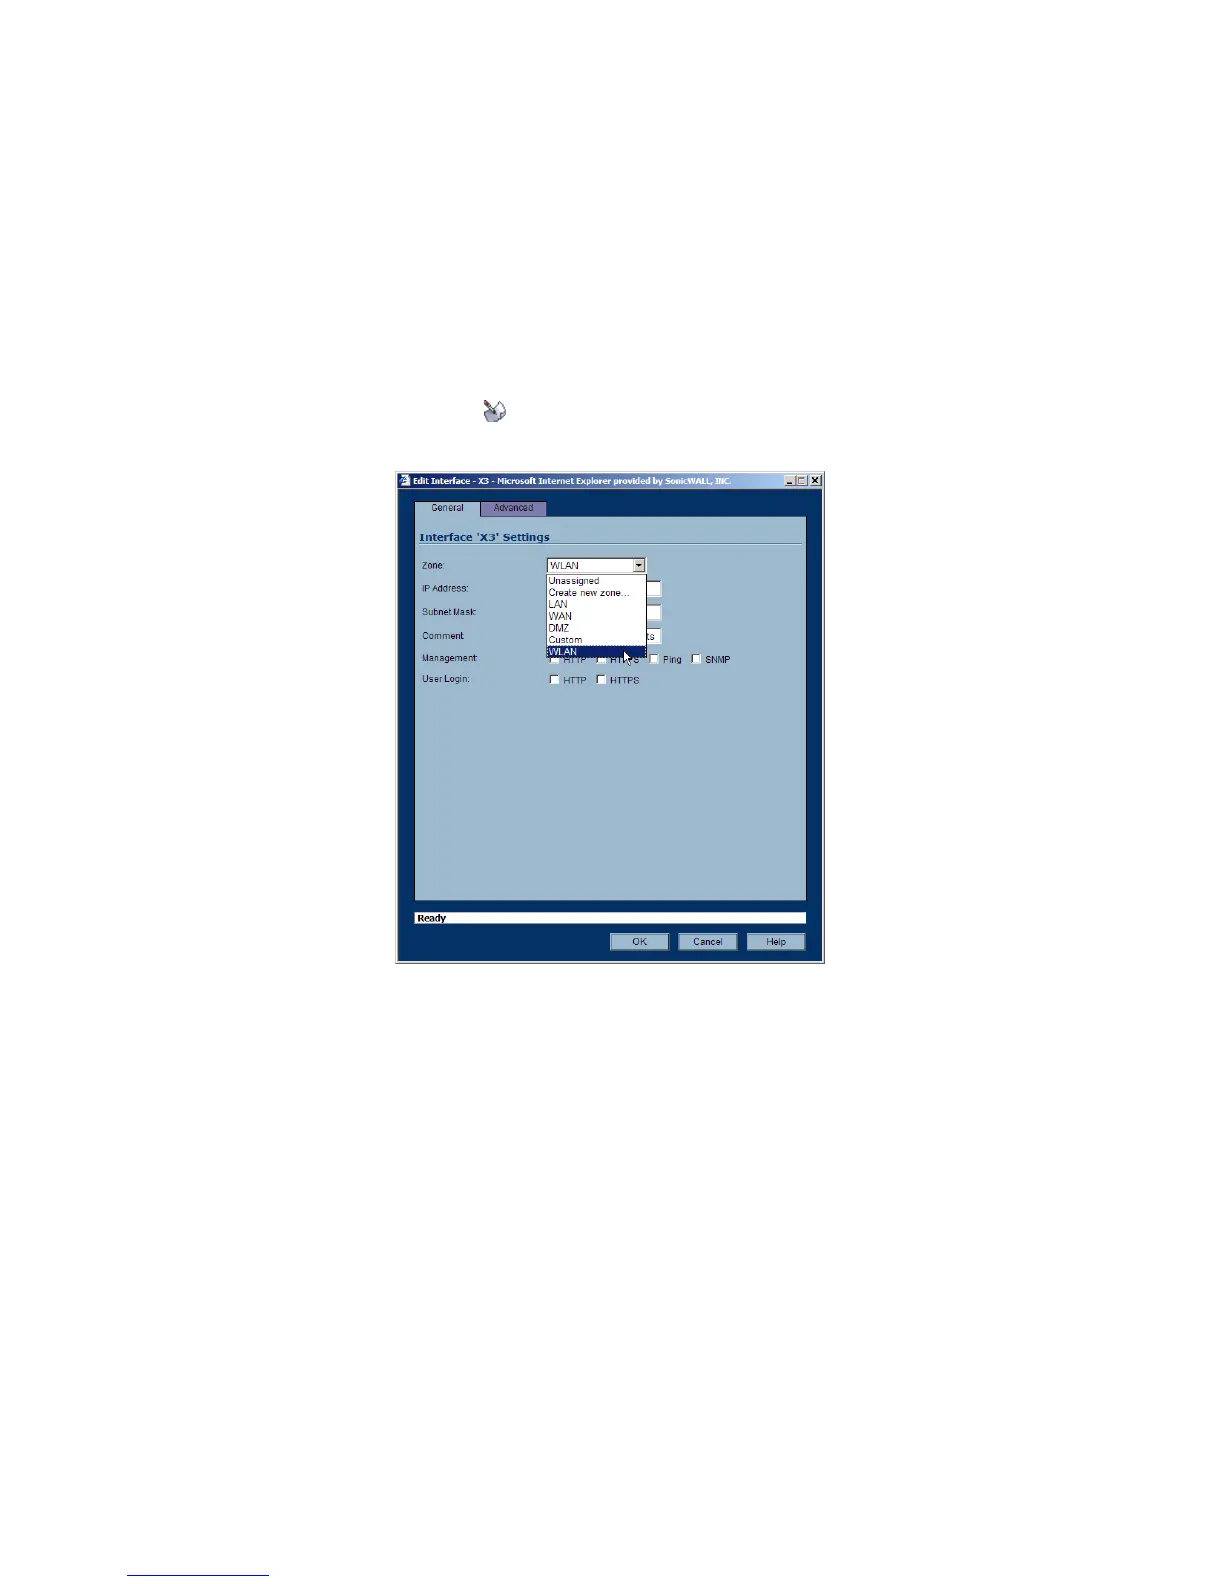
4. In the Edit Interface window, select WLAN from the Zone list.
5. Enter an IP address range and netmask for the interface in the IP Address and Subnet Mask field.
For example, an IP address range of 172.32.16.1 and a subnet of 255.255.255.0. Click OK.
6. Use this interface when you connect a SonicPoint to your SonicWALL PRO series security appliance.
Then the SonicPoint is automatically connected to the Wireless zone.
Note: You can assign several interfaces to the same Wireless zone.