14
Instruction for use | Supercal 739
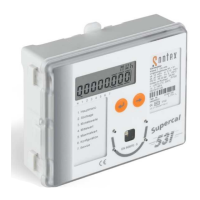
6.7 Temperature sensor 6mm, direct mounting with brass nut
M10 x 1 mm - M12 x 1.5 mm
1. Place the copper gasket (0714P090) on the pocket M10x1 mm side.
2. Screw the pocket on the EAS base of the coaxial multi jet meter M77x1.5 or in
the ball valve.
3. Insert the temperature sensor into the pocket.
4. Tighten by hand the M12 female nut until stumbled on the pocket (maximum
tightening torque of 1-2 Nm).
5. Check the watertightness of the temperature sensor placed under pressure.
6. Seal the temperature sensor.
1. Place the copper gasket (0714P090) on the brass tting M10x1 mm side.
2. Screw the brass tting on the EAS base of the coaxial multi jet meter M77x1.5 or in
the ball valve.
3. Insert the temperature sensor into the brass tting.
4. Tighten by hand the M12 female nut until stumbled on the brass tting (maximum
tightening torque of 1-2 Nm).
5. Check the watertightness of the temperature sensor placed under pressure.
6. Seal the temperature sensor.
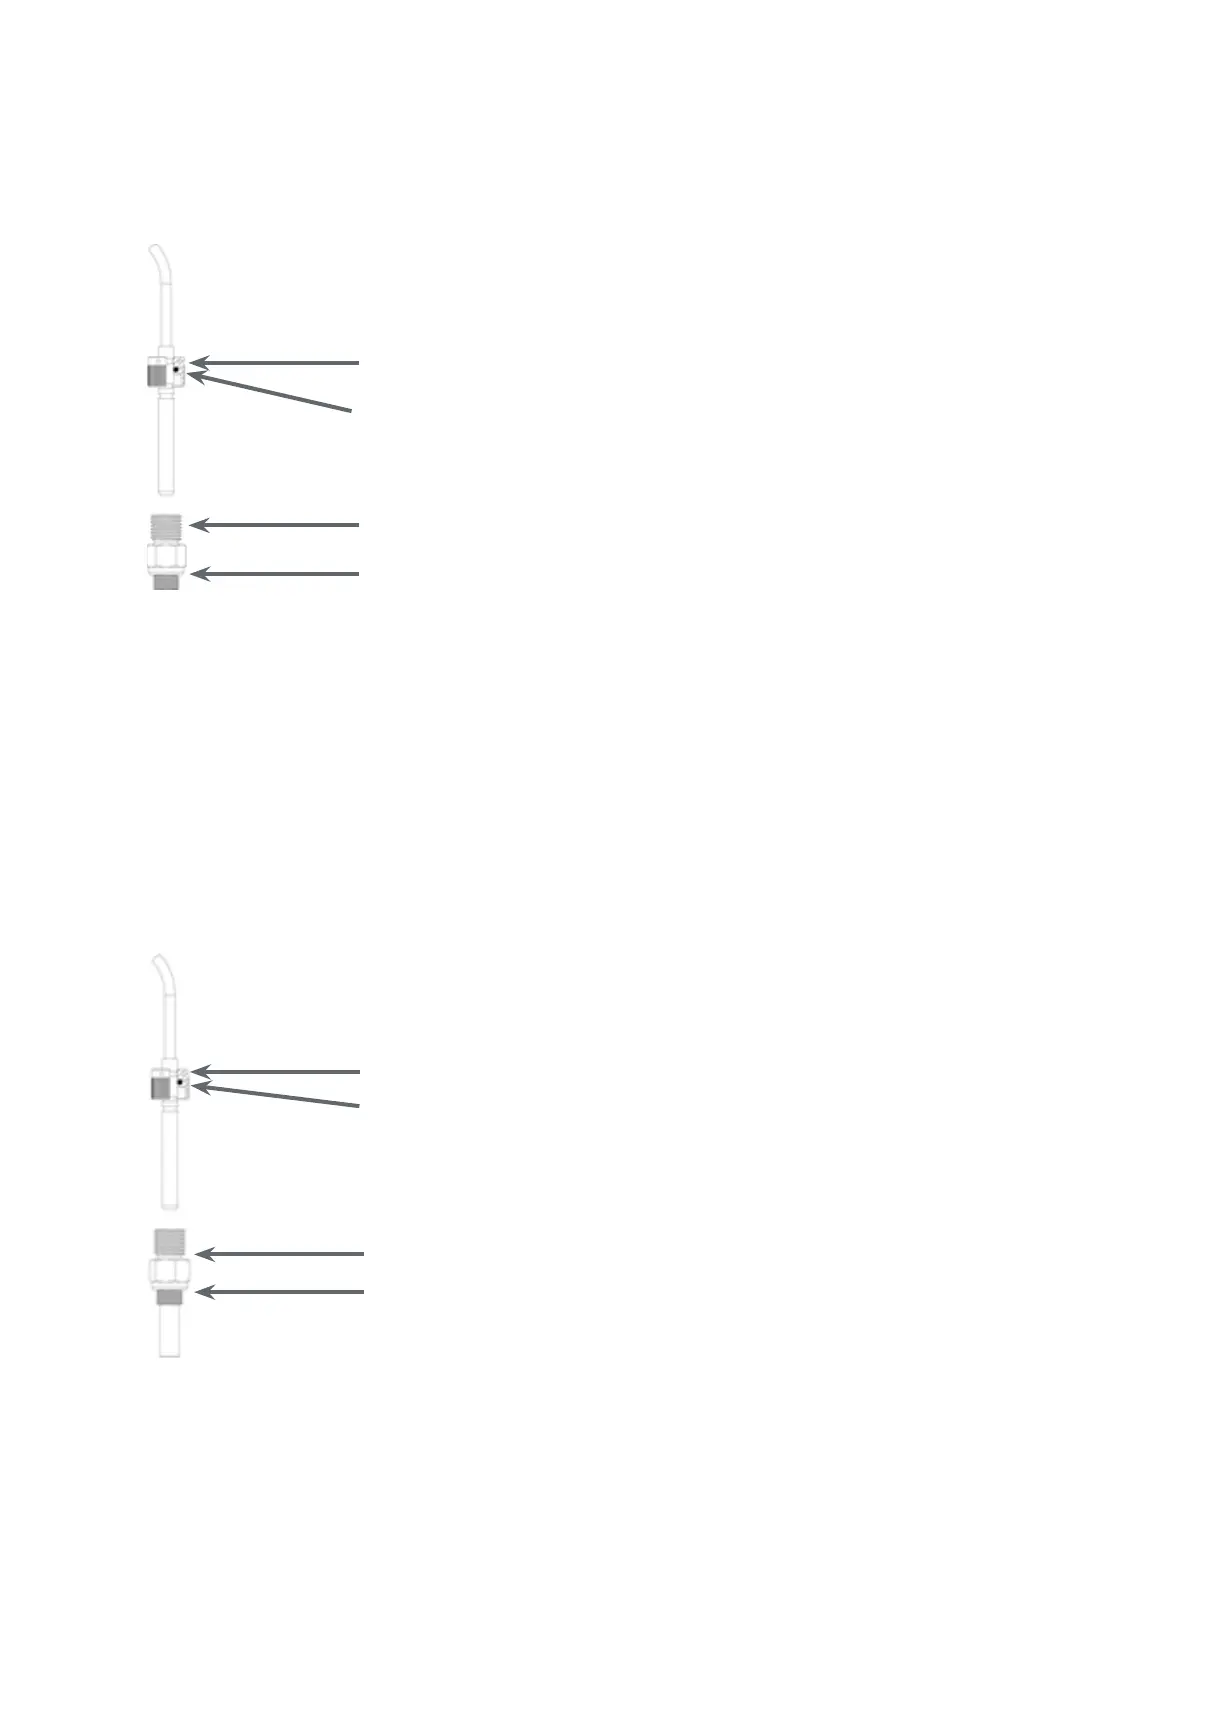
6.8 Temperature sensor 6mm, indirect mounting in a pocket
The brass tting may be mounted in the EAS base of the coaxial multi jet meter M77x1.5 or in
a ball valve.
The brass tting may be replaced by a pocket that can be mounted in the EAS base of the coaxial
multi jet meter M77x1.5 or in a ball valve.
The female nut M12 is already correctly positioned on the tem-
perature sensor using a taper groover pin.
O-ring
Pocket M10x1 mm – M12x1.5 mm: 0460A201
Copper gasket: 0714P090
The female nut M12 is already correctly positioned on the tem-
perature sensor using a taper groover pin.
O-ring
Brass tting M10x1 mm – M12x1.5 mm 0460A198
Copper gasket 0714P090