To change the standby screen appearance
1
Select Menu > Settings > Personal > Standby.
2
Change the settings:
•
Shortcuts – add shortcuts for applications or bookmarks to the standby screen.
•
Standby theme – change the appearance of the standby screen.
3
To save your changes, select Back.
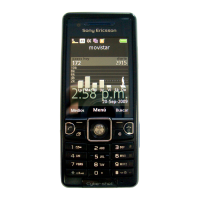
Standby screen
You can change how the standby screen looks and add application shortcuts to the
standby screen.
To use shortcuts from standby
1
To go to standby, press .
2
To access the shortcuts view, tap .
3
Select a shortcut.
The shortcuts view is available only when Sony Ericsson is selected as the default theme for the
standby screen. See To set themes on page 66.
Phone settings
You can change the date, time and phone language, or define settings for your applications.
Date and time
You can set your time zone, current time and date, and choose the formats and separators
for time and date. When you travel across time zones, you can let your phone update the
time and date automatically.
To set date and time
1
Select Menu > Settings > Phone > Date and time.
2
Change the settings and select Back.
To set your time zone
1
Select Menu > Settings > Phone > Date and time > Time zone.
2
Select your country or region.
3
Select Back.
To turn on automatic time update
•
Select Menu > Settings > Phone > Date and time > Automatic time update >
On.
Automatic time update may not be available for all networks.
To change the alarm settings
1
Select Menu > Settings > Phone > Date and time.
2
To change the alarm signal, select Clock alarm signal.
3
To change the alarm snooze time, select Alarm snooze time.
4
To save your settings, select Back.
Languages
You can change your phone language and writing language.
To change the phone language
1
Select Menu > Settings > Phone > Language > Phone language.
2
Select an option and select Back.
67
This is an Internet version of this publication. © Print only for private use.