ILCE-7RM3A
5-026-886-11(1)
GB
29
Preparations for shooting
\\win-473\CAMERA\CX88900(MGA)_CX88800(CQA)_IM\01_Compose\CQA_GB\5026886111\5026886111ILCE7RM3AUC2\01GB-ILCE7RM3AUC2\020PRE.indd
DTP data saved: 2020/11/20 19:22
PDF file created: 2020/11/20 19:27
2
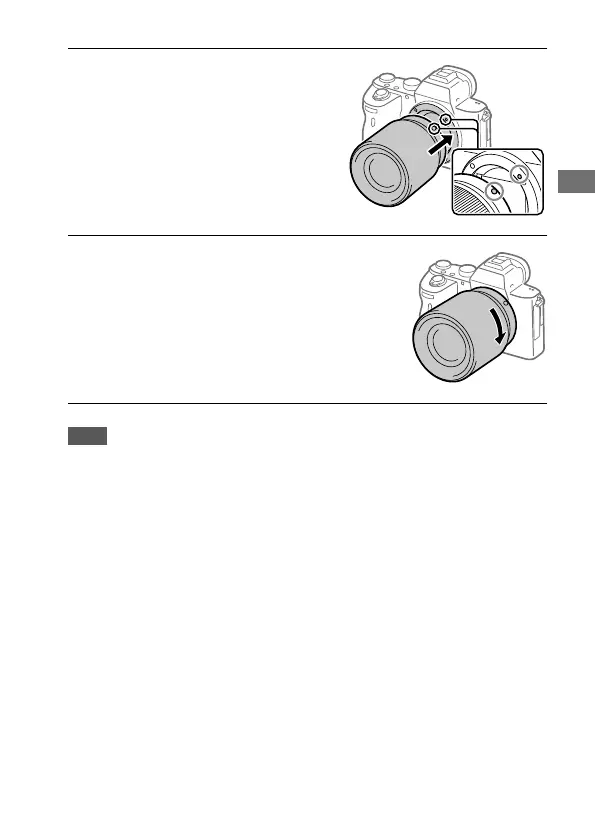
Mount the lens by aligning
the two white index marks
(mounting indexes) on the
lens and camera.
• Hold the camera with the lens
facing down to prevent dust or
debris from entering the camera.
3
While pushing the lens lightly
toward the camera, turn the
lens slowly in the direction of
the arrow until it clicks into
the locked position.
Note
• Be sure to hold the lens straight and do not use force when attaching a lens.
• Do not press the lens release button when attaching a lens.
• The Mount Adaptor (sold separately) is required to use an A-mount lens
(sold separately). For details, refer to the operating manual supplied with the
Mount Adaptor.
• If you want to shoot full-frame images, use a full-frame size compatible lens.
• When carrying the camera with a lens attached, hold both the camera and the
lens firmly.
• Do not hold the part of the lens that is extended for zoom or focus
adjustment.
 Loading...