ILCE-9M2
5-010-473-11 (1)
GB
43
Preparations for shooting
C:\5010473111\5010473111ILCE9M2IN5\01GB-ILCE9M2IN5\020PRE.indd
DTP data saved: 2019/07/26 13:31
PDF file created: 2019/08/06 10:22
7
Repeat steps 5 and 6 to set other items, then select [Enter] and
press the center.
Hint
• To reset the date and time setting, use MENU (page 230).
Note
• This camera does not have a function for inserting the date into images.
You can insert the date into images and then save and print them using
PlayMemories Home (for Windows only).
Step 6: Shooting images in auto mode
1
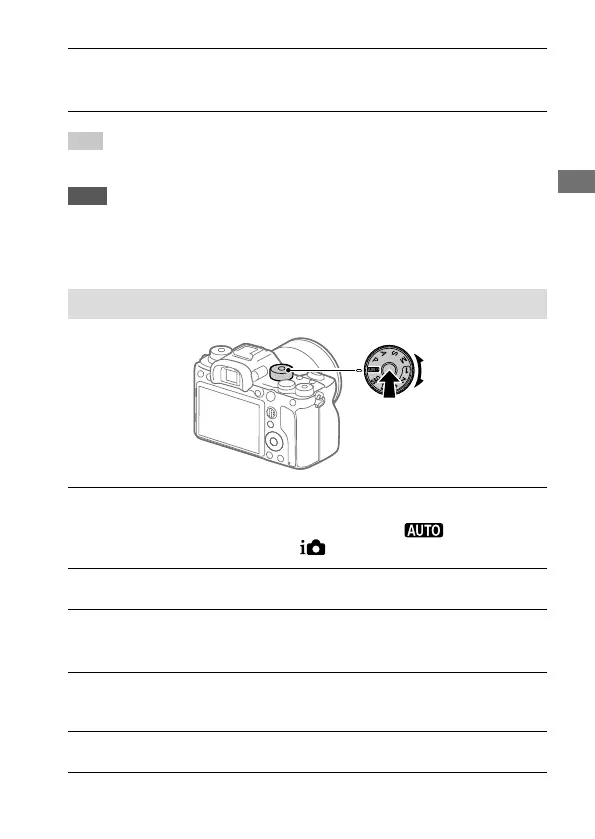
Press and hold the lock release button in the center of the
mode dial, then turn the mode dial to set to
.
The shooting mode will be set to (Intelligent Auto).
2
Look into the viewfinder or the monitor and hold the camera.
3
Set the size of the subject by rotating the zoom ring of the lens
when a zoom lens is attached.
4
Press the shutter button halfway down to focus.
• When the image is in focus, an indicator (such as ) will light up.
5
Press the shutter button all the way down.



 To Next Page