58
GB
Searching for the beginning of
the current or the next track
(AMS)*
To go forward
Press > during play.
Each time you press the button, the search
direction, + (forward), and number of tracks
being skipped (1 to 9) appear.
To go back
Press . during play.
Each time you press the button, the search
direction, – (back), and number of tracks being
skipped (1 to 9) appear.
* AMS: Automatic Music Sensor
Note
The AMS function may not operate correctly under the
following circumstances:
– When the unrecorded space between songs is less
than 4 seconds long.
– When the system is placed near a television.
Tip
When a tape is inserted, corresponding forward (N)/
reverse (n) indicators light.
You can record a whole disc (VIDEO CD and
CD) on a tape.
You can use TYPE I (normal) tape. The
recording level is adjusted automatically.
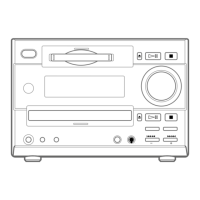
Use buttons on the unit for the operation.
1 Load a recordable tape into the tape
deck, then touch TAPE repeatedly to
select “TAPE”.
2 Press DIRECTION repeatedly to select
“g” to record on one side. Select
“h” or “j” to record on both sides.
3 Touch nN repeatedly to select
recording side, then touch x.
If you select both sides recording or front
side recording, touch nN repeatedly to
light up the N indicator, then touch x. If
you record on the reverse side, touch
nN repeatedly to light up the n
indicator, then touch x.
4 Touch DVD and load a disc you want to
record.
When the system automatically starts
playback, touch x twice to cancel Resume
Play.
5 Press CD SYNC.
The tape deck stands by for recording.
“SYNC” lights up and “REC” flashes.
6 Press z START.
Recording starts.
To stop recording
Touch x.
Tape – Recording
Recording your favorite
CD tracks on a tape
— CD-TAPE Synchro Recording
 Loading...