Do you have a question about the Sony Digital 8- TRV240 and is the answer not in the manual?
Section to record product model and serial numbers for dealer reference.
Information on recycling Lithium-Ion batteries and contact details.
FCC compliance statement for US models.
Covers recording and playback of images on tape and Memory Stick.
Instructions for transferring images from camcorder to computer.
Groups various functions like exposure, effects, and tape operations.
Lists all accessories included with the camcorder and their respective page references.
Step-by-step guide for connecting the camcorder's power supply.
Instructions for correctly inserting a video cassette into the camcorder.
Step-by-step guide for recording video footage with the camcorder.
How to monitor the playback image on the camcorder's LCD screen.
Explains how to use the manual and notes on model differences.
Information on using Digital8 and Hi8 tapes, and TV color systems.
Warning about unauthorized recording of copyrighted materials.
Care instructions for the camcorder's lens and LCD screen/finder.
Instructions for installing and removing the battery pack.
Steps for charging the battery pack using the AC power adaptor.
Instructions for connecting the camcorder to a wall outlet for power.
Step-by-step guide for setting the camcorder's date and time.
Detailed instructions for inserting a video cassette into the camcorder.
Procedure for removing a video cassette from the camcorder.
Step-by-step guide for recording video footage with the camcorder.
Steps to take after finishing a recording session.
Instructions for adjusting the LCD screen's angle and brightness.
How to use the camcorder's zoom lever for telephoto and wide-angle shots.
How to adjust the viewfinder for clear focus.
Instructions for using the mirror mode to view oneself on the LCD screen.
Explains various indicators shown on the screen during recording.
How to use the backlight function to improve shots with strong backlighting.
Features for shooting in low-light conditions.
How to use the self-timer function for delayed recording.
Functions to check recorded footage and ensure smooth scene transitions.
Step-by-step guide for playing back recorded video from a tape.
How to display or hide on-screen indicators during playback.
Explains how recording data like date, time, and settings are stored and displayed.
Describes different modes for playback control.
Details on skip scan, slow playback, double speed, and frame-by-frame viewing.
How to connect the camcorder to a VCR for TV viewing.
Connection instructions for monaural TVs or VCRs.
Using an S-video cable for better picture quality.
How to show screen indicators when viewing on a TV.
Instructions for recording still images onto a video tape.
How to use the self-timer for recording still images on tape.
How to record video in 16:9 aspect ratio for wide-screen viewing.
How to apply fade-in and fade-out effects to video recordings.
How to apply digital picture effects like Sepia or B&W.
How to apply digital effects like STILL, FLASH, LUMI, TRAIL.
How to select automatic exposure modes like Spotlight or Sports.
How to manually adjust exposure settings for optimal lighting.
How to manually adjust focus for sharper images.
How to set up time-lapse recording for gradual appearance shots.
How to create stop-motion animation using frame-by-frame recording.
How to add text titles to video recordings.
How to create and store custom text titles for video recordings.
How to insert new scenes into existing video tapes.
How to apply picture effects during playback of recorded tapes.
How to apply digital effects during playback of recorded tapes.
How to enlarge recorded images from tapes during playback.
How to mark and return to specific scenes using the tape counter.
How to search and play back recordings based on the date they were recorded.
How to search for specific still images or scan through them automatically.
How to scan and view photos automatically.
How to dub tapes using an A/V connecting cable.
How to dub tapes using an i.LINK (DV) cable for digital transfer.
How to use digital program editing to dub selected scenes from tapes.
Instructions for connecting the VCR for digital program editing.
How to set up the VCR using an A/V cable for control signals.
How to set up the VCR using an i.LINK cable for digital program editing.
How to synchronize the camcorder and VCR for accurate dubbing.
How to create a program by selecting scenes for editing.
How to erase specific programs or the entire editing program.
How to perform the actual dubbing of programmed scenes to a tape.
How to capture video and audio from analog sources to a computer.
How to record video from external sources using an A/V cable.
How to record video from external sources using an i.LINK cable.
How to insert video scenes from a VCR into existing recordings.
Steps for connecting via USB and viewing images on a computer.
Minimum system requirements for Windows PCs.
Instructions for installing the USB driver required for computer connection.
Troubleshooting steps for USB driver installation issues.
Guide to installing the image management software for Sony camcorders.
How to capture video and still images using the ImageMixer software.
How to view live video feed from the camcorder on the computer.
How to capture individual still images from the live feed.
How to capture video clips from the live feed.
How to access the software's built-in help documentation.
Notes on computer communication and potential issues.
Guide to accessing and modifying camcorder settings via the menu system.
Details of various menu settings and their functions.
Menu options related to audio modes and tape playback settings.
Menu options for adjusting LCD and viewfinder brightness and color.
Menu options for image quality, shooting modes, and picture formats.
Menu options for protecting, deleting, formatting, and managing Memory Stick contents.
Menu options for printing settings and adjusting recording modes like SP/LP.
Menu options for USB connection and display language settings.
Menu options for displaying data codes, time, and controlling the remote.
Menu options for video editing functions and display indicator settings.
Basic information about using the Memory Stick with the camcorder.
Explains the file formats for still (JPEG) and moving (MPEG) images.
Information on inserting and handling the Memory Stick.
Compatibility notes for image files recorded on Memory Sticks.
How to correctly insert a Memory Stick into the camcorder.
How to safely remove a Memory Stick from the camcorder.
How to choose the image quality for still photos.
Details of image quality settings like Super Fine, Fine, and Standard.
Explains how image quality affects memory capacity and file size.
How to choose image sizes for still photos and moving pictures.
Table detailing image sizes and their corresponding recording/playback indicators.
Table showing still image capacity based on quality, size, and Memory Stick capacity.
Table showing moving picture recording time based on image size and Memory Stick capacity.
How to record still images directly onto a Memory Stick.
How to record multiple still images continuously.
How to use the self-timer for recording still images onto a Memory Stick.
Explains the Memory MIX function for superimposing images.
How to superimpose still images onto moving pictures recorded on tape.
How to superimpose still images onto other still images stored on a Memory Stick.
How to capture moving images from tape and save them as still images on Memory Stick.
How to record a still image from external video sources.
How to record moving pictures from tape onto a Memory Stick.
How to record moving pictures from external video sources.
How to create a program by selecting scenes for editing onto a Memory Stick.
How to erase specific programs or the entire editing program from Memory Stick.
How to erase all programmed editing sequences from Memory Stick.
How to perform the actual dubbing of programmed scenes to a Memory Stick.
How to play back still images stored on a Memory Stick.
How to view still images on a TV using the camcorder.
Explains indicators shown during still image playback.
How to view multiple still images simultaneously in an index screen format.
How to play back moving pictures recorded on a Memory Stick.
Explains indicators shown during moving picture playback.
General information on viewing Memory Stick images on a computer.
Specific instructions for Windows users to view Memory Stick images.
Minimum system requirements for Windows PCs.
Instructions for installing the USB driver required for computer connection.
Troubleshooting steps for USB driver installation issues.
Specific instructions for Macintosh users to view Memory Stick images.
System requirements for Macintosh computers.
Instructions for installing the USB driver for Mac connection.
Procedures for safely disconnecting the camcorder from the computer.
Procedures for safely disconnecting from Macintosh.
Notes regarding computer communication and software.
Information about software compatibility for image viewing.
Explains folder structure and file naming conventions on the Memory Stick.
Troubleshooting common recording issues and their solutions.
Troubleshooting common playback issues and their solutions.
Troubleshooting issues related to power, battery, and tape handling.
Troubleshooting issues related to Memory Stick functionality and recording.
Troubleshooting for other issues like digital program editing and remote control.
Explains the 5-digit error codes and their meanings.
Explains various warning indicators displayed on the screen and their meanings.
Lists and explains various warning messages displayed by the camcorder.
Explanation of the Digital8 video system.
Information on compatible cassette types and recording times.
How the camcorder detects and switches between Digital8 and Hi8 systems.
Information about copyright protection signals.
How to play back dual sound track tapes from Digital8 and Hi8 systems.
Explanation of the InfoLITHIUM battery pack and its functions.
Instructions for charging the InfoLITHIUM battery pack.
Tips for maximizing battery life and performance.
How the remaining battery time indicator works and its limitations.
Proper procedures for storing the battery pack for long-term use.
Explanation of the i.LINK digital interface and its features.
Information on the different maximum baud rates for i.LINK connections.
Details on using the unit's i.LINK jack for data transfer and control.
Specifies the type of i.LINK cable needed for DV dubbing.
Information on using the camcorder internationally, including power and TV systems.
Explanation of moisture condensation issues and how to prevent them.
Guidance on cleaning the video heads and LCD screen.
Instructions for charging the camcorder's internal rechargeable battery.
General safety and operational precautions for using the camcorder.
Guidelines for proper handling and care of video tapes.
Instructions for cleaning and storing the camcorder lens.
Guidelines for using, storing, and maintaining the battery pack.
Precautions for using and handling non-rechargeable batteries.
Detailed technical specifications for the camcorder.
Technical specifications for the AC power adaptor.
Technical specifications for the Memory Stick.
Technical specifications for the camcorder battery packs.
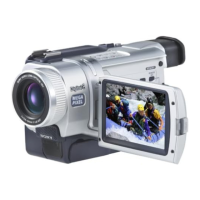
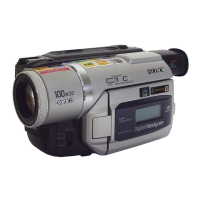
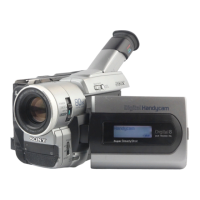
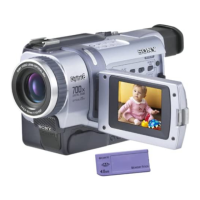
Diagram and list identifying external parts of the camcorder.
Diagram identifying buttons and controls on the camcorder body.
Diagram identifying buttons and controls on the camcorder body.
Diagram identifying external parts of the camcorder (zoom lever, shoe).
Diagram identifying various jacks on the camcorder (S-Video, USB, DV).
Diagram and list identifying buttons on the remote commander.
Explanation of indicators displayed on the LCD screen and display window.
| Recording System | Digital 8 |
|---|---|
| Optical Zoom | 20x |
| Digital Zoom | 120x |
| LCD Screen Size | 2.5 inches |
| Viewfinder Type | Color |
| Image Sensor Size | 1/4 inch |
| Focus Adjustment | Auto/Manual |
| Microphone | Built-in stereo |
| Microphone Operation Mode | Stereo |
| Image Sensor | CCD |
| Camcorder Media Type | Hi8, Digital8 |
| Connector Type | USB, S-Video out |
| Features | NightShot |
| Battery | NP-F330 |