DSX-B700/B700W/B710D
23
Sony CONFIDENTIAL
For Authorized Servicer
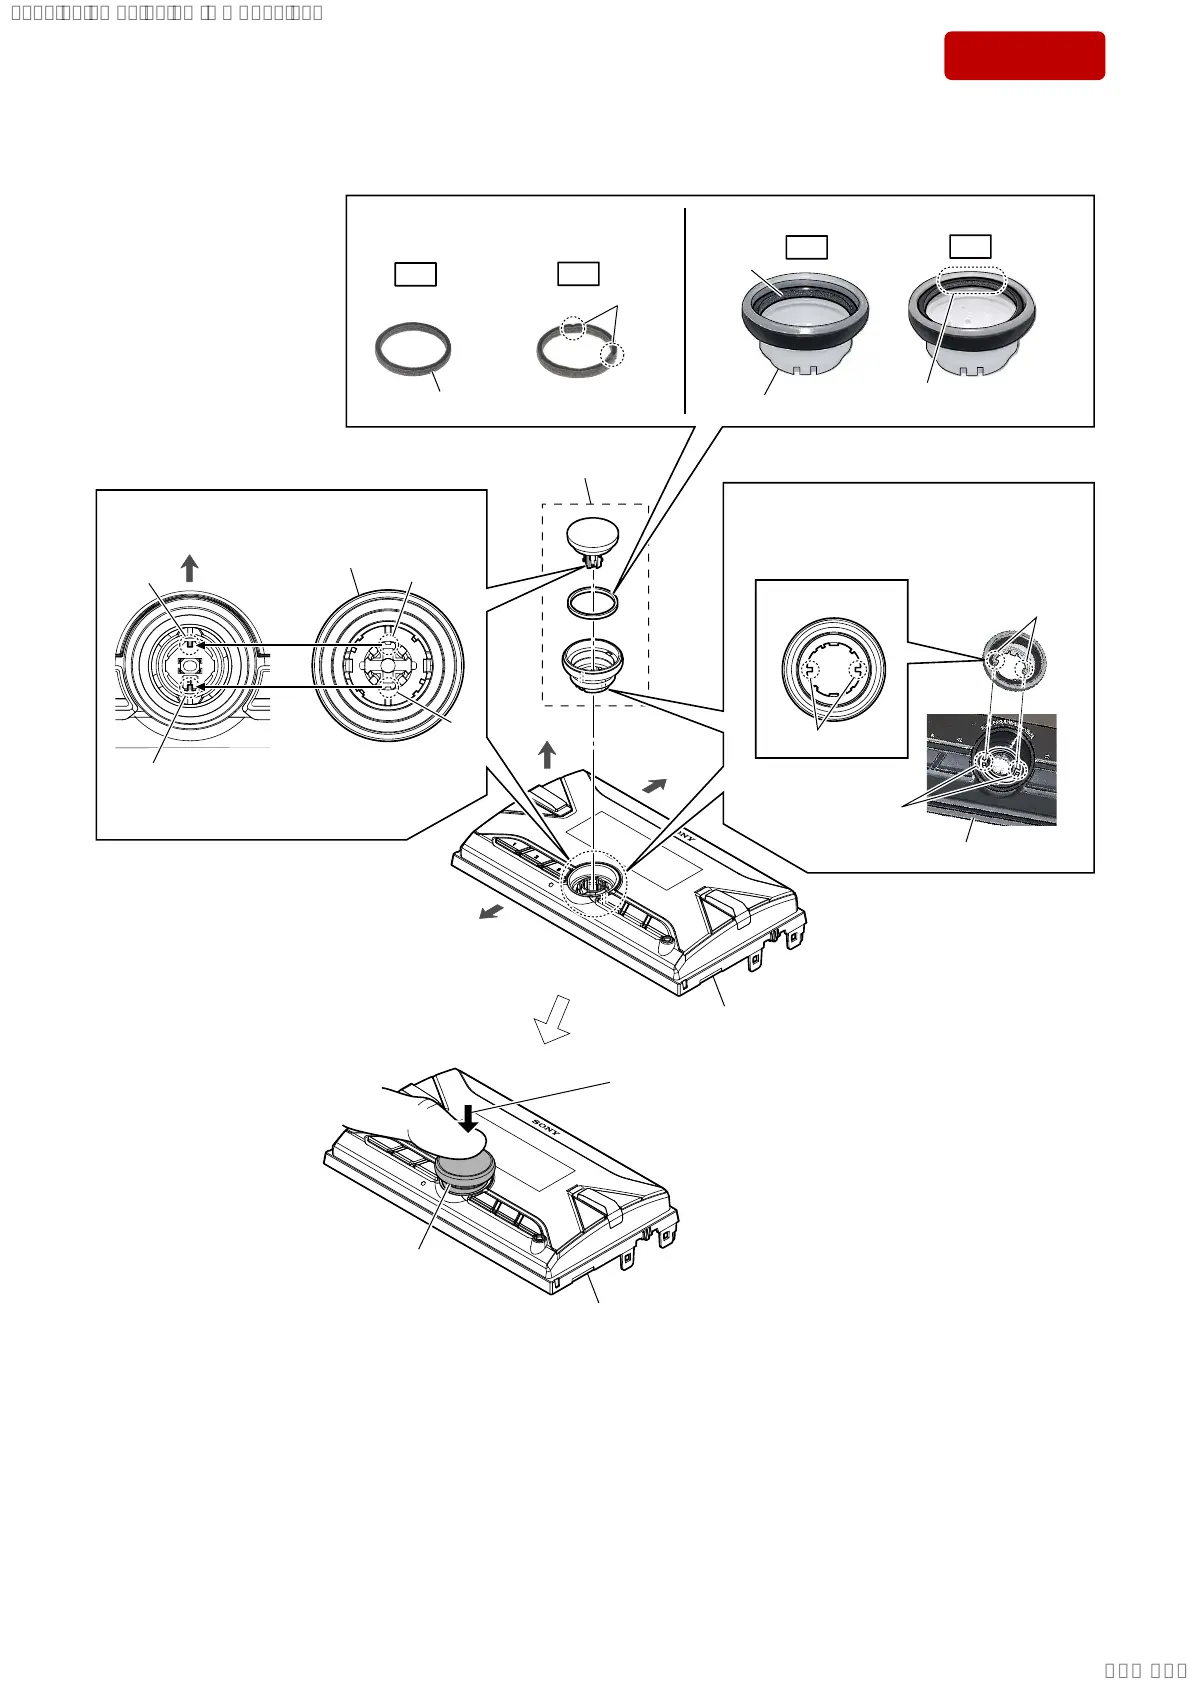
3-8. HOW TO INSTALL THE KNOB (VOL) ASSY
knob (VOL) assy
front panel block
Attach in order from 1 to 5.
front side
top side
bottom side
knob (VOL) assy
4 Align two ribs and two slits.
slit
slit
rib
rib
– Front panel block
front view –
– Inner view –
knob (VOL) assy
top side
two grooves
– Front view –
two shafts
two shafts
1 Confirm the cushion (knob) is not
deformed or damaged.
OK
NG
Deformed or damaged.
No damaged.
OK
NG
Cushion (knob) is overlap on
the edge of knob (VOL).
2 Attach the cushion (knob) to the knob (VOL).
knob (VOL)
cushion
(knob)
cushion (knob)
front panel block
front panel block
5 Push until the clicking sound is heard.
Note 2: When pushed by a strong force there is a
risk of damage to the inside of the switch.
Push in the appropriate force, be careful
not to push too strongly.
3 Align two shafts and two grooves.
Note 1: Since the position of the groove to
rotate, check the position of the groove
when attach the shaft.
SYSSET
2019/10/2421:43:03(GMT+09:00)