Help Guide
Wireless Microphone
ECM-W3 / ECM-W3S
Recording
Use the receiver attached to a camera and the microphone attached to the subject's clothing for audio recording.
Turn on the camera and place the camera on standby.
1
Turn on the receiver and the microphone.
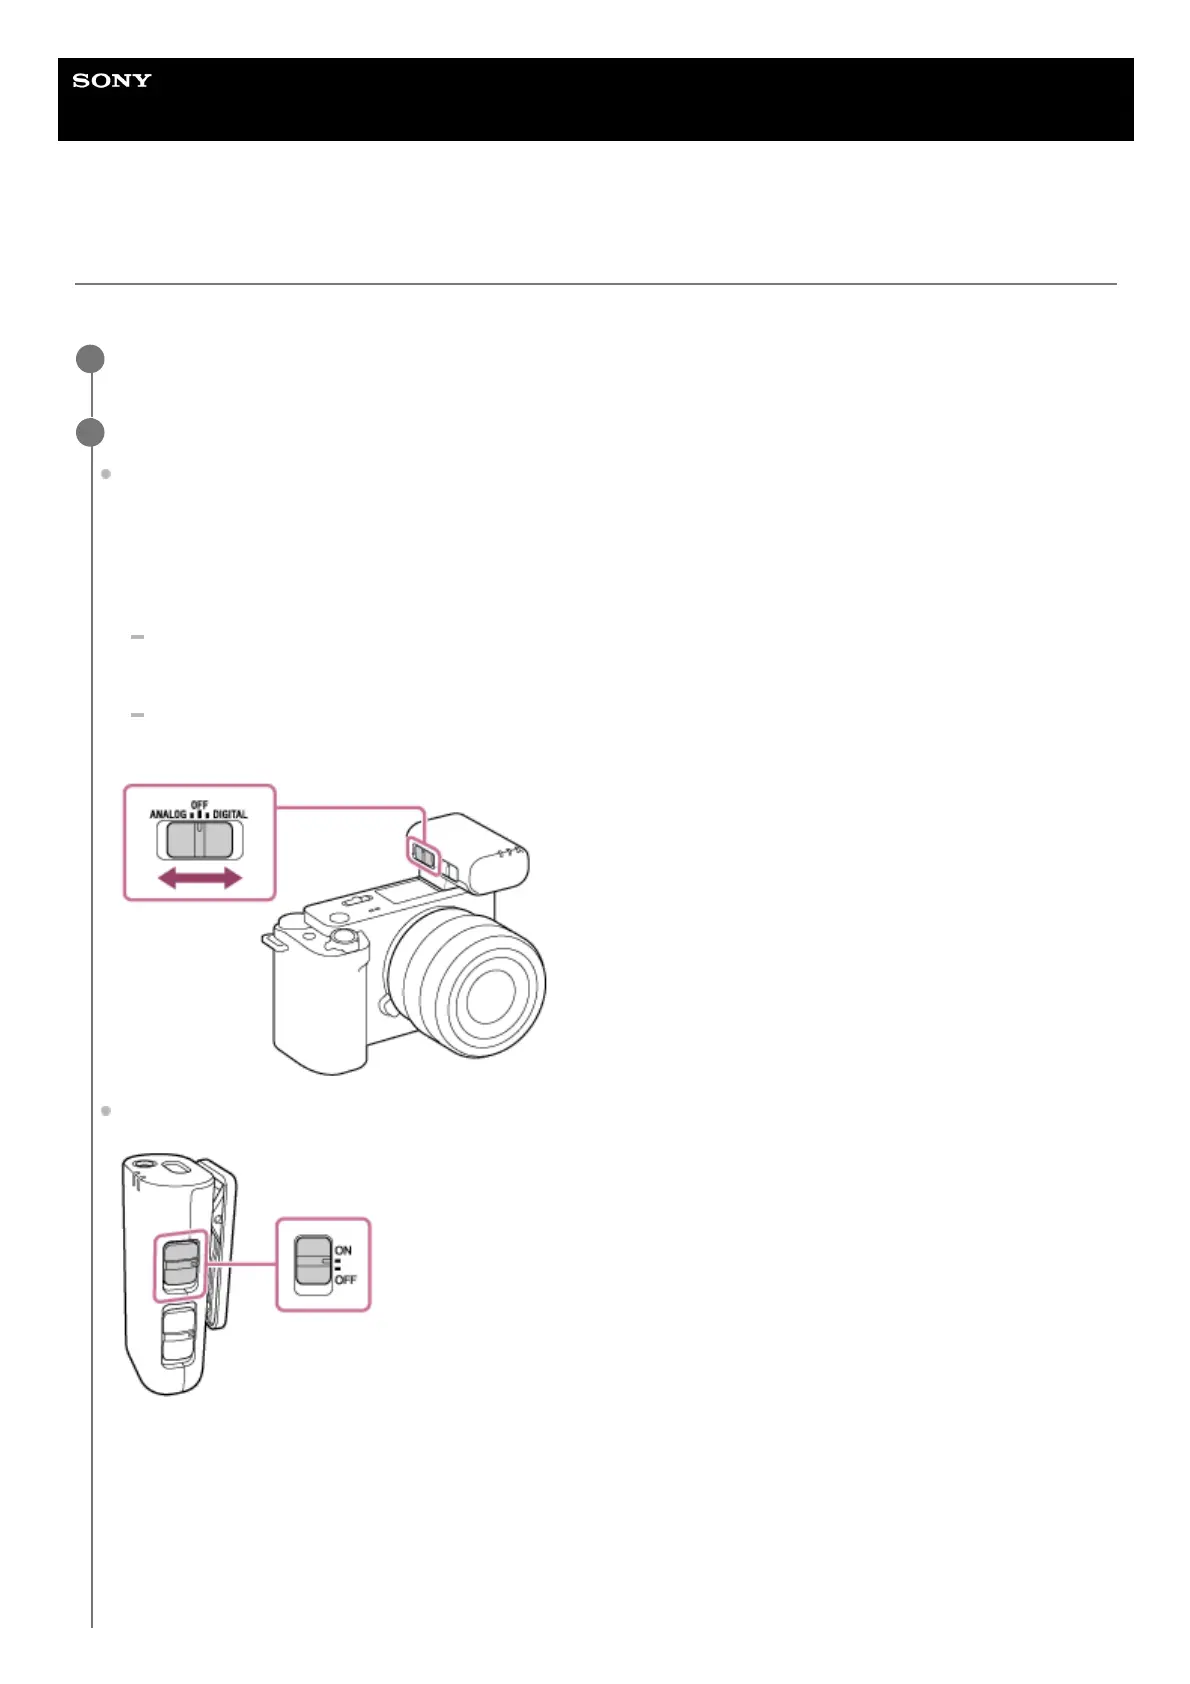
Select your desired audio output with the slide switch (ANALOG/OFF/DIGITAL) on the receiver.
If your camera is compatible with the digital audio interface of the Multi Interface Shoe, make sure that the switch is
set to “DIGITAL.” If not, set the switch to “ANALOG.”
If the switch is not set correctly, a compatibility message will be displayed on the camera. For camera models
compatible with the digital audio interface of the Multi Interface Shoe, visit the website at:
ECM-W3
https://www.sony.net/dics/ecmw3/
ECM-W3S
https://www.sony.net/dics/ecmw3s/
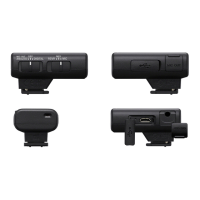
Select “ON” with the power switch on the microphone.
Immediately after the receiver and the microphone are turned on, the LINK lamp on the microphone starts blinking
slowly in blue. This indicates that each of the devices is making a series of attempts to detect, connect to, and
authenticate the other device. When a connection is established between the devices and clear audio recording is
possible, the LINK lamps on both devices stay lit in blue.
If no connection is established, bring the microphone and the receiver closer to each other for another attempt. The
devices may be under influence of environmental or other factors.
2