EasyManua.ls Logo

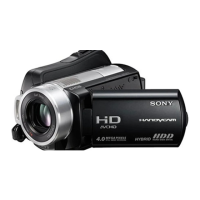
Sony Handycam HDR-SR10 User Manual

Sony Handycam HDR-SR10
119 pages
To Next Page IconTo Next Page
Page #1 background imageLoading...
Page #1 background image
3-286-597-11(1)
© 2008 Sony Corporation
Digital HD Video Camera Recorder
Handycam Handbook
HDR-SR10
Enjoying your
camcorder
9
Getting Started 15
Recording/Playback
25
Editing 47
Utilizing recording media 60
Customizing your
camcorder
64
Troubleshooting 85
Additional
Information
97
Quick
Reference
107

Table of Contents

Other manuals for Sony Handycam HDR-SR10

Questions and Answers:

Sony Handycam HDR-SR10 Specifications

Imaging and Video IconImaging and Video
imaging device1/5" ClearVid™ CMOS sensor
pixel gross2360K
video resolution1920 x 1080
Storage and Recording IconStorage and Recording
recording media40GB Non-Removable Hard Disk Drive
memory stick compatibilityup to 8GB
recording times (high definition)FH = 4 hours 50 min, HQ = 9 hours 40 min, SP = 11 hours 50 min, LP = 15 hours 10 min
Audio and Output IconAudio and Output
audio formatDolby® Digital 5.1
analog audio/video outputIncluded (via A/V Remote Terminal)
digital audio/video outputYes (via USB)
Display and Optics IconDisplay and Optics
lcd screen size2.7"
optical zoom15x
digital zoom180x
Power and Battery IconPower and Battery
power consumption4.5W (VF/LCD)
battery typeInfoLITHIUM® (NP-FH60)
power requirements7.2V (battery pack); 8.4V (AC Adaptor)
Dimensions and Weight IconDimensions and Weight
weight with battery560g
dimensions81x76x129mm
measurements3 1/4 x 3 x 5 1/8 inch

Summary

Enjoying your camcorder

Operation flow

Explains the sequence of operations for using the camcorder.

Read this before operating your camcorder

Notes on use

General handling and usage notes for the camcorder.

Types of “Memory Stick” you can use

Details compatible “Memory Stick” types for the camcorder.

Using the camcorder

Basic usage and handling precautions for the camcorder.

Notes on using the Hard Disk Drive Handycam

Save all your recorded image data

Advice on backing up recorded image data to external media.

Do not apply shock or vibration

Warnings to protect the camcorder from physical damage.

Note on operating temperatures

Effects of extreme temperatures on camcorder operation.

Note on disposal/transfer

Guidance for data disposal and transfer when disposing.

Customizing your camcorder

What you can do with the (SETTINGS) category

Overview of settings available in the SETTINGS category.

MOVIE SETTINGS

Configuration options for recording movies.

PHOTO SETTINGS

Configuration options for recording still images.

VIEW IMAGES SET

Options to customize the display of images.

SOUND/DISP SET

Adjustments for sound and screen settings.

OUTPUT SETTINGS

Settings for connecting the camcorder to other devices.

CLOCK/ LANG

Settings for clock, date, time zone, and language.

GENERAL SET

Various general setup items for the camcorder.

Activating functions using the OPTION MENU

How to access and use functions via the OPTION MENU.

Troubleshooting

The power does not turn on.

Steps to take if the camcorder does not power on.

Buttons do not work.

Solutions for unresponsive buttons or functions.

Enjoying your camcorder

Operation flow

Explains the sequence of operations for using the camcorder.

Recording time of movies (internal hard disk)

HD (high definition) image quality

Details recordable time for HD image quality settings.

SD (standard definition) image quality

Details recordable time for SD image quality settings.

“ HOME” and “ OPTION”

Categories and items of the HOME MENU

Lists categories and items available within the HOME MENU.

Using the HOME MENU

To hide the HOME MENU screen

Instructions on how to close the HOME MENU screen.

Using the HELP function

How to access help information for HOME MENU items.

Using the OPTION MENU

Getting Started

Step 1: Checking supplied items

Lists all items included with the camcorder for verification.

Getting Started

Step 2: Charging the battery pack

Step-by-step guide on how to charge the camcorder's battery pack.

Getting Started

To remove your camcorder from the Handycam Station

Instructions for safely detaching the camcorder from the Handycam Station.

To remove the battery pack

Steps for removing the battery pack from the camcorder.

To check the remaining battery (Battery Info)

How to view the current battery level and remaining time.

Getting Started

Step 3: Turning the power on and setting the date and time

Guide for first-time power-on and setting the date and time.

To turn off the power

How to switch the camcorder off.

Getting Started

Step 4: Making setting adjustments before recording

Adjusting settings before starting to record video.

Adjusting the LCD panel

How to open and adjust the LCD panel for optimal viewing.

Changing the language setting

How to change the camcorder's on-screen display language.

Getting Started

Step 5: Selecting the media

How to choose between hard disk and Memory Stick for recording.

Fastening the grip belt

How to attach and use the grip belt for secure handling.

Selecting the media for movies

Steps to select recording media and quality for movies.

Getting Started

Selecting the media for still images

Steps to select recording media and quality for still images.

Inserting a “Memory Stick PRO Duo”

Instructions for inserting a Memory Stick PRO Duo into the camcorder.

The capacity and approximate recordable time of the “Memory Stick PRO Duo”

Recording/Playback

Recording and playback with ease (Easy Handycam operation)

Overview of the simplified operation mode for recording and playback.

Recording movies

How to record movies using the Easy Handycam mode.

Recording still images

How to capture still images using the Easy Handycam mode.

Recording/Playback

Playing back recorded movies/still images

How to access and play recorded video and still images.

Recording/Playback

Playing movies

Instructions for playing back recorded movie files.

Viewing still images

Instructions for viewing recorded still images.

To adjust the sound volume

How to control the audio volume.

To cancel Easy Handycam operation

Menu settings during Easy Handycam operation

Invalid buttons during Easy Handycam operation

Recording/Playback

Recording

Basic instructions for recording movies and still images.

Recording movies

Recording still images

Recording/Playback

Zooming

How to use the zoom lever and buttons for magnification.

Recording sound with more presence (5.1ch surround recording)

Information on recording and enjoying 5.1ch surround sound.

Starting shooting quickly (QUICK ON)

Recording high quality still images during movie recording (Dual Rec)

Recording in dark places (NightShot)

Adjusting the exposure for backlit subjects

Recording in mirror mode

Recording fast action in slow motion (SMTH SLW REC)

Recording/Playback

Playback

General instructions on how to play back recorded images.

Playing movies

Viewing still images

To adjust the sound volume

Searching for desired scene by pinpoint (Film Roll Index)

Searching for desired scene by face (Face Index)

Searching for desired images by date (Date Index)

Using PB zoom

Playing back a series of still images (Slide show)

Playing the image on a TV

Selecting the most advantageous connection - TV CONNECT Guide

Connecting to a high definition TV

Connecting to a non-high-definition 16:9 (wide) or 4:3 TV

When connecting to your TV via a VCR

On “PhotoTV HD”

Using “BRAVIA” Sync

Saving images

Saving images using a computer

How to save images to a computer using supplied software.

Saving images by connecting your camcorder to other devices

Methods for saving images by connecting to external devices.

Editing

(OTHERS) category

Accessing various editing and utility functions.

Deleting images

Deleting movies

How to delete recorded movie files from the media.

To delete all movies at one time

Instructions for deleting all movie files simultaneously.

To delete all the movies recorded on the same day at one time

How to delete all movies recorded on a specific date.

Deleting still images

To delete all still images at one time

Instructions for deleting all still image files simultaneously.

To delete all the still images recorded on the same day at one time

How to delete all still images recorded on a specific date.

Capturing a still image from a movie

Editing

Dubbing movies

Copying movie files from internal hard disk to Memory Stick.

Copying still images

Editing

Dividing a movie

How to split a movie file into multiple scenes.

Creating the Playlist

To add all the movies recorded on the same day at one time

Adding all movies from a specific date to a playlist.

Playing the Playlist

To erase unnecessary movies from the Playlist

To change the order within the Playlist

Dubbing to other devices

Connecting with the A/V connecting cable

How to dub images using an A/V connecting cable.

Editing

Connecting with the USB cable

How to dub images using a USB cable connection.

Printing recorded still images (PictBridge compliant printer)

Utilizing recording media

(MANAGE MEDIA) category

Accessing functions for managing media like Memory Stick and hard disk.

Checking the media information

How to view remaining capacity and recordable time.

Utilizing recording media

Deleting all images (Formatting)

How to format media to delete all images and recover space.

Formatting the hard disk

Steps to format the camcorder's internal hard disk.

Formatting the “Memory Stick PRO Duo”

Steps to format a “Memory Stick PRO Duo”.

Preventing data on the hard disk of the camcorder from being recovered

Utilizing recording media

Repairing the image database file

How to check and repair media management files.

Customizing your camcorder

What you can do with the (SETTINGS) category of the HOME MENU

Overview of settings available in the SETTINGS category.

Using the HOME MENU

How to navigate and use the camcorder's HOME MENU.

Customizing your camcorder

List of the (SETTINGS) category items

A comprehensive list of all items within the SETTINGS categories.

MOVIE SETTINGS

Settings related to recording movies.

PHOTO SETTINGS

Settings related to recording still images.

VIEW IMAGES SET

Options to customize the display of images.

SOUND/DISP SET

Adjustments for sound and screen settings.

OUTPUT SETTINGS

Settings for connecting to external devices.

CLOCK/ LANG

Settings for clock, date, and language.

Customizing your camcorder

GENERAL SET

Various general setup items for the camcorder.

MOVIE SETTINGS

Settings related to recording movies.

REC MODE (Recording mode)

Selecting the video recording quality and mode.

PHOTO SETTINGS

IMAGE SIZE

Selecting the resolution for still images.

VIEW IMAGES SET (Items to customize the display)

DATA CODE

Displays recorded data information like date and time.

DISPLAY

Customizes the number of thumbnails shown on screen.

SOUND/DISP SET (Items to adjust the sound and the screen)

VOLUME

How to adjust the audio volume.

BEEP

Enables or disables operation beep sounds.

LCD BRIGHT

Adjusts the brightness of the LCD screen.

OUTPUT SETTINGS (Items for when connecting other devices)

LCD BL LEVEL (LCD back light level)

Adjusts the brightness level of the LCD screen backlight.

LCD COLOR

Adjusts the color balance of the LCD screen.

TV TYPE

Selects the TV aspect ratio (16:9 or 4:3) for playback.

CLOCK/ LANG (Items to set clock and language)

DISP OUTPUT

Controls display of time code on LCD and TV screens.

COMPONENT

Settings for component video output to TVs.

CLOCK SET

Sets the camcorder's internal clock and date.

AREA SET

Sets the local area for time zone adjustments.

DST SET/SUMMERTIME

Enables or disables Daylight Saving Time.

LANGUAGE SET

Selects the language for the camcorder's interface.

GENERAL SET (Other setup items)

DEMO MODE

Displays a demonstration of the camcorder's functions.

REC LAMP (Recording lamp)

Controls the camera's recording indicator lamp.

CALIBRATION

Calibrates the touch panel for accurate input.

A.SHUT OFF (Auto shut off)

Automatically turns off the camcorder after inactivity.

QUICK ON STBY (Quick on standby)

Sets standby time before auto power off.

REMOTE CTRL (Remote control)

Enables or disables operation via the remote commander.

DROP SENSOR

Protects hard disk by detecting drops or impacts.

CTRL FOR HDMI (Control for HDMI)

Activating functions using the OPTION MENU

Using the OPTION MENU

How to access and use functions via the OPTION MENU.

Functions set in the OPTION MENU

FOCUS

Manually adjust or automatically set the focus of the lens.

SPOT FOCUS

Focuses on a specific point on the screen, not the center.

TELE MACRO

Enables close-up shooting of small subjects like flowers or insects.

EXPOSURE

SPOT METER (Flexible spot meter)

SCENE SELECTION

Troubleshooting

The camcorder does not operate even when the power is set to on.

Solutions for when the camcorder is unresponsive after powering on.

Overall operations/Easy Handycam operation/Remote Commander

Troubleshooting common issues with operations and remote control.

Images cannot be played back.

Still images cannot be played back.

“ ” is indicated on an image in the VISUAL INDEX screen.

No sound or only a quiet sound is heard during playback.

Playing back images stored on a “Memory Stick PRO Duo” on other devices

Editing images on your camcorder

Unable to edit.

Reasons why image editing might not be possible.

Images cannot be added in the Playlist.

Reasons why images cannot be added to a playlist.

You cannot view the image or hear the sound on the TV.

The image appears distorted on the 4:3 TV.

Black bands appear at the top and bottom of the screen of the 4:3 TV.

You cannot dub correctly.

Functions that cannot be used simultaneously

Troubleshooting

Self-diagnosis display/Warning indicators

Explains error codes and warning indicators on the LCD screen.

(Warning on the hard disk of the camcorder)*

Indicates potential errors or issues with the hard disk drive.

(Battery level warning)

Alerts when the battery pack is low or nearly depleted.

(High temperature warning)

Indicates when the camcorder's temperature is too high.

(Low temperature warning)*

Indicates when the camcorder's temperature is too low.

Media

HDD format error.

Addresses errors related to the hard disk format.

Data error.

Indicates errors during reading or writing data on the hard disk.

The Image Database File is damaged. Do you want to create a new file?

Guides on creating a new image database file if damaged.

Buffer overflow

Explains buffer overflow issues, often related to the drop sensor.

Recovering data

Information about the camcorder's attempt to recover data automatically.

Cannot recover data.

Situations where data recovery fails.

Reinsert the Memory Stick.

Suggests reinserting the Memory Stick to resolve issues.

This Memory Stick is not formatted correctly.

How to address a Memory Stick that is not formatted correctly.

Memory Stick folders are full.

Issues related to exceeding the maximum number of folders.

Additional Information

Using your camcorder abroad

Tips for using the camcorder in different countries and regions.

Power supply

Information on using the AC Adaptor and voltage compatibility.

Viewing images recorded with HD (high definition) image quality

Requirements for viewing HD images on a TV.

On TV color systems

Explains TV color systems and camcorder compatibility.

Setting to the local time

World time difference

File/folder structure on the camcorder hard disk and “Memory Stick PRO Duo”

Maintenance and precautions

What is the AVCHD format?

Explains the AVCHD video format and its features.

Recording and playback on your camcorder

How the camcorder handles AVCHD format for recording and playback.

About the AVCHD format

Further details on the AVCHD format used by the camcorder.

About the “Memory Stick”

Information about “Memory Stick” compatibility and usage.

About handling of your camcorder

On use and care

General guidelines for using and caring for the camcorder.

When not using your camcorder for a long time

Recommended actions for storing the camcorder long-term.

Moisture condensation

Explains moisture condensation issues and how to prevent/resolve them.

How to prevent moisture condensation

LCD screen

To clean the LCD screen

Instructions for cleaning the camcorder's LCD screen.

On adjustment of the touch panel (CALIBRATION)

On handling the casing

About care and storage of the lens

On charging the pre-installed rechargeable battery

Procedures

How to charge the camcorder's internal battery.

On trademarks

Notes on the License

On GNU GPL/LGPL applied software

Quick Reference

Identifying parts and controls

Identifies and locates all physical parts and controls on the camcorder.

Indicators displayed during recording/playback

Indicators when you made changes

Data code during recording

Glossary

Related product manuals