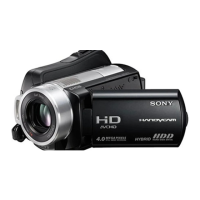
Do you have a question about the Sony Handycam HDR-SR10E and is the answer not in the manual?
Essential safety precautions to prevent hazards like fire, shock, and injury.
Instructions and important considerations for recording movies and still images.
Step-by-step guide to charging the camcorder's battery pack using the AC adapter.
Steps for turning on the camcorder and setting the initial date and time.
Guide to selecting the internal hard disk or Memory Stick for recording and playback.
Procedures for starting the recording of movies and still images.
Steps to start playing back recorded movies and still images.
Methods for saving image data to a computer, disc, or external media.
Step-by-step instructions for deleting movies and still images from the media.
Steps for connecting the camcorder to the computer for software operation.
Solutions for issues like power not turning on, camcorder not operating, or recording failures.
Troubleshooting steps for software installation failures and computer recognition issues.
Explanations of self-diagnosis codes and warning indicators on the LCD screen.
Further details on warning indicators related to media, temperature, and flash errors.
Technical details of the camcorder's system, video, audio, and general operating parameters.
| LCD Screen Size | 2.7 inches |
|---|---|
| Optical Sensor Resolution | 3.2 megapixels |
| Display Type | LCD |
| Touch Screen | No |
| Storage Media Type | Hard Disk Drive |
| Image Format | JPEG |
| HD Output | Yes |
| Type | Camcorder |
| Recording Format | MPEG-2 |
| Image Sensor | CMOS |
| Storage | Hard Drive |
| Focus Adjustment | Auto/Manual |
| Image Stabilizer | Optical |
| Microphone | Built-in stereo microphone |
| Connector Type | HDMI, USB |
| Effective Pixels | 2.3 MP |
| Lens | Carl Zeiss |
| LCD Screen | 2.7" |
