EasyManua.ls Logo

Sony HCD-F200 Service Manual

Sony HCD-F200
76 pages
To Next Page IconTo Next Page
Page #1 background imageLoading...
Page #1 background image
SERVICE MANUAL
Sony Corporation
Audio&Video Business Group
Published by Sony Techno Create Corporation
HCD-F200/F500
SPECIFICATIONS
DVD RECEIVER
9-889-150-02
2008H05-1
©
2008.08
Canadian Model
E Model
Australian Model
Russian Model
HCD-F500
AEP Model
UK Model
HCD-F200
Singapore Model
Thai Model
HCD-F200/F500
Ver. 1.1 2008.08
HCD-F200 is the DVD system, USB, tuner and video section
in DAV-F200.
HCD-F500 is the DVD system, USB, tuner and video section
in DAV-F500.
Note:
In this set, repair in the state of having connected with SA-
WSF200.
In this set, repair in the state of having connected with SA-
WSF500.
Model Name Using Similar Mechanism NEW
DVD Mechanism Type CDM86-DVBU101
Optical Pick-up Block Name KHM-313CAB
Photo: HCD-F500
This product incorporates copyright protection technology that is
protected by U.S. patents and other intellectual property rights.
Use of this copyright protection technology must be authorized by
Macrovision, and is intended for home and other limited viewing
uses only unless otherwise authorized by Macrovision. Reverse
engineering or disassembly is prohibited.
This system incorporates with Dolby* Digital and Dolby Pro Log-
ic (II) adaptive matrix surround decoder and the DTS** Digital
Surround System.
* Manufactured under license from Dolby Laboratories.
Dolby, Pro Logic, and the double-D symbol are trademarks of
Dolby Laboratories.
** Manufactured under license under U.S. Patent #’s: 5,451,942;
5,956,674; 5,974,380; 5,978,762; 6,487,535 & other U.S. and
worldwide patents issued & pending. DTS and DTS Digital
Surround are registered trademarks and the DTS logos and
Symbol are trademarks of DTS, Inc. © 1996-2007 DTS, Inc.
All Rights Reserved.
This system incorporates High-De nition Multimedia Interface
(HDMITM) technology.
HDMI, the HDMI logo and High-De nition Multimedia Interface
are trademarks or registered trademarks of HDMI Licensing LLC.
“BRAVIA” is a trademark of Sony Corporation.
“S-AIR” and its logo are trademarks of Sony Corporation.
Tuner Section
System PLL quartz-locked digital
synthesizer
FM tuner section
Tuning range
Canadian models: 87.5 MHz - 108.0 MHz
(100 kHz step)
Other models: 87.5 MHz - 108.0 MHz
(50 kHz step)
Antenna (aerial) FM wire antenna (aerial)
Antenna (aerial) terminals
75 ohms, unbalanced
Intermediate frequency 10.7 MHz
Video Section
Outputs VIDEO: 1 Vp-p 75 ohms
COMPONENT:
Y: 1 Vp-p 75 ohms
P
B/CB, PR/CR: 0.7 Vp-p
75 ohms
HDMI OUT: Type A
(19 pin)
Inputs (Analog)
TV (AUDIO IN) Sensitivity: 450/250 mV
Inputs (Digital) SAT/CABLE (COAXIAL)
Impedance: 75 ohms
Output (Digital) (HCD-F200)
Impedance: 75 ohms
DVD System
Laser Semiconductor laser
(DVD: λ = 650 nm)
(CD: λ = 790 nm)
Emission duration: continuous
Signal format system
Canadian and Latin American models:
NTSC
Other models: NTSC/PAL
USB Section
Supported bit rate
MP3 (MPEG 1 Audio Layer-3):
32 kbps - 320 kbps
WMA: 48 kbps - 192 kbps
AAC: 48 kbps - 320 kbps
Sampling frequencies
MP3 (MPEG 1 Audio Layer-3):
32/44.1/48 kHz
WMA: 44.1 kHz
AAC: 44.1 kHz
(USB) port:
Maximum current: 500 mA
– Continued on next page –

Table of Contents

Question and Answer IconNeed help?

Do you have a question about the Sony HCD-F200 and is the answer not in the manual?

Sony HCD-F200 Specifications

General IconGeneral
BrandSony
ModelHCD-F200
CategoryReceiver
LanguageEnglish

Summary

Specifications Overview

Tuner Section Specifications

Details on the FM tuner section, tuning range, and antenna inputs.

DVD System Specifications

Information on DVD system laser and signal format.

Video Section Specifications

Details on video output specifications.

USB Section Specifications

Specifications for the USB section, including supported bit rates and sampling frequencies.

Self-diagnosis Functionality

Self-diagnosis Error Codes

Provides a table for identifying causes and corrective actions based on service numbers.

Version Number Display

Explains the display of version numbers and how to reset the system.

Servicing Notes and Precautions

Handling Optical Pick-up Block

Precautions for handling the optical pick-up block to prevent static discharge.

Laser Diode Emission Check

Guidelines for safely checking the laser diode emission.

Unleaded Solder Handling

Notes on using and soldering with unleaded solder.

Lead Free Mark Identification

Explains the characteristics of unleaded solder and the lead-free mark.

Pre-Repair Checks

Steps to connect active speakers before repairing HCD-F200/F500.

Releasing Disc Slot Lock

Procedure to unlock the disc slot for demonstration discs.

Releasing Demo Play Lock

Procedure to disable the demo play lock.

Replacing DMB-FIT Board ICs

Instruction for replacing IC102 and IC103 on the DMB-FIT board.

Model Identification

Table listing model numbers and their corresponding part numbers.

Disc Playback Information

Playable Disc Types

Details the various types of discs supported by the system.

Disc Compatibility Notes

Provides notes on DualDiscs, multi-session CDs, and playback operations.

Region Code Information

Explains the system's region code and playback restrictions.

Unplayable Disc Examples

Lists examples of discs that the system cannot play.

Component Removal Precautions

Optical Pick-up/DMB-FIT Board Removal

Cautionary notes and steps for removing the optical pick-up block or DMB-FIT board.

Ejecting Disc with Power Off

Procedure for ejecting a disc when the power switch is turned off.

Main Board Service Position

General System Overview

Control Unit Description

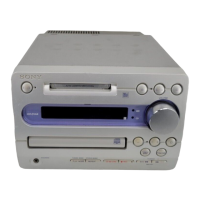
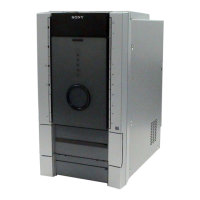
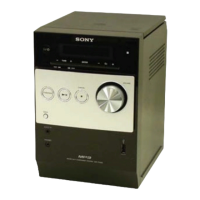
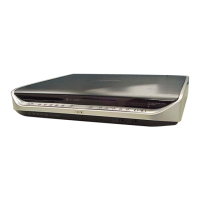
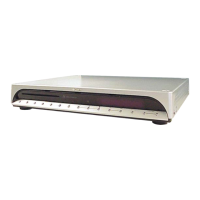
Overview of the HCD-F200 and HCD-F500 control units, including front/side views.

Front Panel and Remote Control Displays

Disassembly Procedures

Disassembly Flowchart

Step-by-step guide showing the order of disassembly.

Disassembly Steps: Panels and Covers

Panel (Stand Top) Removal

Procedure for removing the stand top panel.

Cover and Holder Removal

Procedure for removing the read-HCD cover and terminal holder.

Disassembly: Solder Bridge Process

Solder Bridge Procedure

Instruction to execute a solder bridge for static electricity protection.

Disassembly: Optical Pick-up and Boards

Optical Pick-up Block Removal

Procedure for removing the optical pick-up block.

KEY-R/FL/KEY-L/USB Board Removal

Procedure for removing the KEY-R/FL/KEY-L/USB board.

Disassembly: Main Block

Main Block Removal

Procedure for removing the main block assembly.

Disassembly: Shield Plate and Main Board Block

Shield Plate (Front) Removal

Procedure for removing the front shield plate.

Main Board Block Removal

Procedure for removing the main board block.

Disassembly: Main and DMB-FIT Boards

Main Board Removal

Procedure for removing the main board.

DMB-FIT Board Removal

Procedure for removing the DMB-FIT board.

Disassembly: DVD Mechanism and Motor

DVD Mechanism Block Removal

Procedure for removing the DVD mechanism block.

Motor (Pulley) Assy Removal

Procedure for removing the motor (pulley) assembly.

Disassembly: Holder and Lever (BU Lock)

Holder (BU) Assy Removal

Procedure for removing the holder (BU) assembly.

Lever (BU Lock) Removal

Procedure for removing the lever (BU lock).

Disassembly: Close Lever and DIR Lever

Close Lever Removal

Procedure for removing the close lever.

Lever (DIR) and Gear Removal

Procedure for removing the lever (DIR) and associated gear.

Disassembly: Chassis (Top) Removal

Chassis (Top) Removal

Procedure for removing the top chassis part.

Disassembly: Loading Lever Installation

Lever (Loading-L/R) Installation

Procedure and precautions for installing the loading levers.

Disassembly: Disc Sensor and Gear

Lever (Disc Sensor/Disc Stop) Removal

Procedure for removing the disc sensor and disc stop levers.

Gear (IDL-C) Removal

Procedure for removing the gear (IDL-C).

Test Modes

Basic Test Modes

Details on basic test modes like Cold Reset, DVD Version View, and S-AIR.

Test Modes in Test Menu

Procedures for accessing and executing tests via the test menu.

Demo Disc Play (Releasing Procedure)

Procedure to release the demo disc play mode.

DVD Service Mode

DVD Service Mode General Description

Overview of the DVD service mode for diagnosis and adjustment.

Entering DVD Service Mode

Step-by-step guide to access the DVD service mode.

Executing IOP Measurement

Procedure for executing IOP measurement within DVD service mode.

Error Checking and Version Information

Checking Emergency History

Procedure to check the system's emergency history logs.

Error Code Reference

Table listing error codes and their meanings.

Parameter and Time of Error Code

Details on error code parameters and the time of occurrence.

Checking Version Information

Procedure to check the firmware version information.

Electrical Adjustments

DVD Section Adjustments

Guidance for adjustments when the base unit is replaced.

Tuner Section: FM Tune Level Check

Procedure for checking the FM tune level.

Diagrams

Block Diagram - DVD Servo Section

Schematic block diagram of the DVD servo section.

Block Diagram - Main Section

Schematic block diagram of the main section.

Block Diagram - HDMI, Video Section

Schematic block diagram of the HDMI and video sections.

Block Diagram - Panel, Power Supply Section

Schematic block diagram of the panel and power supply sections.

Circuit Board Locations

Printed Wiring Boards - DMB-FIT Section

DMB-FIT Section (1/2)

Component layout for the DMB-FIT board, side A.

DMB-FIT Section (2/2)

Component layout for the DMB-FIT board, side B.

Schematic Diagrams - DMB-FIT Section

DMB-FIT Section (1/4)

Schematic diagram for the DMB-FIT board.

DMB-FIT Section (2/4)

Schematic diagram for the DMB-FIT board.

DMB-FIT Section (3/4)

Schematic diagram for the DMB-FIT board.

DMB-FIT Section (4/4)

Schematic diagram for the DMB-FIT board.

Printed Wiring Boards - MAIN Section

MAIN Board (Component Side)

Component layout for the MAIN board, component side.

MAIN Board (Conductor Side)

Component layout for the MAIN board, conductor side.

Schematic Diagrams - MAIN Section

MAIN Board (1/3)

Schematic diagram for the MAIN board.

MAIN Board (2/3)

Schematic diagram for the MAIN board.

MAIN Board (3/3)

Schematic diagram for the MAIN board.

CENTER Board Diagrams

Printed Wiring Board - CENTER Board

Component layout for the CENTER board.

Schematic Diagram - CENTER Board

Schematic diagram for the CENTER board.

FL Board Diagrams

Printed Wiring Board - FL Board

Component layout for the FL board.

Schematic Diagram - FL Board

Schematic diagram for the FL board.

KEY Section Diagrams

Printed Wiring Boards - KEY Section

Component layouts for KEY-L and KEY-R boards.

Schematic Diagram - KEY Section

Schematic diagrams for KEY-L and KEY-R boards.

IC Block Diagrams

DMB-FIT Board IC Block Diagrams

Block diagrams for ICs on the DMB-FIT board.

FL Board IC Block Diagrams

Block diagram for the IC on the FL board.

IC Pin Function Descriptions

MAIN BOARD IC101 Pin Function

Detailed pin function description for MAIN BOARD IC101.

DMB-FIT BOARD IC101 Pin Function

Detailed pin function description for DMB-FIT BOARD IC101.

Exploded Views

Rear Cover Section

Exploded view of the rear cover.

Front Panel Section

Exploded view of the front panel assembly.

Main Section Exploded View

Exploded view of the main internal components.

Chassis Section Exploded View

Exploded view of the chassis and related parts.

DVD Mechanism Deck Section-1

Exploded view of the DVD mechanism deck (part 1).

DVD Mechanism Deck Section-2

Exploded view of the DVD mechanism deck (part 2).

DVD Mechanism Deck Section-3

Exploded view of the DVD mechanism deck (part 3).

DVD Mechanism Deck Section-4

Exploded view of the DVD mechanism deck (part 4).

Electrical Parts List

Miscellaneous Parts

Revision History

Related product manuals