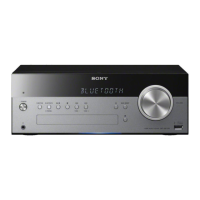
Do you have a question about the Sony HCD-SBT100 and is the answer not in the manual?
Details power output and total harmonic distortion for North American models.
Lists power output and RMS power for non-North American models.
Covers frequency response, signal-to-noise ratio, and dynamic range for tuner.
Details frequency table and tuner specifications for DAB/DAB+.
Provides BLUETOOTH version, band, and profile compatibility information.
Lists compatible standards and frequency band for wireless LAN.
Includes power requirements, dimensions, mass, and standby power consumption.
Explains methods and limits for checking AC leakage from metal parts.
Provides guidelines for safely handling the optical pick-up block and flexible boards.
Details precautions for checking the laser diode emission from the optical pick-up.
Explains characteristics and precautions for using unleaded solder.
Lists part numbers for test discs used for operation confirmation.
Describes the procedure to unlock the disc tray for shop sample discs.
Explains how to identify the unit model using the part number on the rear panel.
Outlines steps to check wireless LAN connectivity after WiFi module replacement.
Details the procedure to verify wired LAN connection status.
Details the procedure for removing the case block from the unit.
Explains how to remove the CD ornament plate using clips and levers.
Illustrates the setting and connection of the flexible flat cable FFC6.
Shows the wire setting and placement of tapes (sub material) during disassembly/assembly.
Details steps for removing the front panel block, including flat cable and ferrite core connections.
Describes the procedure for removing the second part of the front panel block.
Explains how to remove the back panel block, including antenna wire.
Details the removal of the NET board block, including antenna wire and connectors.
Covers replacement of the WiFi module and NET board, referring to other sections.
Explains how to remove and install the 2.4GHz antenna and its holder.
Details steps for removing the main chassis block, including various connectors and flat cables.
Continues the chassis removal process, involving flexible flat cables, chuck caps, and soldering.
Describes the procedure for removing the TUNER board, including flexible flat cable connections.
Details the removal of the DAB TUNER module and DAB board, including flexible flat cables.
Explains how to remove the MAIN board, including heatsink, radiation sheet, and tape connections.
Details the removal and installation of the power cord, including cord bush setting.
Describes the procedure for removing the POWER board, including adhesive sheet and connectors.
Details the removal of the CD mechanism deck block, including screws and connectors.
Explains how to remove the FFC holder, checking for firm installation of bosses and claw.
Guides the removal and installation of the optical pick-up block, including connectors and flexible flat cables.
Describes the procedure to clear all data and reset the unit to initial conditions.
Explains how to confirm the auto standby function operates normally.
Details how to confirm the maximum and minimum volume levels.
Describes the procedure to test the fluorescent indicator tube, LEDs, model name, etc.
Explains the procedure to lock or unlock the disc tray for shop sample discs.
Details how to change the AM tuning step interval between 9 kHz and 10 kHz.
Describes how to check the MC, CD, and NW software versions.
Details checking the FM auto stop function using a signal generator.
Lists notes for CD section checks, including test discs and oscilloscope impedance.
Outlines the procedure for checking RF signal waveform using an oscilloscope.
Provides a block diagram of the CD section, showing signal paths and major components.
Presents a block diagram of the audio section, detailing signal flow from sources to speakers.
Illustrates the panel and power supply sections, including voltage regulators and control signals.
First part of the schematic diagram for the MAIN board, detailing various ICs and connections.
Second part of the MAIN board schematic, focusing on DC/DC converters and motor drive ICs.
Third part of the MAIN board schematic, showing tuner, DAB, and USB interface circuits.
Fourth part of the MAIN board schematic, detailing sample rate converters and audio DSP connections.
Fifth part of the MAIN board schematic, illustrating power amplifier ICs and related circuits.
Sixth part of the MAIN board schematic, showing system controller and various peripheral connections.
Final part of the MAIN board schematic, detailing power supply control and voltage detection circuits.
Shows the component layout for the MAIN board, side 1.
Displays the component layout for the MAIN board, side 2 (conductor side).
Shows the printed wiring board layouts for the USB, HP, and RELAY boards.
Provides schematic diagrams for the USB, HP, and RELAY boards, detailing their circuits.
Illustrates the printed wiring board layout for the NET board (component and conductor sides).
Details the schematic diagram for the NET board, showing IC block and pin connections.
Shows the printed wiring board layout for the FL board, including component placement.
Provides the schematic diagram for the FL board, illustrating its circuitry and component connections.
Displays the printed wiring board layouts for the KEY and ILLUMI boards.
Shows the schematic diagrams for the KEY and ILLUMI boards, detailing their circuits.
Presents the schematic diagram for the POWER board, covering AC input and power supply circuits.
Displays various waveforms for key signals on the MAIN board, aiding in troubleshooting.
Provides block diagrams for various ICs used in the unit, illustrating their internal functions.
Details the pin functions for the system controller IC101 on the MAIN board.
Details pin functions for IC101 on MAIN board for SBT300W/SBT300WB models.
Continues the pin function details for IC101, covering pins 49-100.
Details the pin functions for IC501 on the MAIN board, covering RF AMP and servo/audio processor.
Continues pin function details for IC501, covering pins 72-128.
Details the pin functions for IC762, the audio DSP, on the MAIN board.
Exploded view of the case section, showing parts like case, screws, cushions, and feet.
Exploded view of the base (CD) section, showing CD mechanism parts, plates, and screws.
Exploded view of the FL board section, detailing connectors, screws, and illumination components.
Exploded view of the front panel section, showing buttons, indicators, and flat cables.
Exploded view of the back panel section, showing NET board, WiFi module, antenna, and screws.
Exploded view of the main board section, showing its mounting and screw locations.
Exploded view of the chassis section, detailing CD mechanism, boards, and power cord connections.
Exploded view of the CD mechanism deck, showing insulator, screws, optical pick-up, and flat cables.
Parts list for the FL board, including capacitors, ICs, transistors, resistors, and connectors.
Parts list for the KEY board, including switches, LEDs, and resistors.
Parts list for the ILLUMI board, including LEDs, connectors, and resistors.
Lists components for the NET board, including resistors, capacitors, connectors, and ICs.
Lists components for the POWER board, including fuses, ICs, coils, capacitors, transistors, and resistors.
Lists components for the RELAY board.
Lists components for the TUNER board.
Lists components for the USB board, including ICs, coils, and capacitors.
Table detailing revisions made to the service manual over time.
| Brand | Sony |
|---|---|
| Model | HCD-SBT100 |
| Category | Car Receiver |
| Bluetooth | Yes |
| USB Port | Yes |
| Power Output | 50W x 4 |
| CD Player | Yes |
| FM/AM Tuner | Yes |
| Display | LCD |
| Tuner Bands | FM, AM |
| NFC | Yes |
| Remote Control | Yes |
| Type | Car Audio System |