Do you have a question about the Sony HDW-M2000P and is the answer not in the manual?
Essential safety instructions to prevent fire, shock, and damage, emphasizing qualified personnel for servicing.
Details FCC Part 15 compliance for Class A digital devices and specifies the required UL LISTED power cord for USA use.
Provides warnings for other countries regarding power cords and details European CE marking compliance with directives and standards.
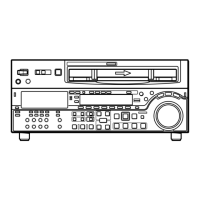
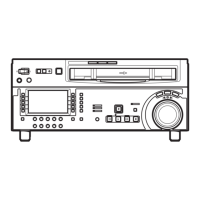
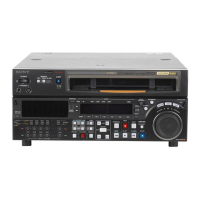
Describes the HDW-2000/M2000/M2000P recorder's HDCAM format, high-definition processing, and interfaces.
Highlights compatibility with older formats (Betacam SX, analog Betacam) and high-quality four-channel audio capabilities.
Explains DMC editing, split editing, preread editing, cross-fade editing, and HD-to-SD/SD-to-HD conversion functions.
Introduces Tele-File for data management between memory labels and VTRs, improving operational efficiency.
Details the remote control interface (RS-422A, parallel) and options for rack mounting the unit.
Illustrates a typical system setup with the recorder connected to an editor, monitors, and a server system.
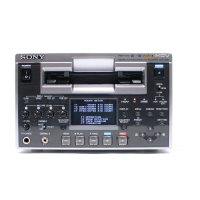
Introduces the three main control panels: Upper, Lower, and Switch, and the operation of the lower panel.
Describes the function of the POWER switch, REMOTE buttons, EJECT button, Format indicators, and PHONES jack.
Identifies key sections of the lower control panel: Audio, Display, Search, Transport, and Editing controls.
Explains audio selection buttons (INPUT, MIXING) and level meter display controls (FULL/FINE).
Details how CH1-CH4 and CUE buttons select audio signals and tracks based on the current mode.
Describes REC/PB controls for level adjustment and the CHANNEL CONDITION indicator for signal status.
Explains the use of menu control buttons and provides an overview of the function menu's utility.
Details the time data display areas, various indicators (LTC, VITC, DF), and tape format/standard indicators.
Explains time data display area 2 contents and introduces the search controls (SHUTTLE, JOG, VAR buttons, search dial).
Describes how to use the search dial with SHUTTLE, JOG, and VAR buttons for different search and playback speeds.
Covers the REC INHI indicator and the functions of tape transport buttons like PREROLL, REC, EDIT, STANDBY, STOP, PLAY, REW.
Explains the STOP button's role in operations and fault display, and how to select ASSEMBLE or INSERT editing modes.
Details the DMC EDIT, MEMORY, DELETE, TRIM buttons, and PLAYER/RECORDER buttons for editing control.
Explains the ALARM indicator for hardware errors and the KEY INHI indicator for control panel lockout.
Describes setting edit points (IN, OUT, AUDIO) and using shot mark controls (LIST, MARK).
Details the memory card slot, PANEL SELECT switch, and KEY INHI switch for unit configuration.
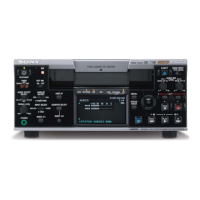
Describes analog audio input/output connectors (XLR), level switches, and CUE IN/OUT connectors.
Covers REF. VIDEO INPUT, COMPONENT VIDEO OUTPUT, and COMPOSITE VIDEO OUTPUT connectors.
Details AES/EBU format digital audio input and output connectors.
Explains HDSDI, SDTI, and SDI input/output connectors and character superimposition options.
Covers AC power input, ground terminal, and various external device connectors for control and monitoring.
Provides in-depth descriptions of REMOTE, VIDEO CONTROL, and RS-232C connectors for external control.
Details the TIME CODE IN and OUT connectors for time code synchronization and recording.
Explains the MONITOR OUTPUT R and L connectors for routing audio signals.
Illustrates digital signal connections from other VTRs, showing player and recorder configurations.
Explains the function of reference signals for video output and servo synchronization.
Details how reference signal selection (REF/INPUT) dynamically changes based on menu settings and unit operation.
Provides diagrams for connecting reference signals when recording from switchers, generators, or external VTRs.
Shows the necessary connections for outputting signals to video monitors during playback.
Introduces setup operations via basic and extended menus, including saving and recalling settings with menu banks.
Explains the display of superimposed characters (time code, menus) and how to adjust their position.
Details indicators for time data types, drop frame marks, VITC fields, recorder/player status, and operation modes.
Lists supported cassette types and provides instructions for inserting, ejecting, and removing tape slack.
Instructs on using the red record inhibit plug on cassettes to prevent unintentional erasure.
Explains Memory Stick functionality for storing data, its types, and usage precautions.
Provides detailed notes on handling, storage, and precautions during data access to prevent damage.
Outlines the essential switch and menu settings required before commencing recording operations.
Details how to set and adjust audio recording levels, monitor simultaneous playback, and use E-E mode.
Explains methods for recording time code and user bit values, including initial value setting and synchronization.
Provides step-by-step procedures for setting initial time code and user bit values using the TCGSET function.
Describes synchronizing the internal time code generator to external LTC or VITC signals.
Details the steps for inserting a cassette, starting recording, and stopping the recording process.
Outlines switch and menu settings needed before starting playback, including time data selection.
Explains selecting displayed time data (CTL, TC, UB) and managing output time code generation.
Lists the various playback modes available: normal, jog, shuttle, variable speed, and DMC playback.
Details how to control playback speed using the search dial in jog and shuttle modes.
Explains precise speed control in variable speed mode and temporary speed adjustment using capstan override.
Describes the procedure for performing continuous capstan override playback for phase synchronization.
Introduces DMC playback for variable speed sections and storing speed variations in memory.
Details the process of storing playback speed variations for DMC playback using the DMC EDIT button.
Explains the two methods for initiating DMC playback: at on-air cue or after preroll.
Introduces automatic editing, detailing assemble and insert modes, and the overall editing sequence.
Provides a flowchart of the steps involved in automatic editing with two VTRs.
Explains setting edit delay on an editing control unit for accurate cut-in/cut-out instructions.
Outlines the necessary switch and menu configurations for both recorder and player prior to editing.
Explains how to choose between ASSEMBLE/INSERT modes and set video/audio edit points, including auto-setting.
Details how to set video and audio edit points, including automatic setting and notes on invalid point configurations.
Details setting separate edit points for audio and video in insert mode, and automatic point calculation.
Shows how to display the time value of edit points and the duration of edit segments.
Provides procedures for adjusting edit points using TRIM buttons and deleting them using the DELETE button.
Explains how to cue up to edit points, preroll before edits, and preview the results.
Describes the recorder/player interaction during automatic editing and monitor output.
Details starting automatic editing, changing OUT points, abandoning operations, and reviewing results.
Introduces DMC editing for variable speed control of the player during editing.
Depicts the tape movement on the player and recorder during DMC editing.
Provides the full procedure for DMC editing, including setting points, player speed, storing variations, and executing the edit.
Lists special automatic editing methods: Quick, Continuous, Standalone, Manual, and Preread.
Explains the processes for quick editing and continuous editing to streamline workflows.
Describes standalone editing, manual editing steps, and the preread editing technique.
Introduces shot marks as indicators for faster cuing, detailing their types and basic operations.
Explains how to access and configure the shot mark operation menu (G01-G04) for various settings.
Details procedures for reading shot marks from tape into memory and writing different types of shot marks.
Covers procedures for erasing shot marks from the list or tape, and displaying the shot mark list.
Illustrates the shot mark list format and describes selecting marks, adding memos, and filtering display types.
Details how to delete shot marks from the list or tape, and how to cue up to selected shot marks.
Explains the index function for cuing to adjacent marks and reading/displaying shot data from tape.
Describes how to sort shot marks by cassette and arrange them chronologically in the list.
Introduces Tele-File as a non-contact data carrier system for managing clip data and its IC features.
Explains accessing the Tele-File menu from the function menu or automatically upon cassette detection.
Details the clip data display and monitor display formats, including data types and indicators.
Explains the setting display area, cursor symbols, and menu item functions in clip data display mode.
Describes how to select clips and individual data items within a clip using the interface controls.
Explains cursor movement for data access and using clip data for preroll/cue-up operations.
Details entering clip data modification mode and lists the functions available for editing clip data.
Provides procedures for adding/deleting clips and setting time code data for clip points.
Covers setting various clip attributes like time data, write protect, marks, and recording start points.
Details setting take number, cut number, and scene number for clips.
Explains how to set comments for clips and use Undo/Resume functions for data modifications.
Details how to display and modify attribute data such as title, ID, administrator data, and write inhibit settings.
Covers modifying attribute data and formatting the Tele-File memory, noting restrictions.
Introduces UMID as meta-data for video/audio materials, explaining its structure and standardization.
Details selecting UMID types (Basic/Extended) and options for inheriting or generating UMIDs.
Explains the process for setting Stored Ownership data (country, organization, user) for UMID generation.
Covers setting USER, COUNTRY, ORGANIZATION data and configuring time zone for UMID generation.
Explains how UMIDs are output and displayed on the control panel and monitor.
Details the specific UMID data items displayed on the monitor, including Instance Number and Source Pack details.
Introduces the function menu for frequently used settings like video input and time code.
Describes the function menu's layout, including HOME, numbered pages, and the HOME2 page for user-defined keys.
Explains how to change menu item settings, navigate between pages, and identify settings not shown on the main display.
Lists and describes the settings available on the HOME page for video input, playback/E-E mode, CONFI, CTL/TC, MENU, and TCGSET.
Details settings for Page 1, focusing on Time Code Generator (TCG) synchronization, regeneration modes, and time code display.
Lists settings for Page 2, covering video processor control, output levels, chroma, hue, setup, and Y/C delay.
Details settings for Page 3, including sync phase, audio emphasis, and tape information display.
Covers settings for capstan lock, reference signals, Dolby NR, character overlay, record inhibit, and preread.
Lists settings for Page 5, focusing on Tele-File and UMID functions.
Introduces the basic and extended setup menus, outlining their structure and item groups.
Explains how to display setup menus on the unit and monitor, and how to navigate through menu items and groups.
Details procedures for modifying settings of menu items with and without sub-items, including saving changes.
Provides instructions for resetting all current menu settings to their original factory defaults.
Details the procedure for switching the unit's system frequency between various standards like 59.94i, 50i, etc.
Explains how to select line conversion modes (1035, 1080, 720P) for SD video output.
Describes how to save current settings into menu banks and recall them later for configuration.
Provides instructions for recalling settings saved in menu banks 1-3 and bank 4.
Lists the main items within the basic setup menu, covering preroll, character display, synchronize, display info, local function, tape timer, and monitor selection.
Details settings for character position/type, system frequency selection, and active line selection for HDSDI output.
Covers configuration of the Local Key Map and setting Stored Ownership data for UMID generation.
Lists settings related to search dial behavior, playback speed limits, audio muting, reference signal alarms, and capstan lock modes.
Details settings for REC INHIBIT lamp, AUTO EE SELECT, TSO PLAY, JOG DIAL RESPONSE, and PANEL SELECT switch.
Covers settings for KEY INHIBIT switch, AUDIO/F-KEY, MODE CONTROL, TELE-FILE functions, and AUTO REWIND.
Details PARA RUN, CF FLAG, REMOTE1 PORT, and VIDEO REMOTE CONTROL SELECT settings.
Covers variable speed synchronization, capstan relocking, edit field selection, sync grade, DMC initial speed, and auto-deletion of inconsistent data.
Details servo/AV reference selection, REC INHIBIT conditions, and analog audio edit preset replacement settings.
Covers audio edit mode, digital audio playback process, preread select, and automatic IN entry after auto edit settings.
Details settings for function mode after cue-up, time reference for preroll, automatic preroll entry, and cue-up by CTL.
Covers settings for still timer, tape protection modes from search/stop, drum rotation, and still tension.
Details VITC position selection, ID code preset/switch, TCG regen mode, TC output signal, and U-BIT BINARY GROUP FLAG.
Covers phase correction, TCG CF FLAG, regen control mode, LTC output phase, and UPCONV EMBEDDED VITC settings.
Details settings for converting time code between 24F/25F formats and setting starting/jumping TC values.
Covers UMID output type, HD VANC line insertion, generation method, recording type, and material number settings.
Details blanking line selection, edge subcarrier reducer, vertical interpolation, and CAV level format settings.
Covers internal video signal generator, video process on cap lock, and video setup reference level adjustments.
Details settings for video gain, chroma gain/phase, setup level, sync phase, and Y/C delay for SD video processing.
Covers horizontal blanking, video edit preview switcher, output SCH phase, and HD output level/phase adjustments.
Details settings for digital jog sound, audio muting, fade time, monitor output mixing, and level meter scales.
Covers audio output phase, internal audio signal generator, edit preview switcher, and non-audio flag settings.
Details how to assign analog audio signals to output channels and set the audio output phase advance mode.
Explains how to assign PB control knobs to digital audio channels or set them to unity.
Covers video output data bit length, freeze modes, auto freeze, and stop freeze controls.
Details active line conversion, slow process mode, down-converter modes, and image enhancer adjustments.
Covers image enhancer adjustments for detail frequency, H/V ratio, gamma, and up-converter settings.
Details up-converter image enhancer settings for detail frequency, H/V ratio, gamma, and background color.
Addresses tape slack issues, recommending professional service for removal of internal components.
Provides instructions for cleaning video and audio heads using a specialized cleaning cassette.
Explains how the unit displays error messages and codes via the ALARM indicator and on-screen displays.
Provides a comprehensive list of error codes, messages, and their descriptions related to unit malfunctions.
Explains moisture condensation on the head-drum, the ERR-10 error, and the unit's automatic drying process.
Details the digital hours meter's display modes for tracking operational history and scheduling maintenance.
Provides a guide for component checking and replacement intervals based on usage hours and conditions.
Lists general specifications (power, dimensions) and tape transport details (speed, record/playback times).
Details specifications for digital video signal processing and analog audio input/output parameters.
Lists playback performance specifications for Digital Betacam, MPEG IMX, and Betacam SX formats.
Provides Analog Betacam playback specs and lists input connectors like HDSDI and SDTI.
Details output connectors, remote interface connectors, memory slots, and supplied accessories.
Lists optional accessories and provides advice on preventing electromagnetic interference from portable devices.
Shows the correlation between HKDV-900/503 settings and the unit's setup menu items for video control.
| Video Format | HDCAM |
|---|---|
| Audio Channels | 4 channels |
| Power Requirements | AC 100-240V, 50/60Hz |
| Audio Signal System | AES/EBU |
| Audio Recording Format | AES/EBU |
| Input/Output | HD-SDI |