HT-S20R
16
Sony CONFIDENTIAL
For Authorized Servicer
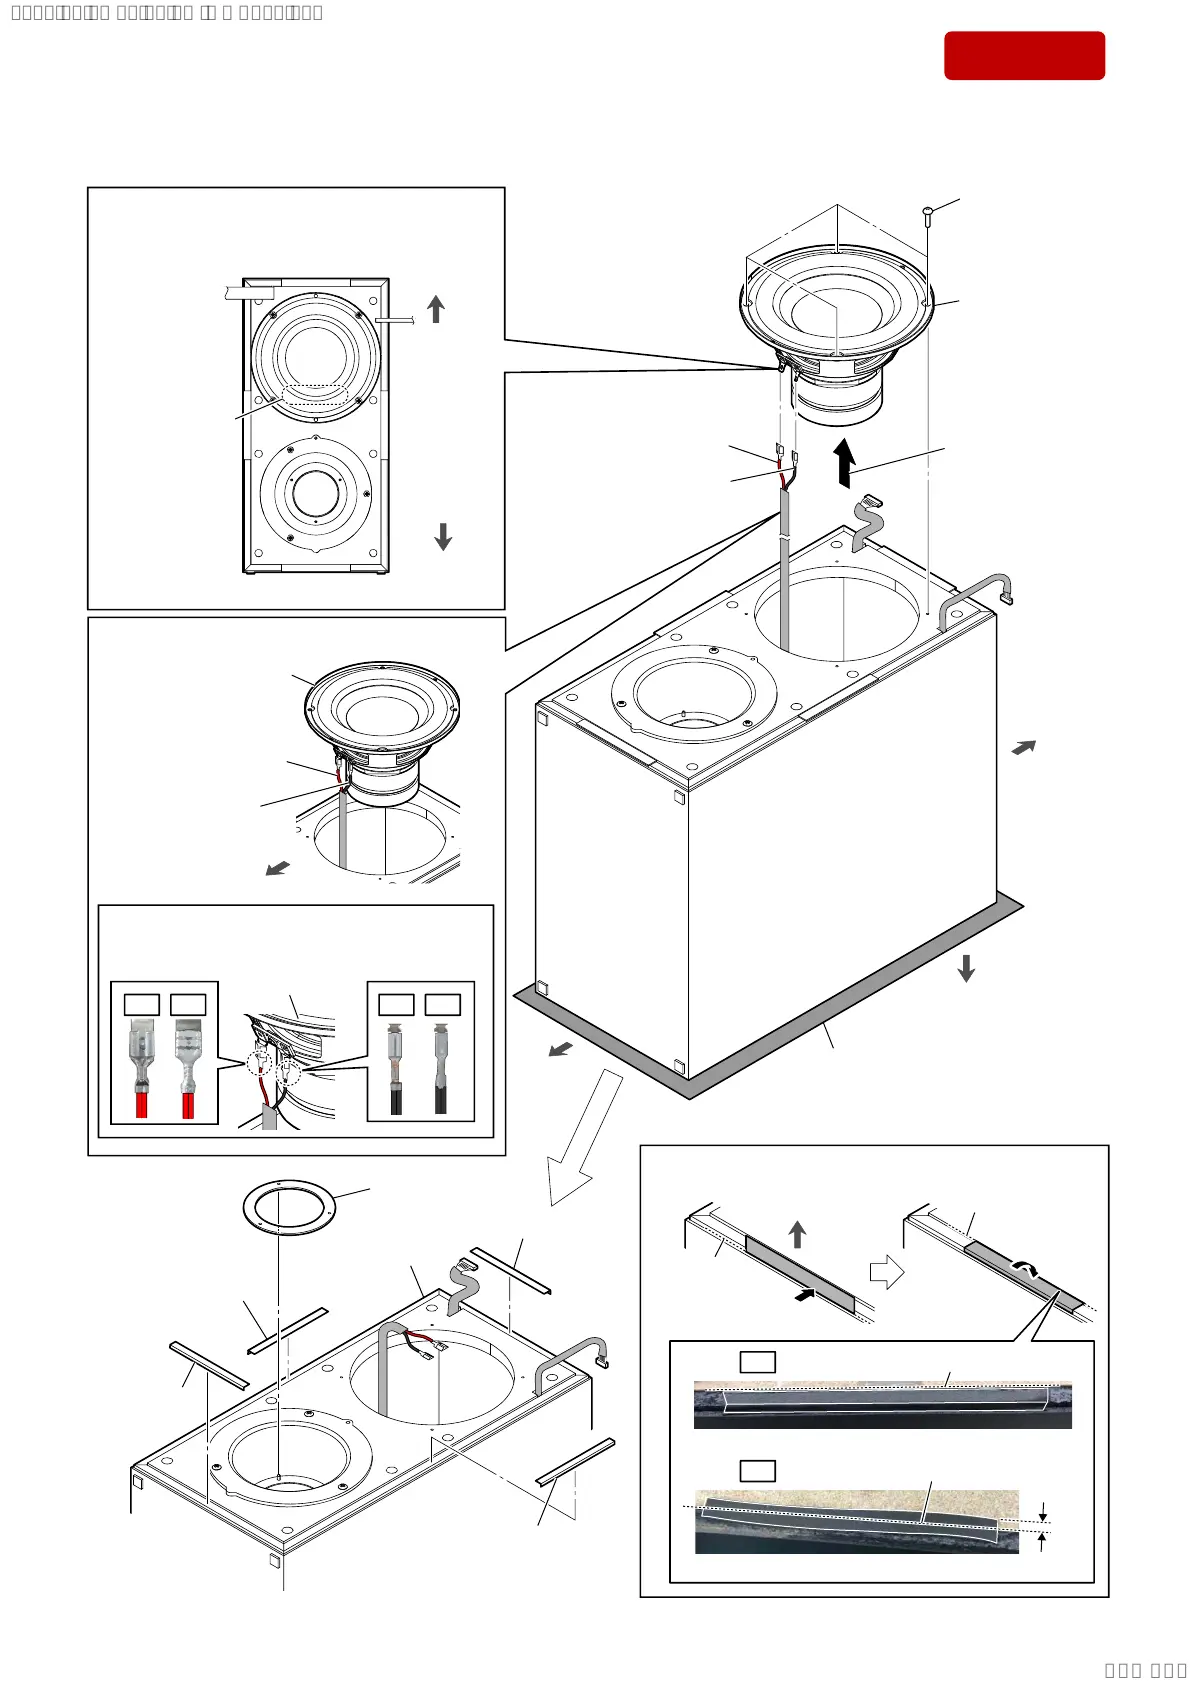
2-10. SPK UNIT (SUBWOOFER), WOOD BOX ASSY (SA-WS20R)
top side
2 Lift up the SPK
unit block in the
direction of the
arrow.
1 four screws
(BVTP4 u 25)
4 SPK unit
(subwoofer)
3 terminal (wide)
[red]
3 terminal (narrow)
[black]
rear side
bottom
side
• Installation direction for the SPK unit
Note 1:
When installing the SPK unit, make the position
of terminals as shown in the figure below.
terminals position
top side
bottom side
– Front view –
soft cloth, etc.
Note 3:
When working with the side other than
the bottom side facing downward, lay
a soft cloth, etc. so as not to damage.
6 duct packing
5 EVA cushion
(See Fig. B)
7 wood box assy
< Fig. B >
5 EVA cushion
(See Fig. B)
5 EVA cushion
(See Fig. B)
front side
guide line (end point)
1 Press.
Attach in order from 1 to 2.
2 Bend.
• How to attach the EVA cushion
5 EVA cushion
(See Fig. B)
• Speaker connection cable setting
Note 2:
When connecting the speaker connection cable
terminal to the SPK unit, take care for the
direction of the terminal and connect it.
SPK unit
SPK unit
terminal (wide)
[red]
terminal (narrow)
[black]
bottom side
OK
NG
OK
NG
guide line
(start point)
OK
NG
– Front view –
– Front view –
guide line (end point)
guide line (end point)
Beyond.
Ver. 1.3
SYSSET
2021/02/1022:25:21(GMT+09:00)
 Loading...