– 8 –
SECTION1
GENERAL
The operating instructions mentioned here are partial abstracts from the
Operating Instruction Manual. The page numbers of the Operating In-
struction Manual remein as in the manual.
Getting Started
Step 1
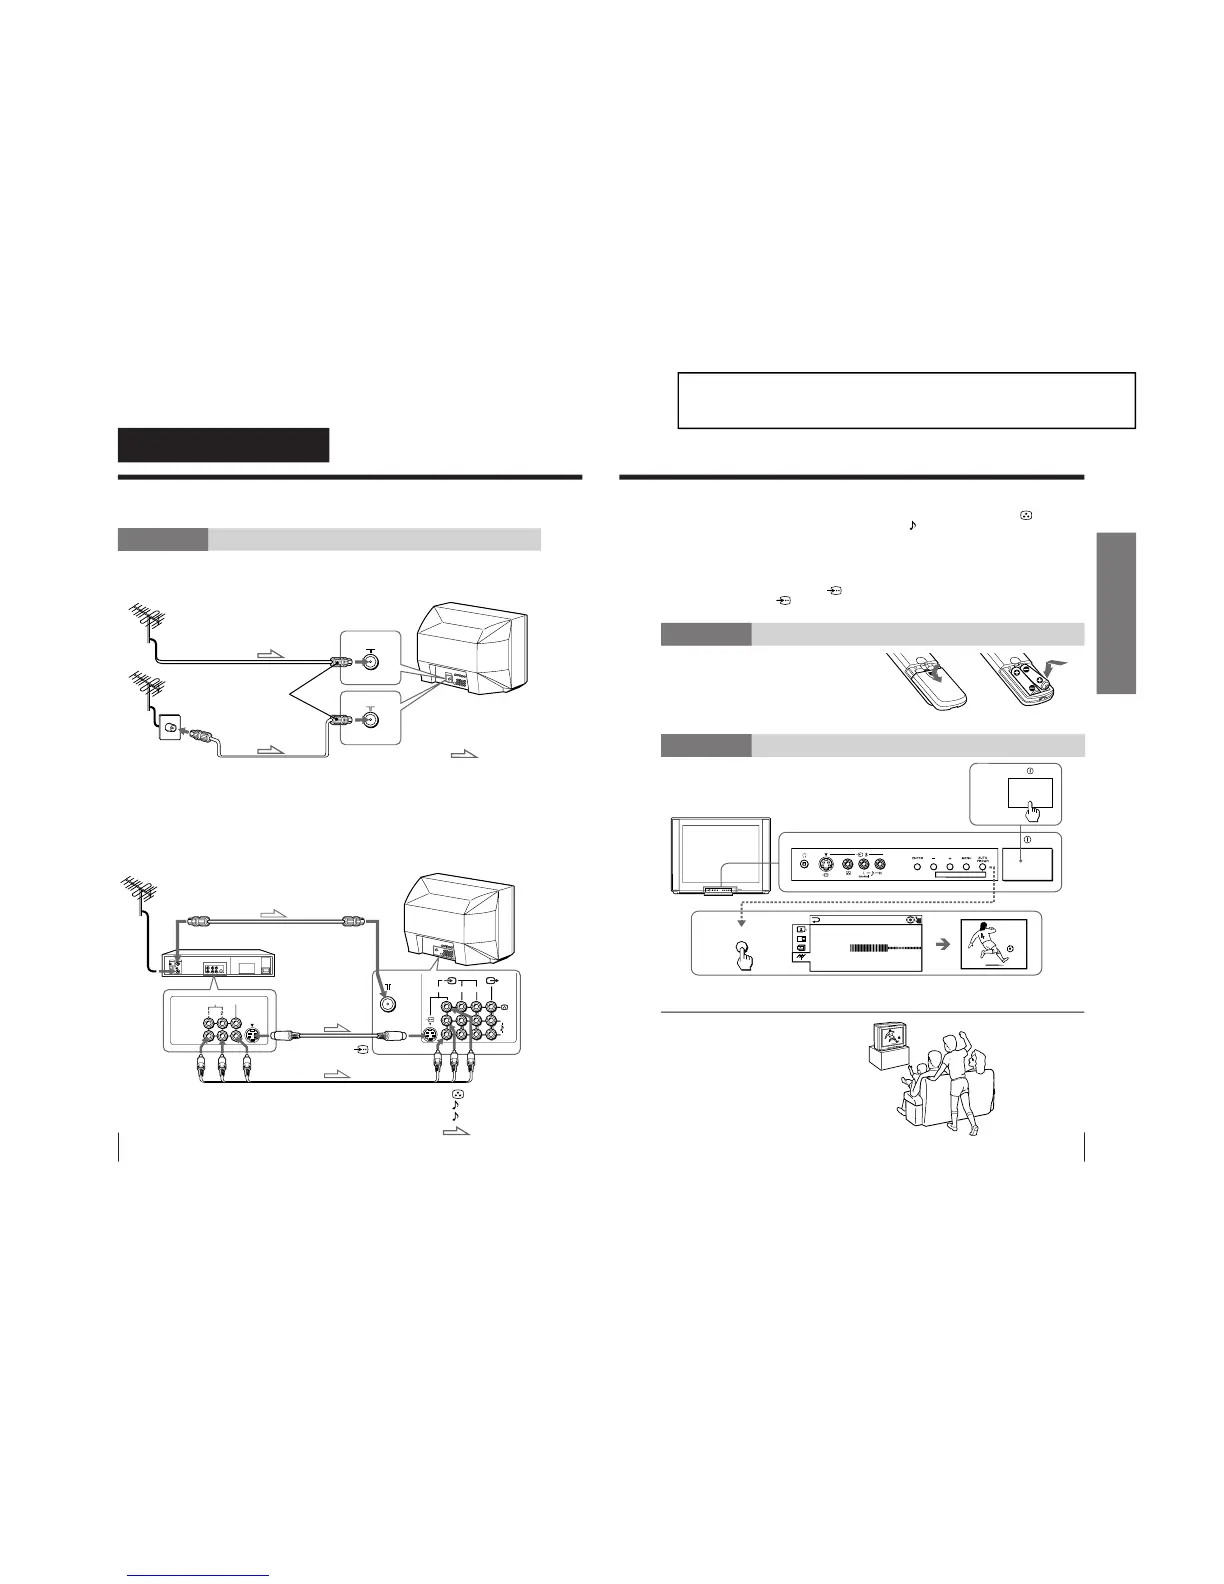
Connect the antenna
If you wish to connect a VCR, see the “Connecting a VCR” diagram below.
CAUTION
Do not connect the power cord until all other connections are complete;
otherwise, a minimal current leakage through the antenna and/or other
terminals to the ground could occur.
Connecting a VCR
To play a video tape, see page 10.
Using Your New TV
IEC connector
(not supplied)
To video and
audio outputs
VCR
(yellow)
-L (MONO) (white)
-R (red)
To S video
output
Antenna cable (not supplied)
Audio/Video cable
(not supplied)
S video cable
(not supplied)
: Signal flow
To
(S video input)
To antenna
output
To ˘
(antenna)
or
: Signal flow
Antenna cable (not supplied)
Antenna cable
(not supplied)
5
Using Your New TV
Using Your New TV
Notes
• If you connect a monaural VCR, connect the yellow plug to
(the
yellow jack) and the black plug to
-L (MONO) (the white jack).
• If you connect a VCR to the ˘ (antenna) terminal, preset the signal
output from the VCR to the program number 0 on the TV.
• Do not have concurrent connections of video equipment to the … 3 (video
input) jacks at the front and the … 3 (video input) jacks at the rear of your
TV; otherwise, the picture will not be displayed properly on the screen.
• When both the
(S video input) and … 1 (video input) are connected,
the
␣ (S video input) is automatically selected. To view the video input
to … 1 (video input), disconnect the S video cable.
Step 2
Insert the batteries
into the remote
Note
• Do not use old batteries or different types of batteries together.
Step 3
Preset the channels automatically
Tip
• To stop the automatic channel presetting, press MENU twice.
Now You Are Ready. . .
The channels are now automatically preset
in your TV. To preset the channels manually,
see page 37.
1
2