35GB
F:\0918\4548379111\4548379111MEXN5100BTUC\01GB-MEXN5100BTUC\040CD.fm masterpage: Right
MEX-N5100BT/MEX-N4100BT
4-548-379-11(1)
Installation
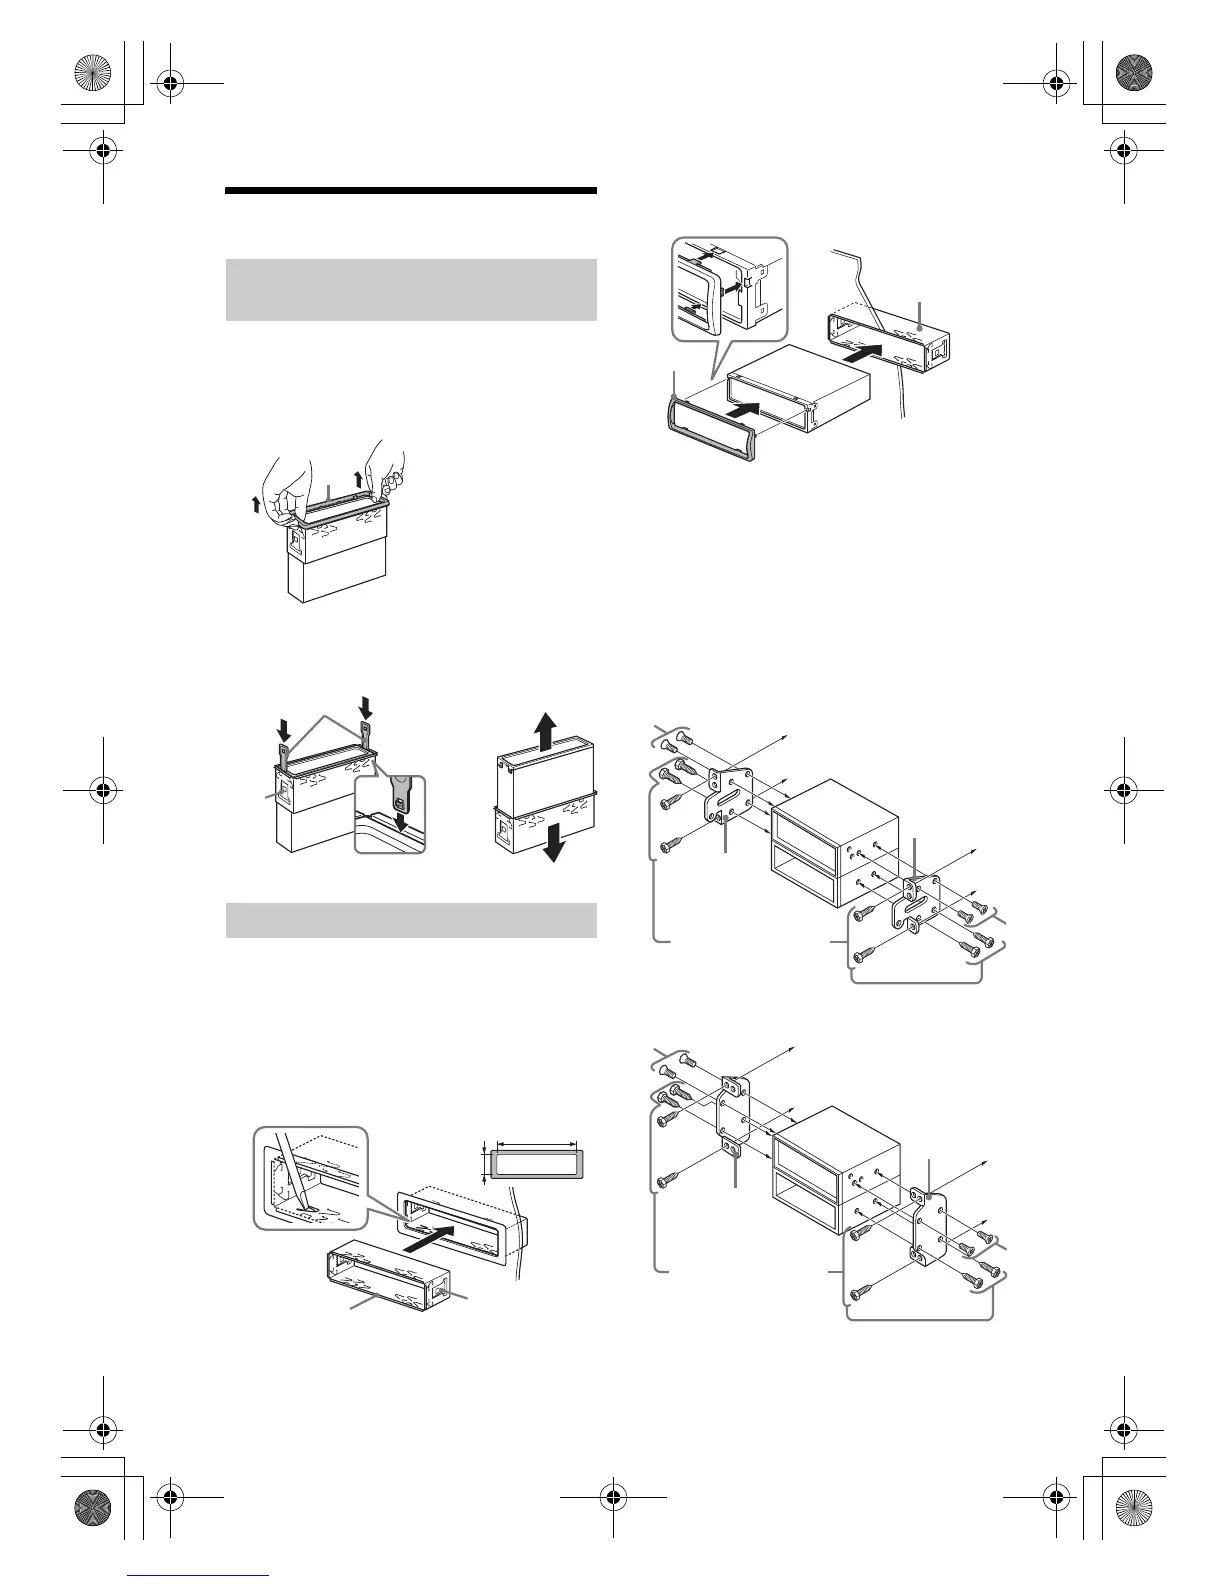
Before installing the unit, remove the protection
collar and the bracket from the unit.
1 Pinch both edges of the protection collar
, then pull it out.
2 Insert both release keys until they
click, and pull down the bracket , then
pull up the unit to separate.
Before installing, make sure the catches on both
sides of the bracket are bent inwards 2 mm (
3
/32
in). When mounting in a Japanese car, see
“Mounting the unit in a Japanese car” (page 35).
1 Position the bracket inside the
dashboard, then bend the claws outward
for a tight fit.
2 Mount the unit onto the bracket , then
attach the protection collar .
Notes
If the catches are straight or bent outwards, the unit
will not be installed securely and may spring out.
Make sure the 4 catches on the protection collar
are properly engaged in the slots of the unit.
Mounting the unit in a Japanese car
You may not be able to install this unit in some
makes of Japanese cars. In such a case, consult your
Sony dealer.
TOYOTA
NISSAN
Removing the protection collar and the
bracket
Mounting the unit in the dashboard