17
GB
USB Device
MHC-ECL7D/ECL6D.GB.4-467-787-11(1)
To transfer all the CD-DA tracks or
a desired CD-DA track
1
Press FUNCTION repeatedly to
select the DVD/CD function.
2
Connect a USB device to the
(USB) port.
3
Press OPEN/CLOSE on the
unit to open the disc tray.
4
Place a disc in the disc tray,
then press OPEN/CLOSE on
the unit to close the disc tray.
Ą To transfer all the CD-DA tracks
(CD SYNC transfer)
Press twice to stop playback,
and then proceed to step 5.
Ą To transfer a desired CD-DA
track (REC 1 transfer)
Press / to select a
desired CD-DA track during
playback, then press
(or )
to start playback of the selected
track.
5
Press REC TO USB on the unit.
“READY” appears on the display.
6
Press to start transferring.
“USB REC” appears on the display.
Do not remove the USB device
until transferring is completed.
When transferring is completed,
“COMPLETE” appears on the display
and audio les in MP3 format will
be created.
To transfer a desired MP3 le or a
desired MP3 folder
1
Press FUNCTION repeatedly to
select the DVD/CD function.
2
Connect a USB device to the
(USB) port.
3
Press OPEN/CLOSE on the
unit to open the disc tray.
4
Place a disc in the disc tray,
then press OPEN/CLOSE on
the unit to close the disc tray.
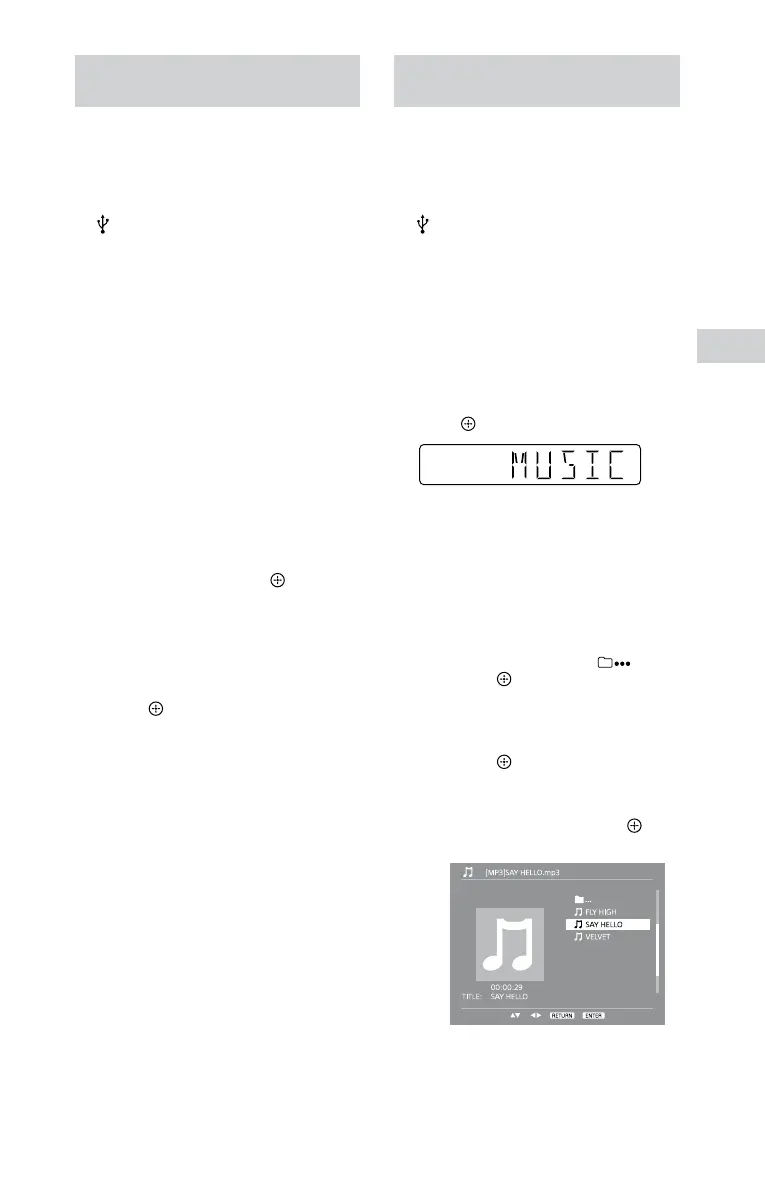
Conrm that the message “MUSIC”
is showing on the display, then
press (or ).
5
Select an MP3 le or MP3
folder you want to transfer.
Ą To transfer a desired MP3 le
(REC1 transfer)
1 Press DVD MENU or / to
move the cursor to
, then
press
.
2 Press / to move the cursor
to a folder that contains a le
you want to transfer, then
press
(or ).
3 Press / or / to
move the cursor to the
desired le, then press
(or
) to start playback.