11
GB
Let’s get the photo frame ready
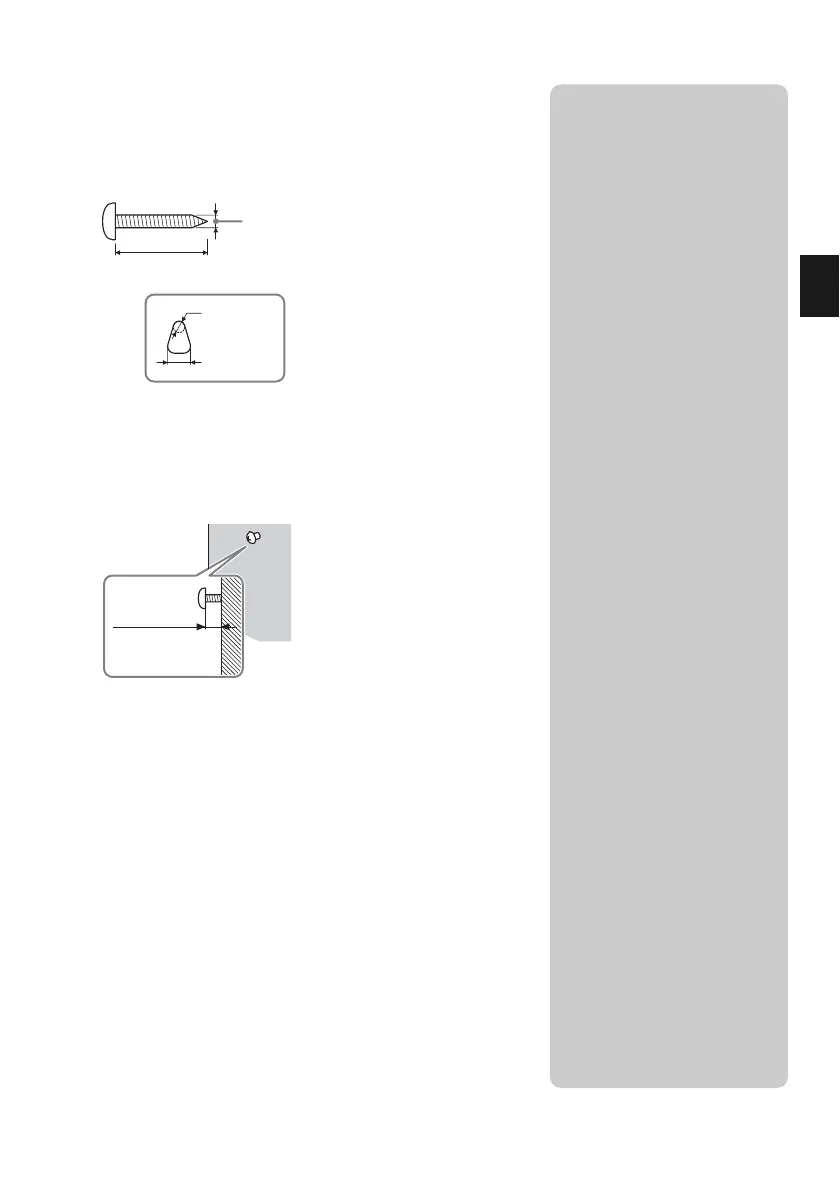
To display the photo frame on the wall
1 Prepare screws (not supplied) suitable for the screw
holes on the rear panel.
2 Screw the screws (not supplied) into the wall.
Be sure the screws (not supplied) protrude between 2.5 mm to
3 mm (
1
/8 inch) from the surface of the wall.
3 Hang the photo frame on the wall by fitting the hole on
the rear panel to the screws on the wall.
4 mm (
3
/16 inch)
More than 25 mm (1 inch)
φ
5 mm
(
7
/32 inch)
10 mm
(
13
/32 inch)
Holes for hanging
the unit on the wall
Between
2.5 mm to 3 mm
(
1
/8 inch)
PNotes
• Use screws suitable for the quality
of the material of the wall. The
screws may be damaged,
depending on the type of material
used in the wall. Set the screws in
a pillar or stud in the wall.
• When you want to re-insert the
memory card, remove the photo
frame from the wall, then eject and
re-insert the memory card while
the photo frame is placed on a
stable surface.
• Remove the stand when you hang
the photo frame on the wall.
• Connect the DC cable of the AC
adaptor to the photo frame and
hang the photo frame on the wall.
Then connect the AC adaptor to
the wall outlet.
• We take no responsibility for any
accidents or damage caused by
defects of attachment, misuse, or
natural disasters, etc.
 Loading...