Do you have a question about the Sony STR-ZA3000ES and is the answer not in the manual?
Guidance on initial setup and usage of the AV receiver, covering essential pre-operation steps.
Instructions for physically connecting speakers to the AV receiver for optimal audio output.
Steps for connecting external AV equipment and antennas to the receiver for signal input.
Details on establishing a wired LAN connection for network functionality and access.
Procedures for powering on the receiver and setting up the remote control for operation.
Guidance on configuring the receiver's basic settings using the Easy Setup feature.
Fundamental steps for operating the receiver and interacting with its features via the TV screen.
Instructions for tuning into FM/AM radio stations and managing presets.
Methods for enhancing audio quality by selecting and adjusting various sound field and effect settings.
Configuring the receiver for audio playback in multiple rooms using a second pair of speakers.
Extending multi-zone audio capabilities by connecting an additional amplifier.
Integrating the receiver with other Sony devices for simplified control via HDMI CEC.
Adjusting various video and sound parameters for optimal playback and user experience.
Creating and loading custom preset configurations for quick access to preferred settings.
Adjusting speaker parameters for optimal audio performance and calibration.
Setting the receiver to automatically turn off after a specified period.
Viewing status and operational information displayed on the receiver's panel.
Customizing input assignments and display options for connected devices.
Detailed configuration of speaker system parameters for accurate sound reproduction.
Configuration steps for connecting the receiver to a wired or wireless network.
Adjusting audio parameters to enhance sound quality and listening experience.
Configuring HDMI-related settings for video and audio signal transmission.
Managing settings related to multi-zone audio output and playback.
Configuring general system parameters like language, display, and software updates.
Setup procedures related to receiver installation, including trigger outputs and test screens.
Streamlined initial setup process for the receiver using an on-screen guide.
Operating the receiver's functions directly via its front panel display.
Restoring the receiver to its original factory default configuration.
Identification and explanation of the receiver's physical components and their functions.
Description of the remote control's functions and operation.
Technical specifications detailing the receiver's performance and capabilities.
List of registered trademarks and associated product names.
Information regarding the software licenses and terms of use.
Common error messages and their potential causes and solutions.
Troubleshooting issues related to the receiver's power supply and operation.
Resolving problems with video signal display and image output.
Addressing issues related to audio output, sound levels, and channel balance.
Resolving reception issues with FM/AM radio tuning.
Troubleshooting problems related to USB device recognition and connection.
Addressing issues that prevent the receiver from connecting to the network.
Troubleshooting difficulties with the BRAVIA Sync and HDMI Control functions.
Resolving issues where the remote control is not functioning correctly.
Final steps to take if troubleshooting measures do not resolve the issue.
List of items included in the product package with the AV receiver.
Important guidelines and precautions for safely and effectively installing the receiver.
Explanation of the receiver's capability to convert and output video signals via HDMI.
Overview of the digital audio formats the receiver can decode and process.
Best practices and recommendations for connecting various types of audio and video cables.
Detailed instructions and features related to utilizing HDMI connections for optimal signal transfer.
Guidance on setting up and connecting speaker systems for various channel configurations.
Specific instructions for connecting speakers to the STR-ZA3000ES model.
Specific instructions for connecting speakers to the STR-ZA2000ES/STR-ZA1000ES models.
Instructions for connecting speakers to enable audio output in a secondary zone.
Steps for connecting a television to the STR-ZA3000ES receiver via HDMI or other video outputs.
Setting up ARC for audio return from TV to receiver using HDMI.
Guidance on connecting both a TV and a projector to the receiver.
Methods for connecting a TV that lacks HDMI ports.
Connecting a TV using video and audio cables, including notes on signal distortion.
Setting up ARC for audio return from TV to receiver using HDMI.
Guidance on connecting both a TV and a projector to the receiver.
Connecting a television to the STR-ZA2000ES/STR-ZA1000ES receiver via HDMI or other video outputs.
Setting up ARC for audio return from TV to receiver using HDMI.
Guidance on connecting both a TV and a projector to the receiver.
Connecting a TV without ARC function via HDMI for audio and video.
Methods for connecting a TV that lacks HDMI ports.
Connecting a TV using video and audio cables, including notes on signal distortion.
Setting up ARC for audio return from TV to receiver using HDMI.
Guidance on connecting both a TV and a projector to the receiver.
Steps for connecting devices with HDMI ports to the STR-ZA3000ES receiver.
Steps for connecting devices with HDMI ports to the STR-ZA2000ES/STR-ZA1000ES receiver.
Instructions for connecting devices that do not have HDMI ports using alternative audio/video jacks.
Guide for connecting the supplied AM and FM antennas for optimal reception.
Steps to connect an additional amplifier for audio output in zone 2 or zone 3.
Essential system and hardware requirements for establishing a wired network connection.
Illustrates a typical home network setup for the STR-ZA3000ES receiver.
Illustrates a typical home network setup for the STR-ZA2000ES/STR-ZA1000ES receiver.
Instructions for correctly inserting batteries into the remote control for operation.
Procedure for connecting the power cord and turning on the AV receiver.
Guided setup process for initial configuration of the receiver via the TV screen.
Fundamental steps for operating the receiver and interacting with its features via the TV screen.
Navigating and operating the receiver's menu system using the TV interface.
Fundamental steps for operating the receiver and interacting with its features via the TV screen.
Steps to play back audio and video content from connected source devices.
Instructions for tuning into FM/AM radio stations and managing presets.
Instructions for tuning into FM/AM radio broadcasts using the receiver's built-in tuner.
Instructions for tuning into FM/AM radio stations and managing presets.
Saving favorite FM/AM radio stations for quick access using preset memory.
Instructions for tuning into FM/AM radio stations and managing presets.
Manually entering frequencies to tune into specific radio stations.
Instructions for tuning into FM/AM radio stations and managing presets.
Adjusting the AM tuning scale for different regional broadcast standards.
Choosing and applying various sound field modes to enhance audio immersion.
Restoring all sound field settings to their original default values.
Customizing the tonal quality of audio by adjusting bass and treble levels.
Optimizing sound for clear and dynamic output at low volume levels.
Enabling in-ceiling speaker mode for a more natural audio experience in specific setups.
Activating Pure Direct mode for the highest fidelity sound by bypassing signal processing.
Configuring the receiver for audio playback in multiple rooms using a second pair of speakers.
Instructions for connecting speakers to enable audio output in a secondary zone.
Configuring the receiver for audio playback in multiple rooms using a second pair of speakers.
Configuring speaker assignments for zone 2 audio playback.
Procedures for listening to audio in zone 2 or zone 3 using various connection methods.
Extending multi-zone audio capabilities by connecting an additional amplifier.
Procedures for listening to audio in zone 2 or zone 3 using various connection methods.
Extending multi-zone audio capabilities by connecting an additional amplifier.
Connecting an amplifier using ZONE 2 VIDEO/AUDIO OUT for multi-zone playback.
Connecting an amplifier using HDMI OUT B for multi-zone audio transmission.
Extending multi-zone audio capabilities by connecting an additional amplifier.
Connecting an amplifier using ZONE 3 AUDIO OUT for multi-zone audio transmission.
Configuring variable or fixed volume control for zone 2/3 audio outputs.
Extending multi-zone audio capabilities by connecting an additional amplifier.
Setting HDMI audio output for zone 2 playback devices connected via HDMI.
Extending multi-zone audio capabilities by connecting an additional amplifier.
Defining priority for main zone and zone 2 when using the same input source.
Extending multi-zone audio capabilities by connecting an additional amplifier.
Procedures for listening to audio in zone 2 or zone 3 using various connection methods.
Integrating the receiver with other Sony devices for simplified control via HDMI CEC.
Explanation of the BRAVIA Sync function and its compatibility with Sony devices.
Steps to enable and configure the Control for HDMI function for BRAVIA Sync.
Integrating the receiver with other Sony devices for simplified control via HDMI CEC.
Simplifying operations by connecting BRAVIA Sync compatible devices via HDMI.
Adjusting various video and sound parameters for optimal playback and user experience.
Outputting TV broadcast sound through the receiver's speakers using ARC.
Selecting which connected monitor receives HDMI video signals.
Adjusting various video and sound parameters for optimal playback and user experience.
Setting the receiver to prioritize digital or analog audio inputs.
Adjusting various video and sound parameters for optimal playback and user experience.
Reassigning video and audio signals to different input jacks for custom configurations.
Adjusting various video and sound parameters for optimal playback and user experience.
Details on reassigning input jacks for HDMI, Component, and Optical/Coaxial connections.
Creating and loading custom preset configurations for quick access to preferred settings.
Explanation of how to save and recall custom receiver settings for one-touch operations.
Loading previously saved custom configurations from scenes.
Creating and loading custom preset configurations for quick access to preferred settings.
Procedure for editing and saving custom receiver settings into presets.
Creating and loading custom preset configurations for quick access to preferred settings.
List of savable settings and their default values for custom presets.
Creating and loading custom preset configurations for quick access to preferred settings.
Details on default settings for Movie, Music, Party, and Night presets.
Using D.C.A.C. function for automatic speaker calibration and sound optimization.
Instructions for connecting speakers using a bi-amplifier configuration.
Setting the receiver to automatically turn off after a specified period.
Viewing status and operational information displayed on the receiver's panel.
Customizing input assignments and display options for connected devices.
Customizing input assignments and display options for connected devices.
Customizing input assignments and display options for connected devices.
Options for setting icons, names, display visibility, and jack assignments for inputs.
Customizing input assignments and display options for connected devices.
Procedure for renaming input sources for easier identification on the display.
Detailed configuration of speaker system parameters for accurate sound reproduction.
Step-by-step guide to performing automatic speaker calibration from the listening position.
Detailed configuration of speaker system parameters for accurate sound reproduction.
Calibrating speaker phase characteristics for well-coordinated surround sound.
Detailed configuration of speaker system parameters for accurate sound reproduction.
Choosing the calibration measurement type for Auto Calibration.
Selecting the appropriate speaker configuration pattern based on the connected system.
Detailed configuration of speaker system parameters for accurate sound reproduction.
Assigning specific speaker terminals for Zone 2, Bi-Amp, or Front B connections.
Detailed configuration of speaker system parameters for accurate sound reproduction.
Setting the size (Large/Small) for each speaker for proper bass redirection.
Measuring and setting the distance from the listening position to each speaker.
Detailed configuration of speaker system parameters for accurate sound reproduction.
Adjusting the output volume level for each individual speaker.
Playing a test tone sequentially from each speaker for setup verification.
Detailed configuration of speaker system parameters for accurate sound reproduction.
Setting the bass crossover frequency for speakers designated as 'Small'.
Detailed configuration of speaker system parameters for accurate sound reproduction.
Customizing the tonal quality of audio by adjusting bass and treble levels.
Detailed configuration of speaker system parameters for accurate sound reproduction.
Adjusting the perceived height of the center speaker's sound.
Configuring the height of ceiling speakers for optimal sound staging.
Detailed configuration of speaker system parameters for accurate sound reproduction.
Choosing the unit (meters or feet) for displaying speaker distances.
Configuration steps for connecting the receiver to a wired or wireless network.
Procedures for establishing a wired LAN connection to the network.
Configuration steps for connecting the receiver to a wired or wireless network.
Viewing current network connection status and configuration details.
Configuration steps for connecting the receiver to a wired or wireless network.
Configuring the receiver to maintain network connectivity in standby mode.
Setting up the receiver to link with Hi-Fi System devices for music playback.
Adjusting audio parameters to enhance sound quality and listening experience.
Enhancing low-quality audio signals to high-quality sound using D.L.L. technology.
Adjusting audio parameters to enhance sound quality and listening experience.
Optimizing sound for clear and dynamic output at low volume levels.
Adjusting audio parameters to enhance sound quality and listening experience.
Choosing and applying various sound field modes to enhance audio immersion.
Adjusting audio parameters to enhance sound quality and listening experience.
Selecting specific HD-D.C.S. effect types for movie sound enhancement.
Enabling in-ceiling speaker mode for a more natural audio experience in specific setups.
Adjusting audio parameters to enhance sound quality and listening experience.
Activating Pure Direct mode for the highest fidelity sound by bypassing signal processing.
Adjusting audio parameters to enhance sound quality and listening experience.
Turning the low-pass filter for the subwoofer output on or off.
Adjusting audio parameters to enhance sound quality and listening experience.
Adjusting audio delay to minimize lip-sync issues between audio and video.
Selecting audio language for digital broadcasts with dual audio.
Adjusting audio parameters to enhance sound quality and listening experience.
Compressing the soundtrack's dynamic range for easier listening at low volumes.
Configuring HDMI-related settings for video and audio signal transmission.
Converting video signals to 4K resolution for output via HDMI OUT A.
Configuring HDMI-related settings for video and audio signal transmission.
Enabling or disabling the Control for HDMI function for interconnected device control.
Configuring HDMI-related settings for video and audio signal transmission.
Outputting HDMI signals to TV even when the receiver is in standby mode.
Configuring HDMI-related settings for video and audio signal transmission.
Configuring HDMI audio signal output from connected devices to receiver or TV speakers.
Setting HDMI audio output for zone 2 playback devices connected via HDMI.
Configuring HDMI-related settings for video and audio signal transmission.
Adjusting the subwoofer output level for multi-channel PCM signals via HDMI.
Configuring HDMI-related settings for video and audio signal transmission.
Choosing the usage mode for the HDMI OUT B jack (Main zone or Zone 2).
Defining priority for main zone and zone 2 when using the same input source.
Configuring HDMI-related settings for video and audio signal transmission.
Enabling faster HDMI input switching for improved display response.
Managing settings related to multi-zone audio output and playback.
Setting the default volume level for when the receiver is turned on.
Controlling the power status for zone 2 or zone 3 independently.
Managing settings related to multi-zone audio output and playback.
Choosing the audio/video source signals for playback in zone 2 or zone 3.
Adjusting the audio volume level for zone 2 or zone 3 playback.
Managing settings related to multi-zone audio output and playback.
Setting preset volume levels for zone 2 or zone 3 playback.
Configuring variable or fixed volume control for zone 2/3 audio outputs.
Configuring general system parameters like language, display, and software updates.
Choosing the display language for system messages and menus.
Controlling whether status information displays automatically on the TV screen.
Configuring general system parameters like language, display, and software updates.
Configuring automatic standby mode based on receiver inactivity or input absence.
Selecting how the volume level is displayed on the panel and GUI.
Adjusting the brightness level of the receiver's front panel display.
Configuring general system parameters like language, display, and software updates.
Setting the receiver to automatically turn off at a specified time.
Viewing the current software version installed on the receiver.
Configuring general system parameters like language, display, and software updates.
Procedure for updating the receiver's software using a USB flash drive.
Configuring FM mode and preset station naming for the tuner.
Setup procedures related to receiver installation, including trigger outputs and test screens.
Enabling or disabling external control mode for receiver maintenance.
Configuring the 12V trigger outputs for various input and zone conditions.
Setup procedures related to receiver installation, including trigger outputs and test screens.
Configuring the 12V trigger outputs for various input and zone conditions.
Outputting a test pattern for HDMI OUT A and HDMI OUT B jacks.
Preventing accidental erasure of receiver settings by locking them.
Streamlined initial setup process for the receiver using an on-screen guide.
Guided setup process for initial configuration of the receiver via the TV screen.
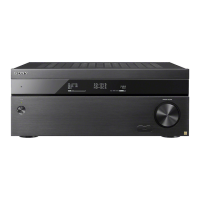
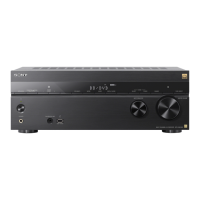
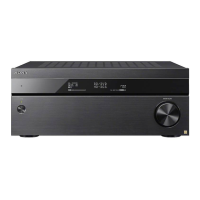
Identification and explanation of the receiver's physical components and their functions.
Identification of buttons and indicators on the receiver's front panel.
Identification and explanation of the receiver's physical components and their functions.
Detailed explanation of front panel controls and features, including indicator lights.
Identification and explanation of the receiver's physical components and their functions.
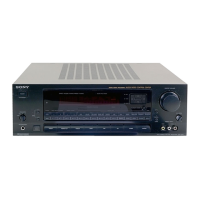
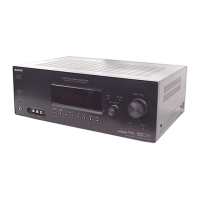
Diagram and labeling of the rear panel connections and terminals for the STR-ZA3000ES.
Identification and explanation of the receiver's physical components and their functions.
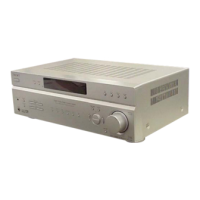
Diagram and labeling of the rear panel connections and terminals for the STR-ZA2000ES/STR-ZA1000ES.
Identification and explanation of the receiver's physical components and their functions.
Explanation of the various indicators and symbols displayed on the receiver's front panel.
Description and function of each button on the supplied remote control.
Detailed explanation of remote control buttons, including power saving and zone control functions.
Overview of remote control buttons for tuner, input, sound settings, and calibration.
Technical specifications detailing the receiver's performance and capabilities.
Detailed specifications for power output and harmonic distortion across different models.
Technical specifications detailing the receiver's performance and capabilities.
Power output specifications for STR-ZA3000ES, STR-ZA2000ES, and STR-ZA1000ES models.
Technical specifications detailing the receiver's performance and capabilities.
Reference power output specifications for various speaker configurations and modes.
Frequency response characteristics for analog audio inputs.
Technical specifications detailing the receiver's performance and capabilities.
Sensitivity, impedance, and S/N ratio for analog audio input signals.
Impedance and S/N ratio for digital audio input signals.
Voltage and impedance specifications for various audio output terminals.
Technical specifications detailing the receiver's performance and capabilities.
Supported 4K resolution and HDCP 2.2 specifications for HDMI input/output jacks.
Technical specifications detailing the receiver's performance and capabilities.
General information about the receiver's power, dimensions, and mass.
Electrical power requirements for USA/Canada and other regions.
Receiver power consumption ratings during operation and standby mode.
Approximate physical dimensions of the receiver unit.
Approximate mass of the receiver unit, including the front cover.
List of items included in the product package with the AV receiver.
Technical specifications detailing the receiver's performance and capabilities.
List of registered trademarks and associated product names.
Technical specifications detailing the receiver's performance and capabilities.
Details regarding software licenses, copyrights, and terms of use for included software.
Receiver turns off automatically due to electrical surge, blocked ventilation, or speaker impedance.
Troubleshooting USB update failures by re-inserting the flash drive and power cycling.
Check for blocked ventilation holes on the top of the receiver.
Interpreting error and warning messages from the Auto Calibration process.
Interpreting error and warning messages from the Auto Calibration process.
Understanding messages related to network connectivity and features.
Troubleshooting issues related to the receiver's power supply and operation.
Checks for Auto Standby, sleep timer, PROTECTOR, or FAN STOPPED activation.
Resolving issues where the receiver fails to power on after a USB update.
Resolving problems with video signal display and image output.
Troubleshooting steps for missing video signals on the TV screen.
Resolving problems with video signal display and image output.
Troubleshooting lack of 3D images by checking HDMI video formats and cables.
Troubleshooting lack of 4K images by checking video capabilities and HDMI cables.
Ensuring Pass Through is set correctly for standby mode HDMI output.
Resolving problems with video signal display and image output.
Ensuring TV is connected to HDMI OUT A and GUI is enabled via HOME button.
Checking Pure Direct and DIMMER settings if the display panel is off.
Addressing issues related to audio output, sound levels, and channel balance.
Checking connections, volume levels, speaker settings, and mute function.
Troubleshooting humming or noise by checking cable placement and connections.
Verifying speaker connections, levels, and settings, including subwoofer setup.
Addressing issues related to audio output, sound levels, and channel balance.
Checking device connections, HDMI settings, and HDCP compatibility.
Addressing issues related to audio output, sound levels, and channel balance.
Checking speaker connections and adjusting sound level parameters.
Verifying source format and digital output settings for multi-channel sound.
Ensuring movie sound fields are selected and checking speaker pattern compatibility.
Addressing issues related to audio output, sound levels, and channel balance.
Checking speaker cable connections for security and short circuits.
Verifying speaker pattern setup matches speaker connections.
Ensuring Pass Through is set correctly for standby mode HDMI output.
Resolving reception issues with FM/AM radio tuning.
Using an outdoor FM antenna with a coaxial cable for improved reception.
Setting FM mode to monaural to improve stereo reception.
Checking antenna connections, using direct tuning, and presetting stations.
Troubleshooting problems related to USB device recognition and connection.
Steps to resolve USB device recognition issues, including formatting and reconnections.
Troubleshooting USB connection errors, such as incorrect plug orientation.
Addressing issues that prevent the receiver from connecting to the network.
Checking the nature of the error and referring to the network features message list.
Verifying LAN cable connection and network information settings.
Troubleshooting difficulties with the BRAVIA Sync and HDMI Control functions.
Checking HDMI connections, device compatibility, and Control for HDMI settings.
Troubleshooting ARC by verifying Control for HDMI, Input Mode, and TV compatibility.
Resolving issues where the remote control is not functioning correctly.
Checking remote control sensor, obstructions, and battery status.
Final steps to take if troubleshooting measures do not resolve the issue.
Restoring the receiver to its original factory default configuration.
Restoring all sound field settings to their original default values.
Final steps to take if troubleshooting measures do not resolve the issue.
Links to Sony support websites for the latest information and assistance.
Describes the setup for a 5.1 channel surround sound system with five speakers.
Explains the setup for a 7.1 channel system utilizing surround back speakers.
Guidance on positioning surround back speakers for optimal 6.1 channel audio.
Illustrates optimal placement and angles for surround back speakers in a 7.1 system.
Enabling audio playback in Zone 2 when using a 5.1 channel setup.
Illustrated guide showing the correct procedure for connecting speaker cables.
Explanation of the Auto Calibration process and its measurement steps.
Pre-calibration checks including speaker setup, microphone connection, and environment.
Instructions for connecting the supplied optimizer microphone to the AUTO CAL MIC jack.
Steps for setting up an active subwoofer, including level and crossover frequency adjustments.
Choosing which set of front speaker terminals (A, B, AB, None) to operate.
Reviewing error codes or warning messages received during Auto Calibration.
Listening mode that preserves original recording format without surround effects.
Switching output to 2-channel sound regardless of recording format or connected device.
Outputs sound from front left/right speakers only, bypassing surround processing.
Enables high-quality analog source playback in 2-channel mode.
Decodes 2-channel stereo or monaural audio as multi-channel audio from all speakers.
Selecting pre-programmed sound fields for immersive movie theater audio experience.
Sony's HD Digital Cinema Sound technology for precise acoustic response.
Emphasizes sound reflection for a spacious feel, simulating a large movie theater.
Reproduces movie theater reverberation for a general living room environment.
Reproduces reverberation suitable for home use, based on mastering studio data.
Performs Dolby Pro Logic II Movie decoding for Dolby Surround or 5.1-channel sources.
Expands Dolby Pro Logic II Movie or Dolby Digital 5.1 to 7.1 discrete channels.
Performs DTS Neo:6 Cinema decoding, enhancing 2-channel sources up to 7 channels.
Automatically turns on and switches to the appropriate HDMI input when content plays.
Outputs TV sound via receiver speakers; adjusts receiver volume with TV volume.
Simultaneously powers off the TV, receiver, and connected devices via HDMI.
Automatically selects optimum picture and sound based on the TV scene selected.
Maps TV scenes to specific sound fields for automatic audio adjustments.
Enables control of receiver functions using a Home Theatre Control-compatible TV.
Using the TV remote to operate the receiver's menu system for convenience.
Assigning custom names to preset radio stations for easier identification.
Options for configuring input jack assignments and display settings.
Detailed configuration of speaker system parameters for accurate sound reproduction.
Configuration steps for connecting the receiver to a wired or wireless network.
Adjusting audio parameters to enhance sound quality and listening experience.
Configuring HDMI-related settings for video and audio signal transmission.
Managing settings related to multi-zone audio output and playback.
Configuring general system parameters like language, display, and software updates.
Setup procedures related to receiver installation, including trigger outputs and test screens.
Streamlined initial setup process for the receiver using an on-screen guide.
Procedure for attaching the front cover to prevent misoperations.
Instructions for safely removing the front cover from the bottom side.
Setting the FM reception mode to monaural for improved signal quality.