9(E)
RESET
>
+
ENTER
SELECT
The buttons that can be used on the menus and
adjustment screens are displayed at the bottom of the
screen. You can perform menu operation using the
displayed buttons.
Usable buttons
Usable buttons
Adjustment screen
Operating procedures
To display the menu, follow this procedure.
1 Press the MENU/EXIT (1) button.
MENU (1 : main menu) appears.
2 Move the cursor (z) to the desired setting menu by
pressing the ./– or >/+ (4, 3) button.
3 Press the ENTER/SELECT (2) button.
The setting menu selected in step 2 appears.
4 Move the cursor (z) to the desired item by
pressing the ./– or >/+ (4, 3) button.
5 Press the ENTER/SELECT (2) button.
The adjustment screen or setting menu selected in
step 4 appears.
For detailed information of menus, see “Functions of On-
Screen Menus” on page 10(E).
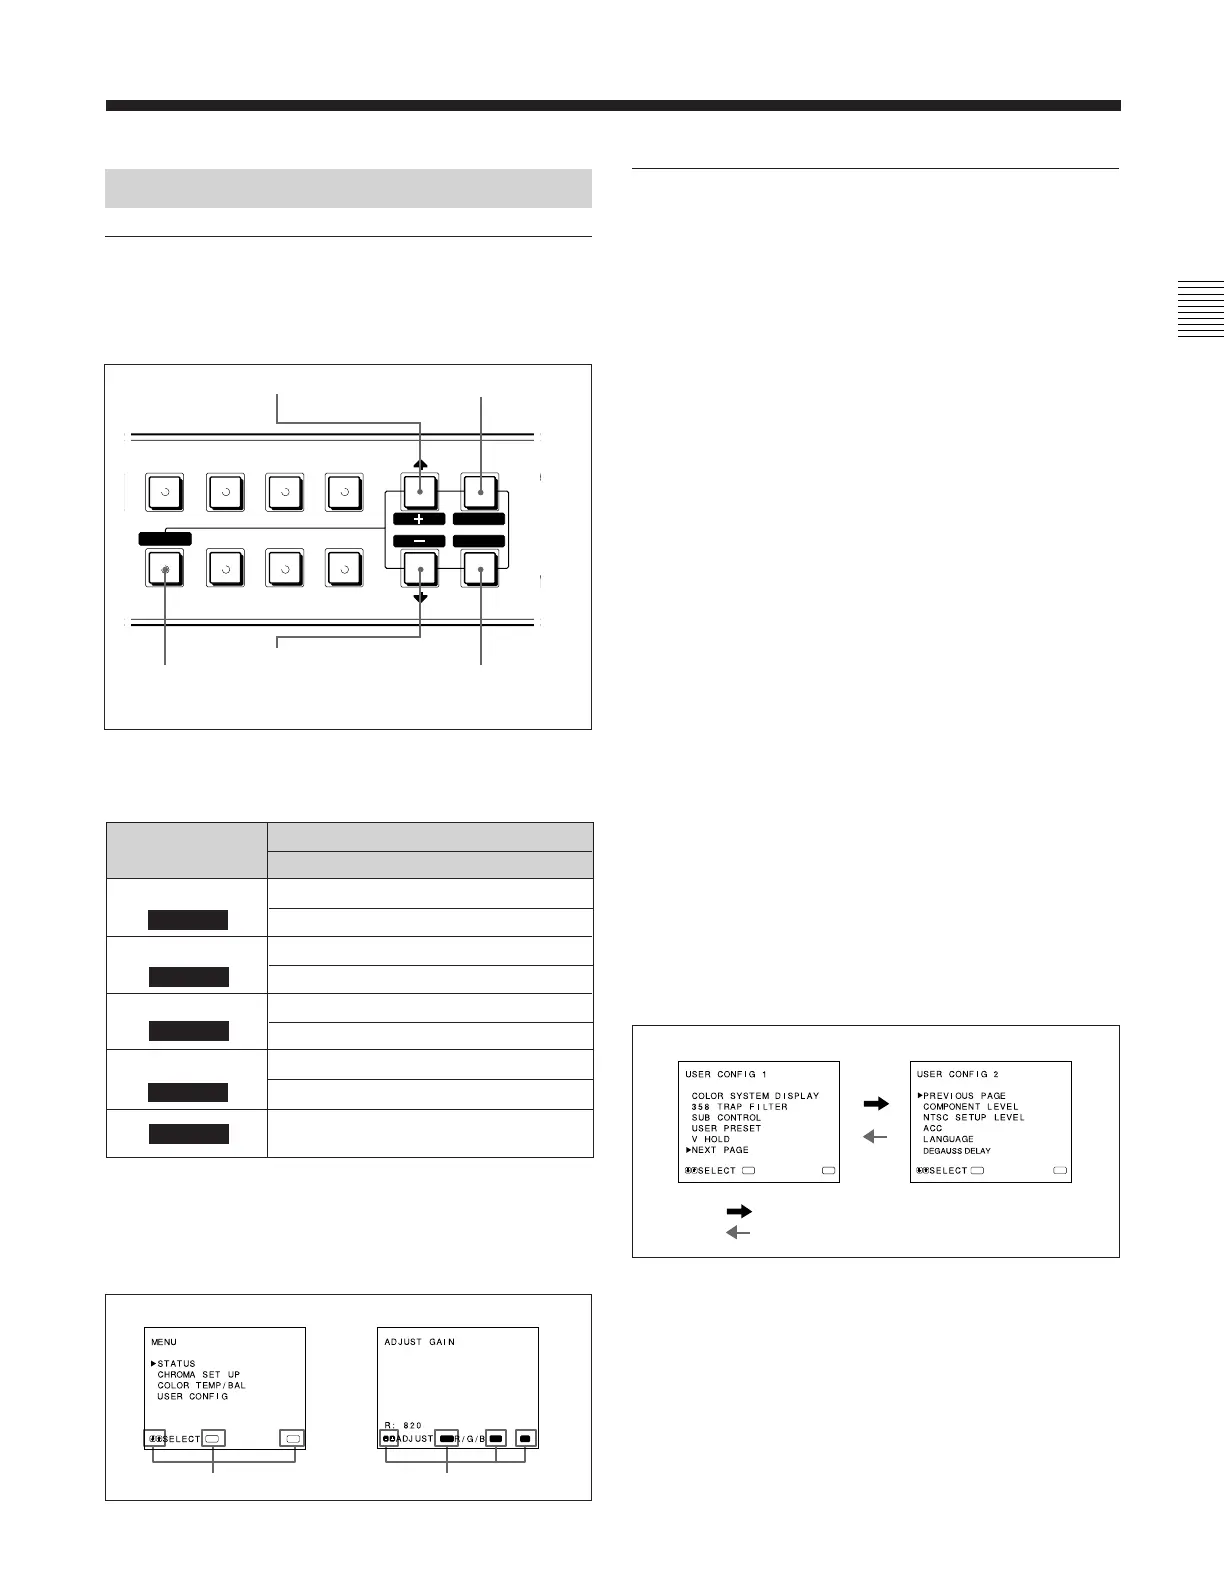
To display the next (or previous) page of the
menus
Select NEXT PAGE on the menu to display the next
page and PREVIOUS PAGE on the menu to display
the previous page.
How to display the next or the previous page
Display of the usable menu operation buttons
SELECT
EXIT
RESET
Menu
Operation through On-Screen Menus
Menu operation buttons
There are five menu operation buttons on the front
panel of the monitor.
1
5
2
MENU/EXIT
button
MENU
ENTER
EXIT
SELECT
EXT
SYNC
LINE/
RGB
C/
SDI
B/
COMPONENT
BLUE
ONLY
UNDER
SCAN
H/V
DELAY
16:9
RESET
3 >/+ button
4 ./– button
RESET button
ENTER/
SELECT
button
The following table shows how these five buttons
function when using the menus.
Button
To select menu item
To adjust the item selected
return to the previous menu
return to the previous menu
decide a selected item
select an adjustment item
move the cursor (z) upwards
increase selected value
move the cursor (z) downwards
decrease selected value
reset current settings to the factory
setting
5
3
.
–
4
2
MENU
EXIT
1
ENTER
MENU
MENU 1 MENU 2
When selecting NEXT PAGE
When selecting PREVIOUS PAGE
:
:
MENU
MENU
ENTERENTER