EasyManua.ls Logo

South Shore 3170010 User Manual

South Shore 3170010
23 pages
To Next Page IconTo Next Page
Page #1 background imageLoading...
Page #1 background image
THANK YOU FOR CHOOSING SOUTH SHORE!
MERCI DE CHOISIR SOUTH SHORE!
GRACIAS POR ELEGIR SOUTH SHORE!
1-800-290-0465
service@southshore.ca
www.southshore.ca
Live Chat available Clavardage en ligne disponible
DAMAGED OR MISSING PART? NEED ASSISTANCE FOR ASSEMBLY?
PLEASE CONTACT US DIRECTLY!
PIÈCE BRISÉE OU MANQUANTE?BESOIN D’ASSISTANCE POUR ASSEMBLAGE?
S’IL VOUS PLAIT CONTACTEZ -NOUS!
ESTA DAÑADA O LE FALTA ALGUNA PIEZA? NECESITA AYUDA CON EL
ENSAMBLE?
POR FAVOR CONTACTENOS DIRECTAMENTE!
PRODUCTION CODE CODE DE PRODUCTION
CODIGO PRODUCCION
**
**This number should be kept for all service requests.
**Ce numéro devra être conservé pour toute demande de
service.
**Este numero debera guardarlo para cualquier solicitud de
servicio.
Question and Answer IconNeed help?

Do you have a question about the South Shore 3170010 and is the answer not in the manual?

South Shore 3170010 Specifications

General IconGeneral
BrandSouth Shore
Model3170010
CategoryIndoor Furnishing
LanguageEnglish

Summary

Assembly Instructions and Product Details

Product Identification

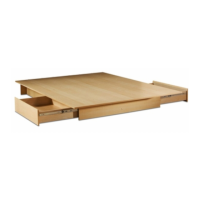
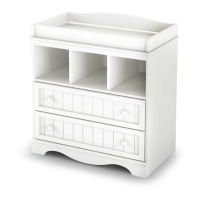
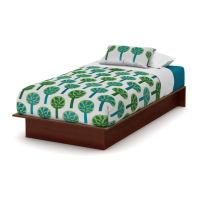
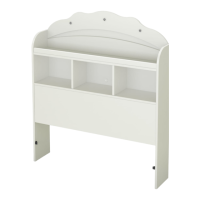
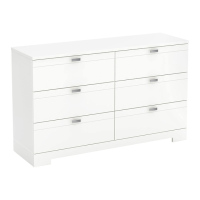
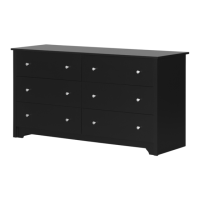
Details for identifying the specific model and item of the furniture.

Warranty and Safety Information

Overview of the 5-year warranty and the requirement for adult assembly.

Critical Safety: Furniture Tip-Over Prevention

Prevention Measures for Tip-Over

Guidelines to prevent serious or fatal crushing injuries from furniture tip-over.

Tools Required for Assembly

Exploded View and Component Identification

Component Labels and Quantities

Visual guide to furniture parts with labels (A, C, F, etc.) and quantities.

Hardware Components Identification

List of Hardware Components

Catalog of all hardware items with corresponding numbers and quantities.

Assembly Steps: Initial Frame Construction

Step 1: Attaching Support Rails

Instructions for attaching support rails (N2, N, P2) to the frame.

Step 2: Attaching Side Panels

Instructions for attaching side panels (C, C1, P, P1) to the main frame.

Assembly Steps: Frame Reinforcement and Slides

Step 3: Securing Top Panel

Instructions for attaching the top panel (A) with screws.

Step 4: Installing Drawer Slides

Instructions for installing drawer slides (N2, N) onto the frame.

Assembly Steps: Drawer Slide and Support Installation

Step 5: Attaching Drawer Slides Components

Attaching drawer slides and related components to panels C, C1, and H.

Step 6: Adding Drawer Supports

Installation of circular supports (-65-) on panels C, C1, and H.

Assembly Steps: Drawer Unit and Base Assembly

Step 7: Securing Base Support

Attaching the base support (P2) using specific hardware.

Step 8: Assembling Drawer Units

Connecting drawer unit components (C, P, C1, P1) using hardware.

Assembly Steps: Drawer Unit Integration and Framing

Step 9: Attaching Side Panel to Drawer Unit

Connecting side panel (C) to drawer unit with slides (N2, N).

Step 10: Assembling Drawer Unit Frame

Assembling drawer unit frame (H) with slides (N2, N).

Assembly Steps: Frame Joining and Completion

Step 11: Connecting Frame Components

Connecting frame components (C, H, P2, N) with slides.

Step 12: Joining Frame Sections

Joining frame sections (C1, H, P2, N, N2) together.

Assembly Steps: Final Frame, Base, and Paper Removal

Step 13: Final Frame Assembly

Completing the main frame assembly (A, C, C1, H, N).

Step 14: Attaching Base and Paper Removal

Attaching the base and instructions to pull off protective paper.

Assembly Steps: Connecting Major Furniture Sections

Step 15: Connecting Major Assemblies

Connecting the main furniture assemblies.

Step 16: Attaching Back Panel

Instructions for attaching the back panel (F) to the unit.

Drawer Assembly: Slide Mechanisms

Step 17: Installing Drawer Slides Supports

Installing supports (-229-) on drawer panels (R/R1).

Step 18: Attaching Drawer Slide Runners

Attaching drawer slide runners (-21-, -22-, -221-) to drawer panels (S, S1).

Drawer Assembly: Drawer Body Construction

Step 19: Securing Drawer Bottom Panel

Securing the drawer bottom panel (T) with hardware (-242-).

Step 20: Attaching Drawer Front Hardware

Attaching hardware (-184-) to drawer front panels (S, S1).

Drawer Assembly: Drawer Side Panel Attachment

Step 21: Assembling Drawer Sides

Assembling drawer side panels (S1, S) to drawer base (R/R1).

Step 22: Completing Drawer Sides

Completing the attachment of drawer side panels (S1, S) to the base.

Drawer Assembly: Integrating Drawer Panels

Step 23: Integrating Drawer Panels

Integrating drawer panels (u) with drawer sides (S, S1) and base (R/R1).

Step 24: Securing Drawer Front Panel

Securing the drawer front panel (u) to the assembly.

Drawer Assembly: Drawer Finishing Touches

Step 25: Attaching Drawer Sides to Front

Attaching drawer sides (S, S1) to the front panel (u) using hardware.

Step 26: Installing Drawer Handles

Installing drawer handles (-35-) onto the drawer front panels.

Safety Bracket Installation for Anti-Tip Protection

Preventing Unit Fall on Children

Instructions for installing the safety bracket to prevent furniture from tipping.

Final Product Dimensions and Drawer Operation

Product Dimensions Overview

Provides the overall dimensions (A, B, C) of the assembled furniture.

Drawer Operation Guide

Demonstrates how to open and close the drawers, including a 'PUSH' instruction.

Furniture Maintenance and Care Guide

General Cleaning and Protection

Tips on cleaning with damp cloths, avoiding chemicals, and using felt protectors.

Placement and Sunlight Avoidance

Advice on avoiding direct sunlight to preserve furniture finish.

5-Year Limited Warranty Terms and Claims

Warranty Coverage and Limitations

Details on what the 5-year warranty covers, exclusions, and limitations.

Warranty Claim Procedure

Instructions on how to register and make a warranty claim.

Related product manuals