EasyManua.ls Logo

South Shore 9006 User Manual

South Shore 9006
12 pages
To Next Page IconTo Next Page
Page #1 background imageLoading...
Page #1 background image
ASSEMBLY INSTRUCTIONS
INSTRUCTIONS D’ASSEMBLAGE
INSTRUCCIONES DE ENSAMBLAJE
- -270
Model/ / ModeloModèle
Article/ / ArticuloItem
10020977
Rev.:Ai1
25/09 2013/
1-800-290-0465
Headboard 54”/60”
Tête de lit 137/152 cm
Cabecera 54”/60”
-9006 9007-9008--
ADULT ASSEMBLY REQUIRED
DOIT ÊTRE ASSEMBLÉ PAR UN ADULTE
DEBE SER ENSAMBLADO POR UN ADULTA
FRANÇAIS
ESPANOL
ENGLISH
N.B.: It is important to carefully read the instructions
before beginning the assembly.
Identify all the parts and hardware.
We recommend that you assemble the unit on a carpeted floor
to avoid scratches. To facilitate assembly .2 people are required
Keep the assembly instructions and
for future use
for warranty purposes. It contains all pertinent
information regarding replacement parts and maintenance.
N.B. Il est important de bien lire les instructions
avant de commencer l’assemblage.
Bien identifier les pièces et la quincaillerie.
Il est recommand d’assembl l’unité sur un tapis pour
é er
éviter les égratignures. Pour un assemblage facile et agréable
; .2 personnes sont requises
Gardez les instructions d’assemblage pour et pour
utilisation future
la garantie. Elles contiennent toutes les informations pour un
remplacement de pièce ou pour l’entretien périodique.
N.B. Lea con detenimiento las instrucciones
antes de comenzar a ensamblar su mueble.
Identifique las piezas y los articulos de ferretería.
Se recomienda ensamblar la unidad sobre una alfombra
para evitar los rasguños. Para un ensamblaje mas facil
se necesitan dos personas. el instructivo de ensamble
Guarde
para uso de garantía.un futuro y para usos
Este instructivo contiene todas las informaciones necesarias
para un sustitución de pieza o un mantenimiento periodico.
Question and Answer IconNeed help?

Do you have a question about the South Shore 9006 and is the answer not in the manual?

South Shore 9006 Specifications

General IconGeneral
Product TypeDresser
Number of Drawers6
Assembly RequiredYes
CategoryIndoor Furnishing
Product NameSouth Shore 9006 Dresser

Summary

Assembly Preparation and Safety

General Assembly Guidelines

Important pre-assembly steps including reading instructions, identifying parts, and preparation for assembly.

Warranty and Future Reference

Advice on retaining assembly instructions for future use and warranty claims.

Customer Support and Maintenance

Customer Service Contact Information

Contact information for customer service to assist with assembly or replacement parts.

Furniture Care and Maintenance Tips

Recommendations for cleaning, avoiding damage, and maintaining the furniture's appearance.

Hardware Usage Guide

Using Dowels and Eccentric Nuts

Detailed guide on correctly installing dowels and eccentric nuts for furniture assembly.

Parts Identification

Exploded View Diagram

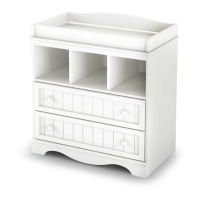
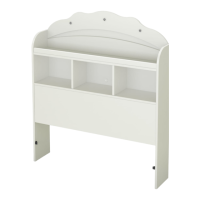
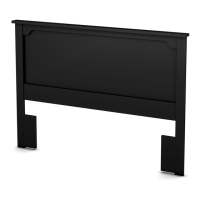
A visual diagram showing all furniture components with their respective labels for assembly reference.

Hardware and Tools Required

Hardware Components List

Comprehensive list of all hardware parts needed for assembly, including codes and quantities.

Assembly Steps - Part 1

Connecting Side and Support Panels (Steps 1-2)

Steps 1 and 2 detail connecting side and support panels using dowels, cam locks, and felt protectors.

Assembly Steps - Part 2

Attaching Frame Components (Steps 3-4)

Steps 3 and 4 involve attaching frame components using plastic dowels and eccentric nuts.

Assembly Steps - Part 3

Securing Main Panels (Step 5)

Step 5 demonstrates how to secure main structural panels using flat head screws.

Assembly Steps - Part 4

Joining Frame Sections (Steps 6-7)

Steps 6 and 7 focus on positioning and joining frame sections together using screws.

Assembly Steps - Part 5

Finalizing Headboard Structure (Step 8)

Step 8 details the process of locking the main headboard components together using eccentric nuts.

Final Assembly and Attachment

Attaching Headboard to Bed (Step 9)

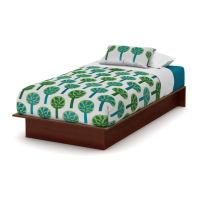
Step 9 explains how to attach the completed headboard to a platform bed using screws and washers.

Warranty and Contact Information

5-Year Limited Warranty Details

Detailed terms and conditions of the 5-year limited warranty provided by the manufacturer.
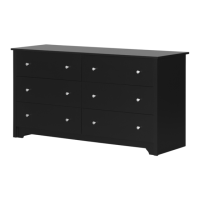
Related product manuals