EasyManua.ls Logo

South Shore 3576 User Manual

South Shore 3576
20 pages
To Next Page IconTo Next Page
Page #1 background imageLoading...
Page #1 background image
-3576-
Morgan Cherry
Cerezo morgan
Cerisier morgan
Model/ / ModeloModèle
Article/ / ArticuloItem
1-800-290-0465
Rev.:Bi2
ADULT ASSEMBLY REQUIRED
DOIT ÊTRE ASSEMBLÉ PAR UN ADULTE
DEBE SER ENSAMBLADO POR UN ADULTA
Serial number / Numéro de série / número de serie
FRANÇAIS
ESPANOL
ENGLISH
N.B.: It is important to carefully read the instructions
before beginning the assembly.
Identify all the parts and hardware.
We recommend that you assemble the unit
on a carpeted floor to avoid scratches.
To make the assemble easier and more pleasant,
ask a friend to help you !
In the box on that page, write the 9 (nine)
digits serial number that can be found on the label
on the furniture.
2 people required !
Keep the booklet as a .
This page contains all pertinent information regar-
ding replacement pieces and maintenance.
reference
Pour un assemblage facile et agréable,
demandez à un ami de vous aider !
Gardez le livret pour . Ce livret contient
toutes les informations pertinentes pour un rempla-
cement de pièce ou pour un entretien périodique.
références
N.B. Il est important de bien lire les instructions
avant de commencer l’assemblage.
Bien identifier les pièces et la quincaillerie.
Il est recommandé d’assembler l’unité
sur un tapis pour éviter les égratignures.
Écrire le numéro de série à 9 chiffres provenant de
l’étiquette collée sur le meuble dans la case sur cette page.
2 personnes requises !
Guarde al cuaderno a modo de futura.
Este cuaderno contiene todas las informaciones
necesarias para un reemplazo de pieza
o un mantenimiento periodico.
referencia
N.B. Lea con detenimiento las instrucciones
antes de comenzar a ensamblar su mueble.
Identifique las piezas y los articulos de ferretería.
Se recomienda ensamblar la unidad sobre una
alfombra para evitar las rayaduras.
Para un ensamblaje facil y placentero, pida
ayuda a un amigo.
En la casilla de esta página, escribir el número de serie de
9 (nueve) dígitos que se encoentra en la etiqueta
sobre el mueble.
Se necesitan dos personas !
ASSEMBLY INSTRUCTIONS
INSTRUCCIONES DE ENSAMBLAJE
INSTRUCTIONS D’ASSEMBLAGE
-085-
10014245
Twin Loft Bed Storage Unit
Unidad con espacios separados para cama
cucheta simple
Unité de rangement lit simple superposé
01/04/2011
LEFT
GAUCHE
IZQUIERDO
RIGHT
DROIT
DERECHO
Question and Answer IconNeed help?

Do you have a question about the South Shore 3576 and is the answer not in the manual?

South Shore 3576 Specifications

General IconGeneral
BrandSouth Shore
Model3576
CategoryIndoor Furnishing
LanguageEnglish

Summary

Product Identification and Preparation

Model and Item Details

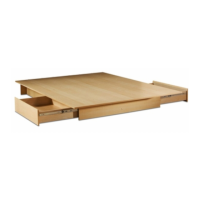
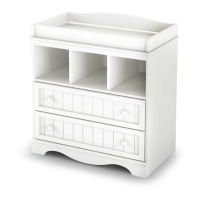
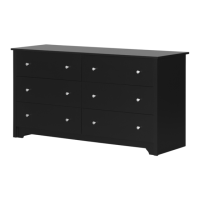
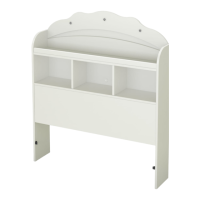
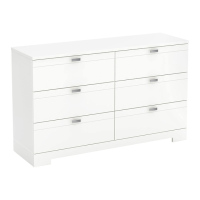
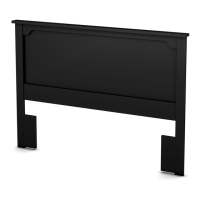
Identifies the model number and item name for the storage unit.

Assembly Precautions and Tips

Key advice before starting assembly, including reading instructions and identifying parts.

Customer Service Phone Number

Provides the primary customer service phone number for assistance.

Customer Support and Maintenance

Customer Service and Part Orders

Instructions for contacting customer service for assembly help or replacement parts.

Maintenance Tips and Care Instructions

Guidance on cleaning and protecting the furniture's finish.

Assembly Sequence

Assembly Box Order

Specifies the recommended order for assembling components from different boxes.

Component Identification

Exploded View and Part Identification

Diagram showing all parts with reference numbers for assembly.

Left and Right Side Panels

Identifies the left and right side panels of the unit.

Hardware List

Hardware List and Quantities

Detailed list of all hardware components required for assembly.

Assembly Instructions: Tools and Step 1

Tools and Personnel Required

Lists necessary tools and the number of people needed for assembly.

First Assembly Step

Instructions for assembling parts C, C-1 with specified hardware.

Assembly Instructions: Steps 2-3

Steps 2 and 3 Assembly

Instructions for attaching part T and securing S/S-1.

Assembly Instructions: Steps 4-5

Steps 4 and 5 Assembly

Instructions for securing S/S-1 and connecting frame components.

Assembly Instructions: Steps 6-7

Steps 6 and 7 Assembly

Instructions for attaching S/S-1 to R-3 and inserting unit U.

Assembly Instructions: Steps 8-9

Steps 8 and 9 Assembly

Instructions for attaching drawer mechanism components.

Assembly Instructions: Steps 10-11

Steps 10 and 11 Assembly

Instructions for assembling drawer mechanism parts.

Assembly Instructions: Steps 12-13

Steps 12 and 13 Assembly

Instructions for connecting side panels to the frame.

Assembly Instructions: Steps 14-15

Steps 14 and 15 Assembly

Instructions for panel orientation and attachment.

Assembly Instructions: Steps 16-17

Steps 16 and 17 Assembly

Instructions for attaching P-D and connecting G.

Assembly Instructions: Steps 18-19

Steps 18 and 19 Assembly

Instructions for attaching drawer and shelf components.

Assembly Instructions: Step 20

Twentieth Assembly Step

Instructions for attaching main panels using specified hardware.

Paper Removal Instruction

Guidance on how to remove protective paper from components.

Reversible Configuration and Final Steps

Steps 21 and 22 Assembly

Details reversible configuration and final drawer/door attachment.

Reversible Configuration Detail

Step 21 Detailed View: Reversible Options

Shows detailed attachment for reversible left/right configurations using -251- hardware.

Final Drawer/Door Attachment

Step 22 Final Attachment

Final instructions for attaching drawer/door components C-1 and C using hardware -50- and -148-.

Warranty and Contact Information

5-Year Limited Warranty Information

Details the terms, conditions, and limitations of the product warranty.

Customer Service Contact Details

Provides contact numbers, email, and website for customer support.

Related product manuals