EasyManua.ls Logo

Soyer BMK-12 W - User Manual

Soyer BMK-12 W
81 pages
Print Icon
To Next Page IconTo Next Page
Loading...
Operating Instructions
BMK-12 W
Stud Welder

Table of Contents

Questions and Answers

  • D
    David KhanSep 17, 2025
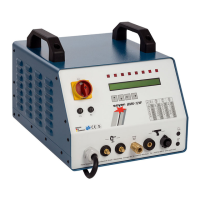
    What should I do if the stud doesn't lift and no current is generated on my Soyer BMK-12 W?
    • A
      angela21Sep 18, 2025
      If the stud doesn't lift, and neither the preweld nor main current arc is generated, even though the LED "Stud on workpiece” lights up, ensure that the height of lift is correctly set in accordance with the operating instructions of your stud welding gun.
  • B
    Brian Brown MDAug 25, 2025
    What to do if my Soyer BMK-12 W does not weld, showing no or poor sparking?
    • B
      brandon19Aug 25, 2025
      If your Soyer Welding System does not weld and you notice no or poor sparking, ensure the system is connected to the mains supply and switched on, keeping the main switch in position "1" for drawn arc and short-cycle drawn arc operation. Also, verify that the operating mode is set to "OP". Check all cables and hoses for proper connection and damage, replacing them if necessary. Ensure the earth cables are correctly connected and clamps are attached to the workpiece, and that welding points are clean. For drawn arc welding, make sure the height of lift and depth of immersion are correctly adjusted, and the gas flow rate is set to 4-5 l/min. Finally, ensure the gun is vertical and the ceramic ferrule and stud holder are centered.
  • H
    hdunnAug 25, 2025
    Why does the main switch of my Soyer BMK-12 W Welding System not remain in position "1"?
    • C
      Cheryl KleinAug 26, 2025
      If your Soyer Welding System's main switch doesn't stay in position "1", it could be due to one or more failed phases. Check the mains supply fuses. If the issue continues, the fuse F2 may be defective, and you should replace it.
  • K
    Kevin BryanAug 26, 2025
    How to troubleshoot varying welding results with my Soyer BMK-12 W Welding System?
    • D
      david53Aug 26, 2025
      If you're experiencing varying welding results with your Soyer Welding System, start by adjusting the welding energy. Then, check all cable connections and earth clamps to ensure they are tight. Make sure the stud is fully inserted into the stud holder, replacing the holder if necessary. Address any magnetic blowing action by adjusting the fixture of earth clamps, placing iron parts on the edges, or rotating the welding gun. Verify that the height of lift and depth of immersion are correctly set according to the welding gun's operating instructions. Use only SOYER® welding studs as per DIN EN ISO 13 918. Reset the welding time and gas flow as needed, and ensure the parent metal is suitable for welding.
  • H
    Heather DavisSep 18, 2025
    What to do if the gas flow duration is set to "0" on my Soyer Welding System?
    • B
      brandon53Sep 18, 2025
      Set the gas flow duration to the desired preflow time. Ensure that the gas flow rate is set to 4-5 l/min using the control cock.
  • N
    Nicholas FordSep 23, 2025
    Why is the stud not welded with the total flange surface on my Soyer BMK-12 W?
    • T
      Tina SimsSep 23, 2025
      If the stud is not welded with the total flange surface, it means the welding time is too short. Readjust the time for main current duration according to the list.
  • B
    Bruce OliverSep 9, 2025
    What to do if my Soyer Welding System does not weld or has poor sparking?
    • B
      Brianna WatsonSep 9, 2025
      If your Soyer Welding System isn't welding or sparking poorly, ensure the system is connected to the mains supply and switched on, with the main switch in position "1" for drawn arc and short-cycle drawn arc operation. Verify that the operating mode is set to "OP" and that all welding, control cables, and gas hoses are properly connected and undamaged. Check for burnt connecting plugs or sockets, and ensure both earth cables are correctly connected with the clamps attached to the workpiece. Clean the welding and earth connection points, correctly adjust the height of lift and depth of immersion, and set the gas flow rate to 4-5 l/min. Also, make sure the gun is vertical and the ceramic ferrule and stud holder are centered.
  • C
    Crystal KruegerSep 10, 2025
    Why am I getting varying welding results with my Soyer Welding System?
    • J
      john05Sep 10, 2025
      Inconsistent welding results with your Soyer Welding System can stem from several factors. Ensure that the welding energy is correctly adjusted and all cable connections and earth clamps are tightly secured to avoid transition resistances. Check that the stud is fully inserted into the stud holder, replacing the holder if necessary. Address potential magnetic blowing action by altering the fixture of earth clamps, placing iron parts on the edges, or rotating the welding gun. Verify the height of lift and depth of immersion are correctly set, and use only SOYER® welding studs as per DIN EN ISO 13 918. Confirm that the welding time and gas flow are correctly set and that you are using suitable material combinations.
  • C
    Connie StewartSep 3, 2025
    Why is the stud face deformed when using my Soyer BMK-12 W?
    • M
      Mr. Joshua SimpsonSep 3, 2025
      If the stud face is deformed when using your Soyer Welding System, use new welding studs. Set the distance between the stud holder and stud face to 2-3 mm. Ensure that all three gun legs are simultaneously and evenly positioned on the workpiece, and set the lift correctly.
  • C
    Christopher RogersSep 1, 2025
    What should I do if the gas flow rate is set too low on my Soyer Welding System?
    • S
      Sharon WallSep 1, 2025
      If the gas flow rate is set too low on your Soyer Welding System, set the gas flow rate to 4-5 l/min using the control cock. If the issue persists, the solenoid valve in the stud welder may be soiled or defective; deaerate and clean it, or have it replaced by SOYER customer service.

Summary

General Information and Product Overview

Key Operating Principles

Key operating principles and initial observations for safe and effective use.

Stud Welder Description

Short-cycle Drawn Arc Technology

Explains the short-cycle drawn arc welding process and its underlying principles.

Safety Instructions

Reference Signs and General Safety

Explains warning symbols and general safety principles for operating the equipment.

Personnel and Operational Safety

Covers staff qualifications, operational hazards, and safety-conscious working practices.

Pre-Operation and Installation Safety

Lists essential checks before system start-up, welding, and safety precautions at the installation site.

Equipment Usage and Maintenance Safety

Specifies safety for working with equipment, maintenance, unauthorized modifications, and stopping procedures.

Start-up Procedures

Start-up Preparation

Outlines steps for preparing the welder, including earth connection, gun, gas, and power supply.

Operating Mode Adjustment

Explains how to select and adjust operating modes (OP, PRE, LIFT, GAS) and parameters.

Operation

Standard Welding Operation

Covers basic steps for standard welding, including parameter setting for MCTIME, PCTIME, GPTIME, RLTIME.

Welding Parameters Table

Presents recommended welding parameters based on stud size and material for optimal results.

Quality Control

Maintenance

Troubleshooting

Malfunctions and Error Resolution

Lists common errors, their causes, and recommended elimination steps for the stud welder.

Appendix A: Short-cycle Drawn Arc Stud Welding

Soyer BMK-12 W Specifications

General IconGeneral
BrandSoyer
ModelBMK-12 W
CategoryWelding System
LanguageEnglish

Related product manuals