Page 8 Spacerails, LLC. All rights reserved. Spacerails.com
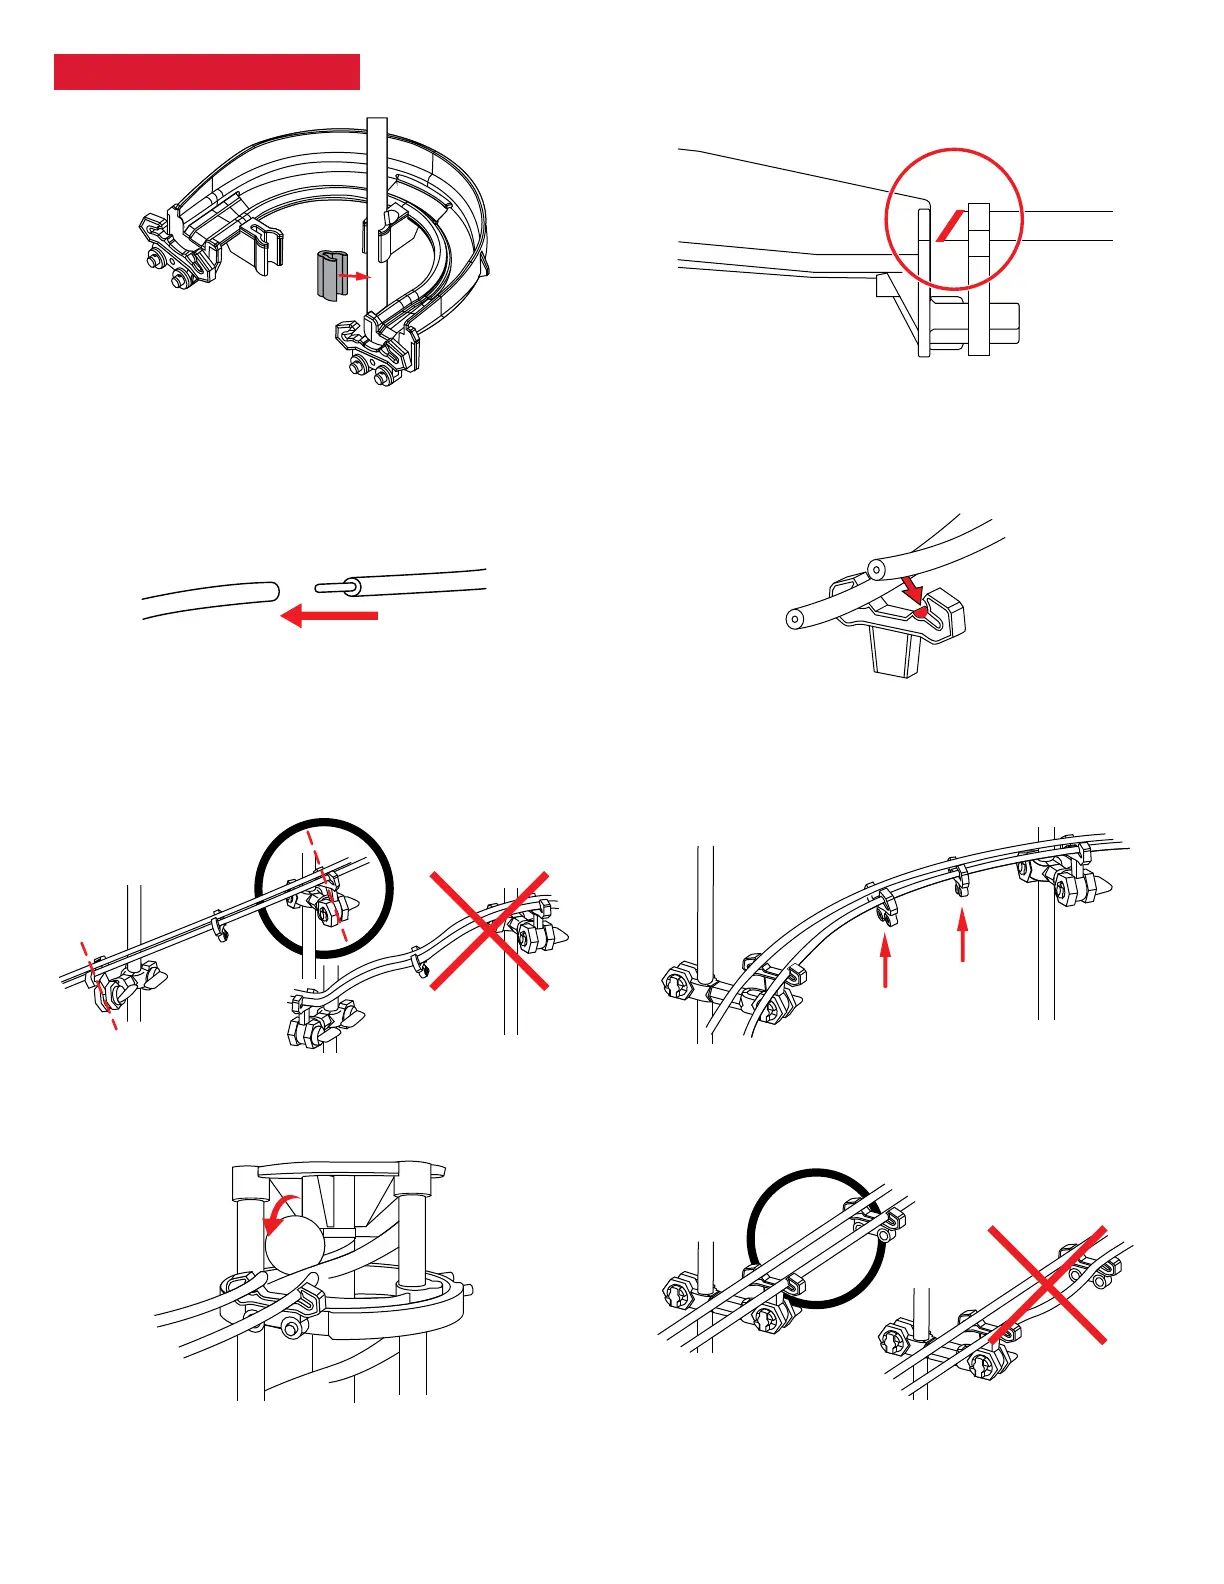
Rail joining for custom designs: To adjust your
designs with the Rails, use the Rail Couplings to increase
the length of your Rail sections.
Connecting Rails to Arms: To install the Rails, press
them into the Arm as shown. You should hear a click
when the Rail is locked in place.
Angling the Arms: Install the Arms at the angle of the
incline the Rails will travel along.
Railroad stability: To maintain stability on longer track
segments, attach Rail Clips as needed.
Elevator Exit: When installing the Elevator exit Rails, pull
the Rails close to the Elevator Helix to ensure the Marble
enters the rollercoaster smoothly.
Smooth Rails for ecient travel: Make sure the Rails
connect smoothly and are free of any bumps, twists,
or kinks.
Corner stability: To provide extra stability on the
Corners, place Corner Stands directly below the Corners.
Rail and Corner connections: Cut the rail at a 45° angle
where it meets a Corner. This will help smooth out the
transition as the Marble ies around the track.
ASSEMBLY TIPS & TRICKS