Seaich Corporation, LLC. All rights reserved. www.seaich.com
|
Spacerails, LLC. www.spacerails.com Page 5
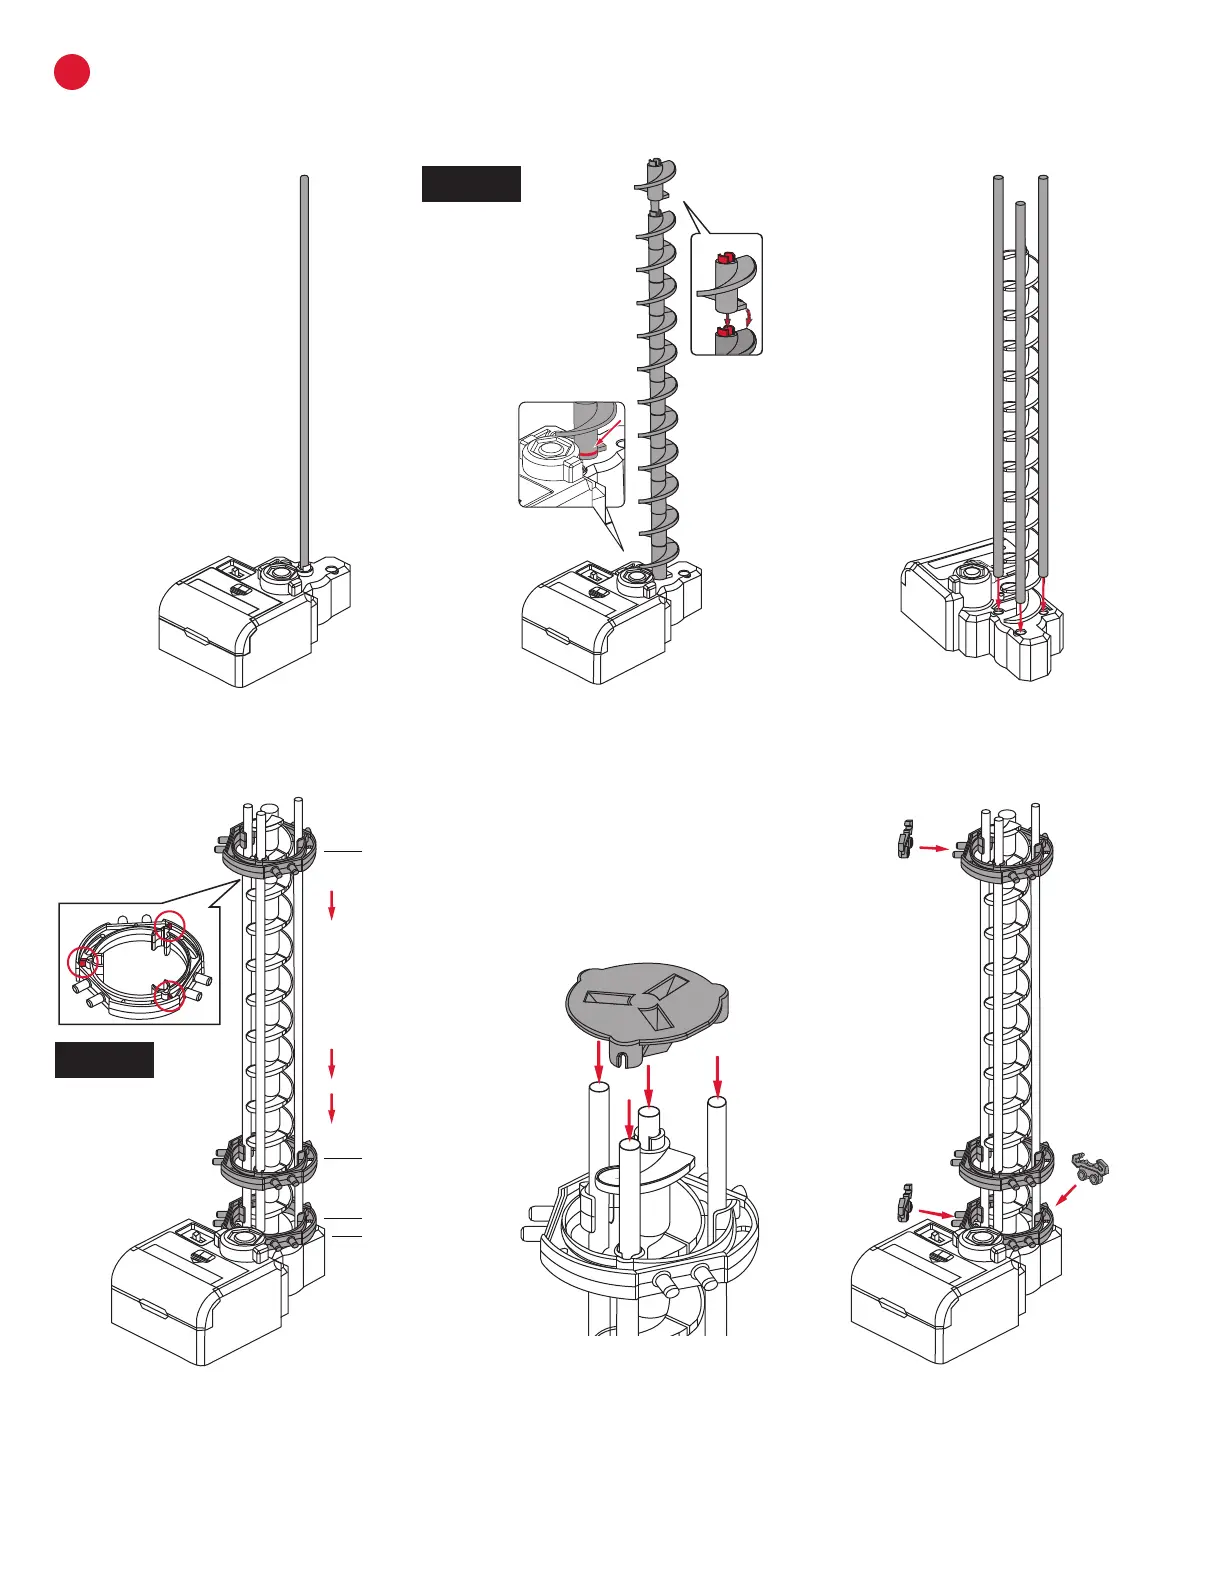
Use each step to assemble all 3 elevators.
Step 3: Attach 3 of Shaft 300mm
to the Power Box.
D
ELEVATOR ASSEMBLY
Step 2: Connect Elevator Helix
pieces together and slide onto
the shaft.
NOTE:
There should be no
space between the
Power Box and the
Helix. If the Elevator
Helix is not installed
correctly, the elevator
will not run.
NOTE:
Make sure convex
parts point upward.
Step 1: Place Shaft 300mm into the
Power Box.
Step 5: Place the Elevator Cover
on top of the shafts.
Step 6: Attach Rail Clips onto the
elevator rings.
Step 4: Place the 3 Elevator Rings
over the 3 shafts. For 1:1 ratio
placement, see the tri-fold.
0 mm
5 mm
51 mm