SETUP12
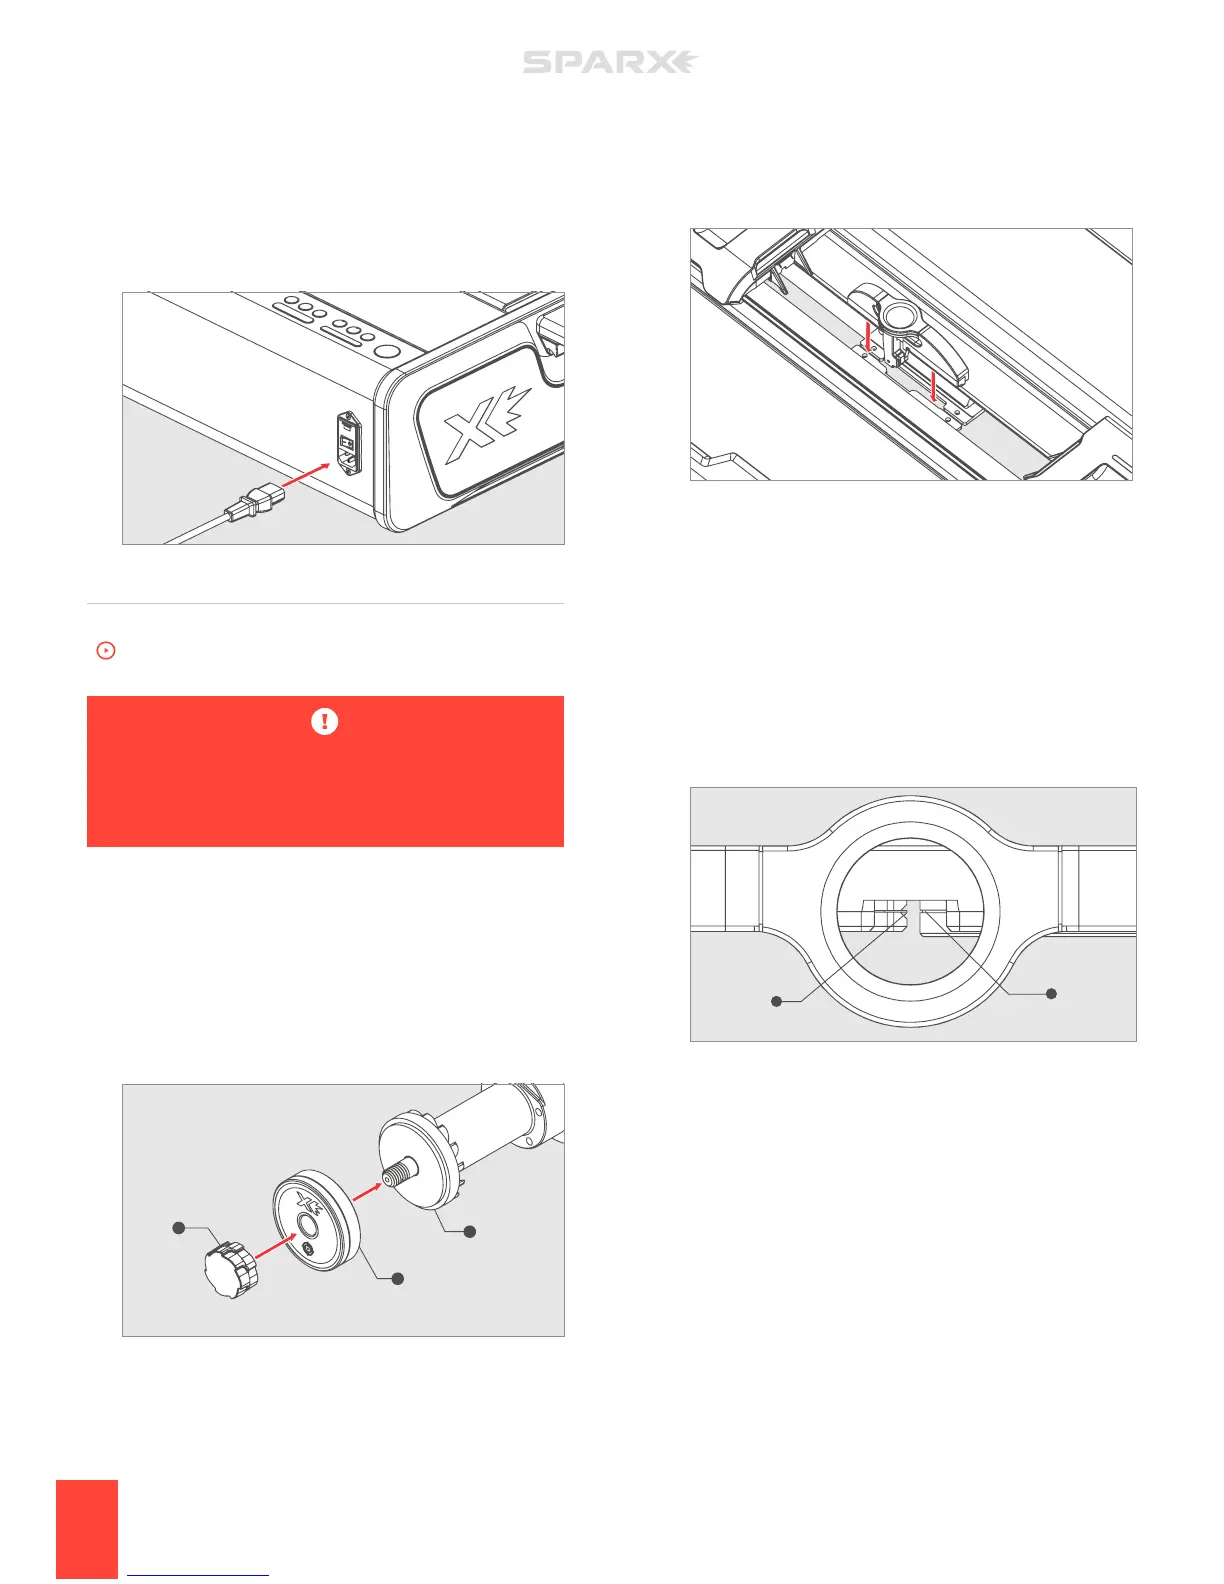
towards the user) into the Skate Clamp. Place the Optical
Alignment Tool into the slot and let it fall into place. Release
the Clamp Lever.
3 INITIATE ALIGNMENT MODE
Press the
c
Alignment Button to send the Carriage to its
alignment position. When the Carriage is in place, a tone will
sound and the case will illuminate white.
4 LOCATE THE TAB AND GROOVE
Look through the eyepiece of the Optical Alignment Tool and
locate the indicator tab (A) of the Optical Alignment Tool and
the groove (B) on the Alignment Ring.
A
B
5 PLUG IN THE POWER CORD
Plug the Power Cord into the Power Input Port on the back of
the sharpener. Plug the other end into a wall outlet. Toggle the
switch on the Power Input Port to the on position (I=on, 0=o).
ALIGNMENT
To watch the How-To video, visit sparxhockey.com/alignment.
The Alignment process is required when you first receive
your Sparx™ Sharpener and also after every time the
sharpener is moved and/or travels.
1 INSTALL THE ALIGNMENT RING
Open the Glass Door. The Carriage will automatically move into
the install position, and the sharpener will play a “ready” tone.
While holding the Grinding Ring Shaft (C), unscrew the Thumb
Nut (A). Slide the Alignment Ring (B) onto the Grinding Ring
Shaft (C), with the label facing out. Replace and tighten the
Thumb Nut until hand-tight. Close the Glass Door.
2 INSTALL THE OPTICAL ALIGNMENT TOOL
Press down on the Clamp Lever to open the Skate Clamp.
Place the Optical Alignment Tool (with Sparx™ logo facing
A
A
B
C