2. Attach Speaker Cables
a. Attach the speaker cable (observing the proper polarity with your
amplier: + to + and – to –). Make sure the proper channel of the
amplier is connected to the proper speaker. Left Amp Channel
to Left Speaker, Right Amp Channel to Right Speaker, Center Amp
Channel to Center Speaker, etc.
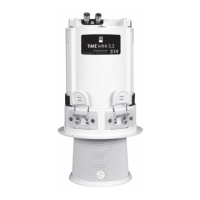
b. Attach the RJ45 Connector from the TIME Mini Controller to the
speaker. Make sure the RJ45 connector snaps securely into place.
CAUTION: The RJ45 connector on the TIME Mini speaker is designed
to only connect to the TIME Mini Controller. Connecting the other
end of the RJ45 Cable to any other connection other than the RJ45
connector on the TIME Mini Controller may seriously damage the
speaker and void the speaker's warranty.
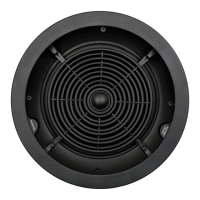
3. Install Speaker into Ceiling
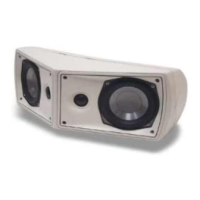
Carefully insert the speaker assembly into the ceiling cut out and push
straight up (Figure 6)until the speaker snaps into place (Figure 7).
NOTE: The removable arrow sticker indicates which direction the
speaker is pointed (Figure 6).
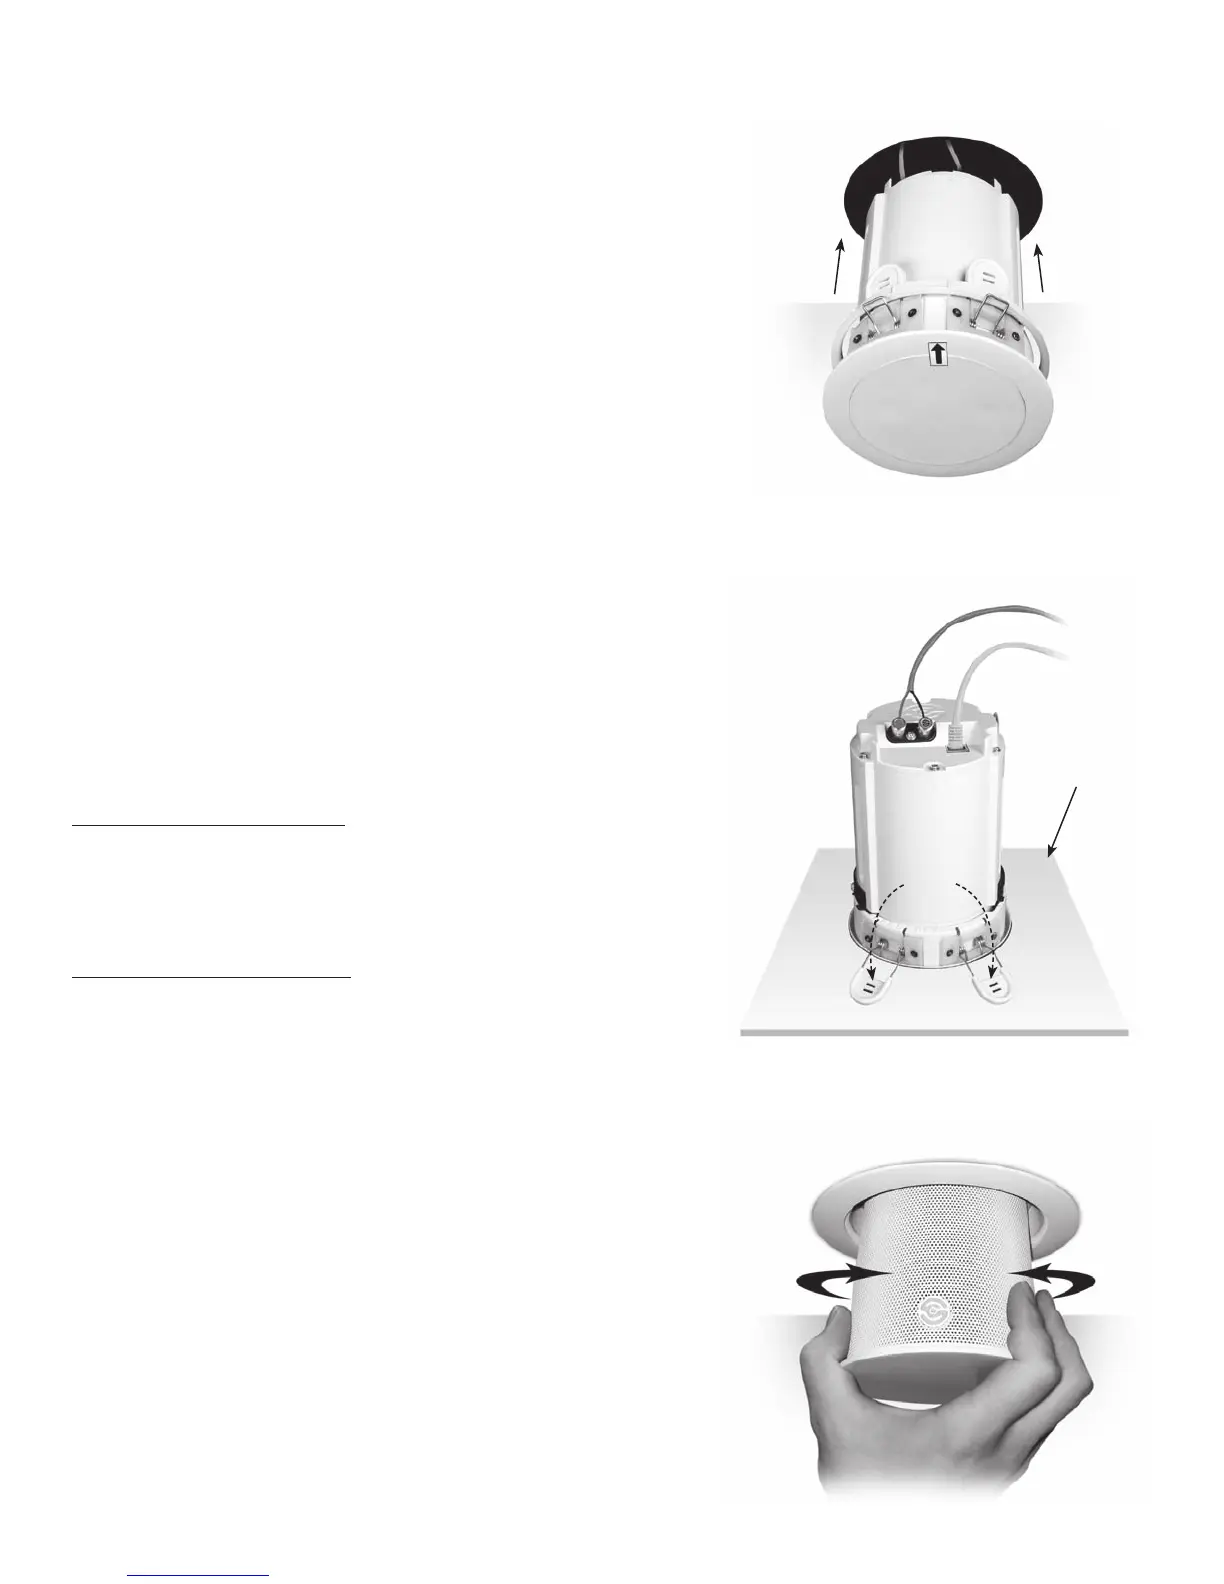
4. Aiming the Speaker
After installing the speaker and the TIME Mini Controller, bring all the
speakers down into the room (see separate controller manual for in-
structions on how to do this). Then aim each speaker in the direction
you desire. The logo on the speaker grille indicates which direction
the speaker is pointed. Rotate the speaker by grabbing the extended
speaker enclosure and gently turning it to point in the direction you
desire (See Figure 8). Repeat this for all speakers. After this is done, you
can retract the speakers into the ceiling, as directed in the controller's
manual.
NOTE: Do not rotate more than 360º in one direction. Doing so can
damage the speaker and RJ45 data cable.
PAINTING THE SPEAKERS
If you plan to paint your speakers, we recommend that it be done after
installation, especially if you want to paint it the same color as the ceil-
ing. Simply leave the speaker retracted into the ceiling and paint the
exposed surfaces. Do not attempt to paint the metal grille mesh.
REMOVING THE SPEAKER
1. Be sure the TIME Mini Controller is turned off.
2. Insert a at blade screwdriver or putty knife between the speaker
ange and the ceiling (Figure 9). It is easier if you use two tools one on
each side of the speaker.
3. Gently pry the speaker away from the ceiling (Figure 10). As you move
the speaker downward, you can then put your ngers between the
speaker ange and the ceiling. Then pull the speaker straight down
from the ceiling (Figure 11).
4. Disconnect the RJ45 data cable and the speaker wires.
3
FIGURE 6
Push Speaker into Ceiling Cut Out
FIGURE 7
Mounting Feet snap into place
Top View of
Drywall Ceiling
FIGURE 8
Rotating the Speaker