EasyManua.ls Logo

SPEC-D Tuning 2LHP-DEN07-TM User Manual

SPEC-D Tuning 2LHP-DEN07-TM
5 pages
To Next Page IconTo Next Page
Page #1 background imageLoading...
Page #1 background image
If you experience any difficulties that the instruction did not cover, Please seek local auto shop for advise.
Please wear protection b efo re you wo rk on you r vehicle.
An assistant is helpful when removing the front bumper.
Please be careful while working with the bumper or body part to avoid scratching.
Do not make direct contact with the halogen bulb or the wire assem bly until the un it has co oled down after use
.
W W W . S P E C D T U N I N G . C O M
2 007-2010 G MC Y UKON DENALI P ROJECTOR H EADLIGHTS
2LHP-DEN07-TM
2LHP-DEN07JM-TM
Handy Remover
¼” Drive Ratchet
¼” Drive Extensions (3 to 6 inches)
10mm Socket
If your Headlight is Halo type, you also need:
Wire Stripper
Wire Crimper
4 Blue Quick Splice Wire Connectors
2 Red Wires (8 inch)
2 Black Wires (8 inch)
INSTALLATI ON INSTRUCTIO NS
TOOLS AND SUPPLIES REQUIRED
Question and Answer IconNeed help?

Do you have a question about the SPEC-D Tuning 2LHP-DEN07-TM and is the answer not in the manual?

SPEC-D Tuning 2LHP-DEN07-TM Specifications

General IconGeneral
BrandSPEC-D Tuning
Model2LHP-DEN07-TM
TypeProjector Headlights
Housing ColorChrome
Lens ColorClear
Bulb IncludedNo
SAE/DOT ApprovedYes
Beam PatternProjector

Summary

Installation Preparation and Parts

Tools and Supplies Required

Lists all necessary tools and supplies for the installation process.

Product Part Numbers

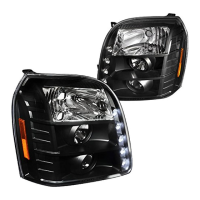
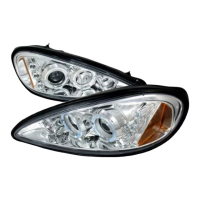
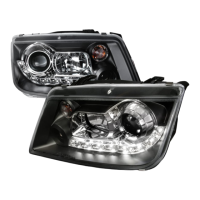
Lists the specific part numbers for the projector headlights.

Headlight Removal and Disconnection

Step 1: Open Hood and Remove Top Bolts

Instructions on opening the hood and removing six top bolts.

Step 2: Remove Wheel Well Bolts

Guidance on removing two bolts located in the wheel well.

Step 3: Remove Hidden Bumper Bolt

Instructions for locating and removing a hidden bolt between bumper and fender.

Step 4: Remove Headlight Mounting Bolts

Details on removing the two bolts that secure the headlight assembly.

Step 5: Pull Out Headlight Assembly

Gently pulling the headlight to access the wire harness.

Step 6: Disconnect Headlight Connectors

Detaching the electrical connectors from the original headlight.

Step 7: Remove Harness from OEM Headlight

Separating the vehicle's harness from the old headlight.

Step 8: Remove Driving Light Bulb

Instructions for removing the driving light bulb.

New Headlight Wiring and Installation

Step 9: Connect Driving Light Socket to LED Wire

Connecting the driving light socket to the new LED wire, ensuring correct polarity.

Step 10: Connect All Harnesses to New Headlight

Connecting all electrical connectors and harnesses to the new headlight unit.

Step 11: Connect Vehicle Connectors

Connecting the vehicle's wiring harness to the new headlight.

Step 12: Position New Headlight

Placing the new headlight assembly into its original mounting location.

Step 13: Install Headlight Fastening Bolts

Securing the new headlight using two bolts.

Step 14: Reinstall Hidden Bumper Bolt

Reinstalling the hidden bolt between the bumper and fender.

Step 15: Reinstall Wheel Well Bolts

Reinstalling the two bolts under the wheel well.

Step 16: Reinstall Top Front Grill Bolts

Securing the top front grill with six bolts.

Installation Completion and Repetition

Step 17: Installation Complete

Confirms the installation is finished and instructs to repeat for the opposite side.

Related product manuals