3.2. Set the WR to Your Target
Place the White Reference
panel next to your target, so
that it covers approximately
a minimum of 10% of your
Spectral camera view.
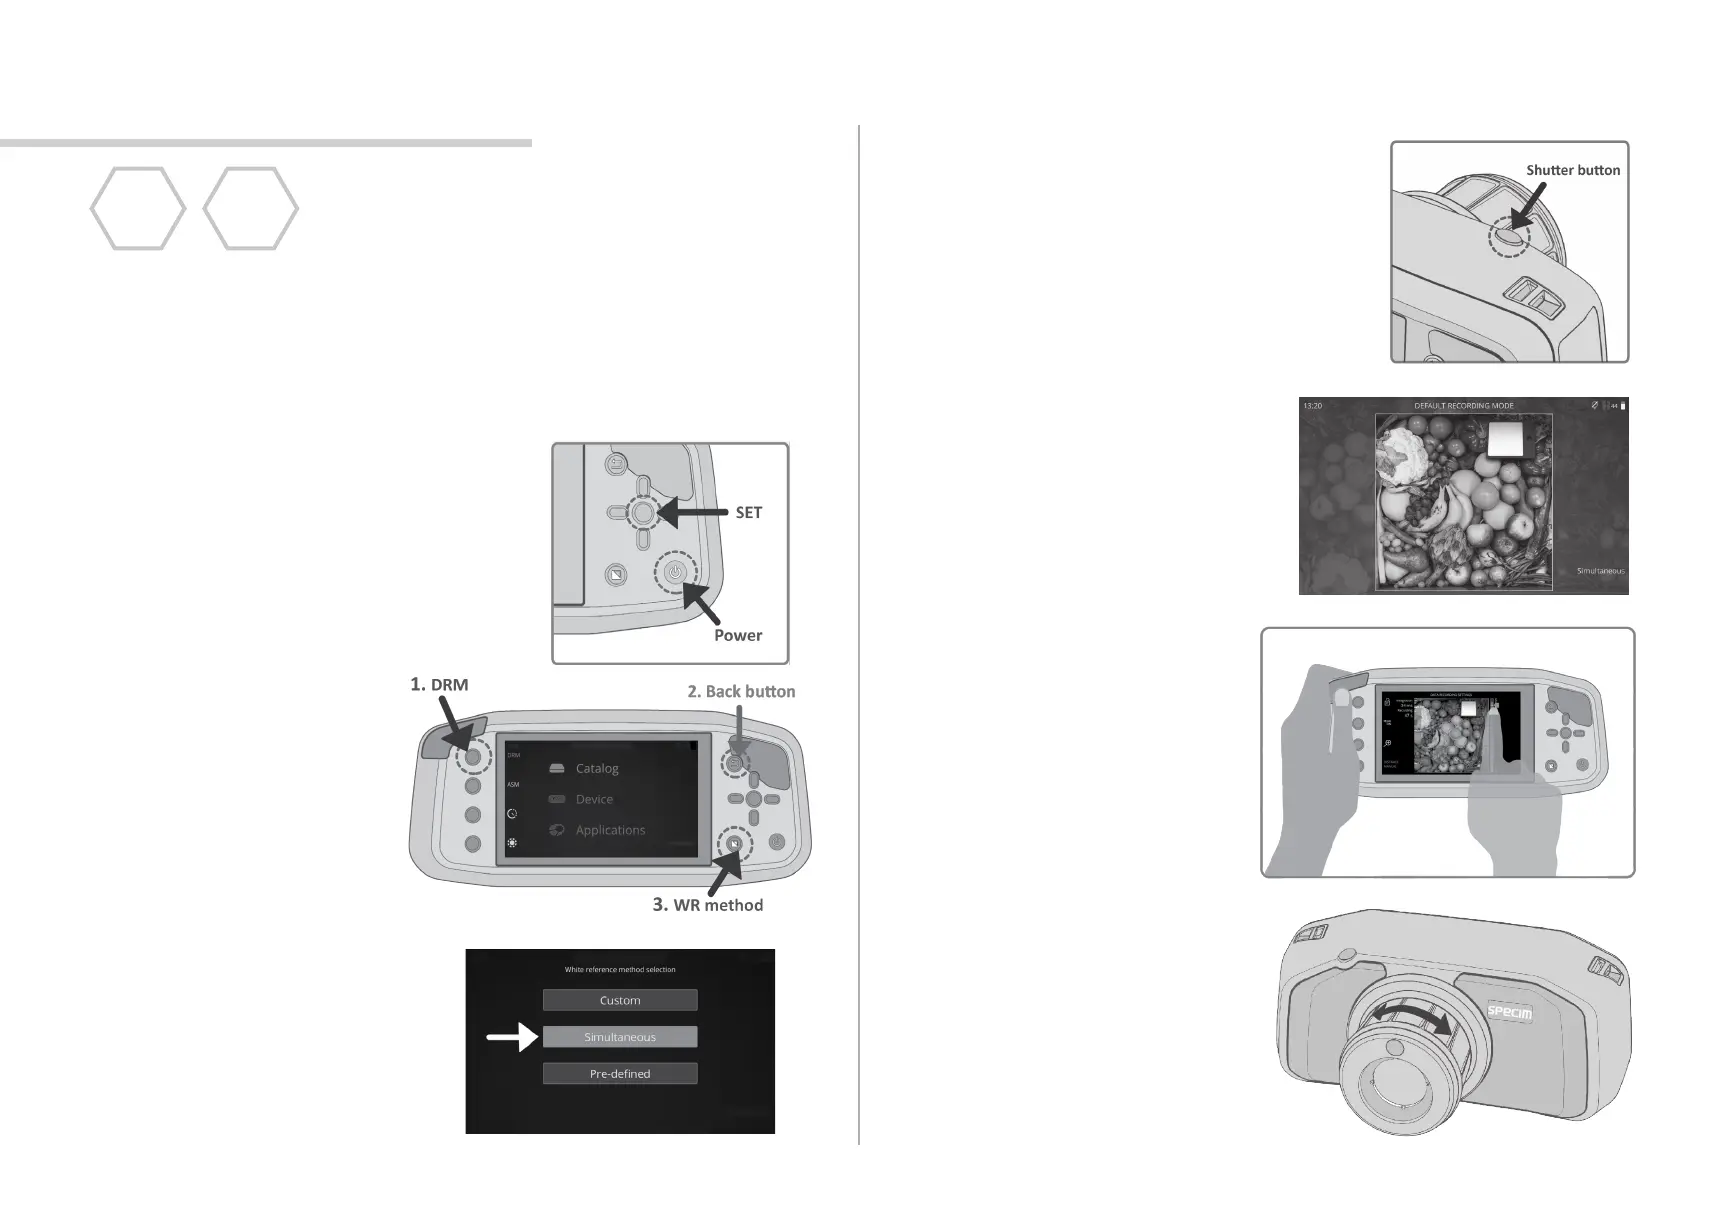
1. POWER ON
Press the Power buon to switch the Specim
IQ on. Power buon should be pressed for
2-3 seconds unl you hear a signal.
2. DEVICE SETUP
2.1. Press the SET buon
to go to the Menu.
3. DATA RECORDING SETTINGS
3.1. Half press the shuer buon to
setup the Data Recording Sengs.
Data Recording Sengs includes
seng up the correct integraon
me and focusing the Specim IQ.
This data recording ow uses Default Recording Mode (DRM) and
Simultaneous White Reference method. In this WR method the WR
panel is included in the recorded data and dened aer the
recording.
3.3. Integraon Time
See the Integraon Slider
on the right. The white
indicator line will auto-
macally be set up to
the green bar, which
shows the opmal value
for the integraon me.
You can change the integra-
on me by sliding the
white indicator line with
your nger, or control it
with the navigaon buons.
3.4. Focus
Rotate the focus ring unl
the target is highlighted with
maximum amount of orange
indicators.
2.3. Press SIMULTANEOUS
on the touch screen,
or choose it with the
navigaon and SET
buons.
2.2. Choose DRM
mode by pressing
the Custom 1
buon. Return to
Viewnder view
with Back buon.
Then, press the WR
method buon.
2. DATA RECORDING
DRM
Simult.
WR
 Loading...