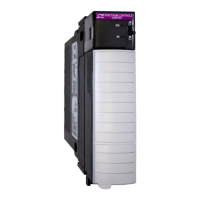
2-6 Chapter 2: Installing a ControlLogix 1756sc-CTR8-SC Module
Owner’s Guide 0300199-01 Rev. D
Follow these guidelines to wire your input signal cables:
• Power, input, and output (I/O) wiring must be in accordance with Class I,
Division 2 wiring methods [Article 501-4(b) of the National Electrical Code,
NFPA 70] and in accordance with the authority having jurisdiction.
• Peripheral equipment must be suitable for the location in which it is used.
• Route the field wiring away from any other wiring and as far as possible
from sources of electrical noise, such as motors, transformers, contactors,
and ac devices. As a general rule, allow at least 15.2 cm (about 6 in.) of
separation for every 120 V of power.
• Routing the field wiring in a grounded conduit can reduce electrical noise
further.
• If the field wiring must cross ac or power cables, ensure that they cross at
right angles.
• To limit the pickup of electrical noise, keep thermocouple, RTD, millivolt,
and milliamp signal wires as far from power and load lines as possible.
• Ground the shield drain wire at only one end of the cable. The preferred
location is at the shield connections at the ControlLogix chassis. (Refer to
IEEE Std. 518, Section 6.4.2.7 or contact your sensor manufacturer for
additional details.)
• Keep all unshielded wires as short as possible.
• To limit overall cable impedance, keep input cables as short as possible.
Locate your I/O chassis as near the RTD or thermocouple sensors as your
application will permit.
• Tighten screw terminals with care. Excessive tightening can strip a screw.
The RTB terminations can accommodate 2.1…0.25 mm
2
(14…22 AWG)
shielded wire and a torque of 0.5 N•m (4.4 lb•in.).
• Follow system grounding and wiring guidelines found in your ControlLogix
Installation and Operation Manual.
• Wire the RTB before installing it onto the module. Use a 1/8-inch (3.2 mm)
maximum flat-bladed screwdriver.
NOTE
Before wiring, pull the housing off the RTB.