Spring 2010
the CRONICLE issue
65:9
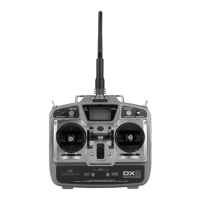
see the “main screen” shown in Panel 1.
To initiate programming, momentarily
depress (click) the roller switch. at
takes you to the first screen of the first
of two menus (for some reason they are
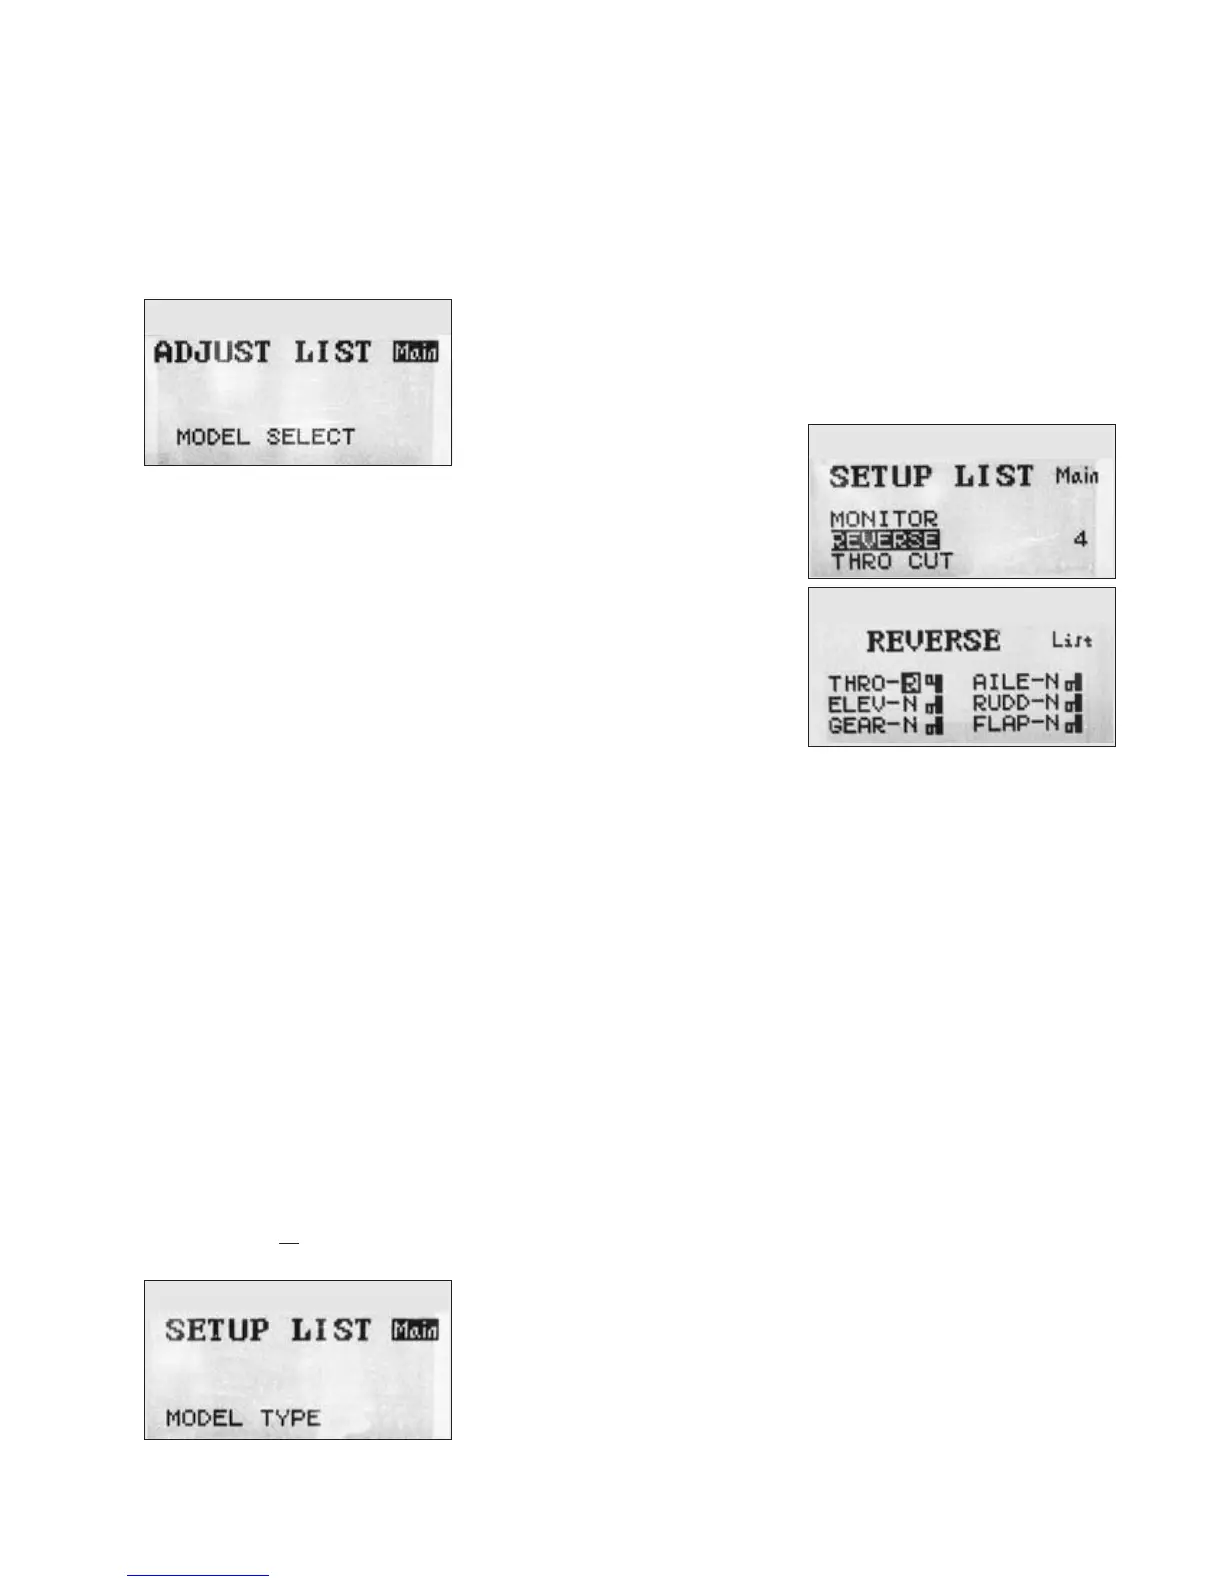
called lists). is one is the adjust list
(see Panel 2). When you arrive there the
word “Main” is highlighted to indicate it
is live and that if you depress the roller
now you will return to the Main screen.
Don’t do that now; instead become
familiar with the roller and how it op-
erates—and how easy it is to overshoot
with it. You’ll discover that the “Main”
‘button’ becomes highlighted when
you reach the extreme left or counter-
clockwise end of 9 active roller notches
on the adjust list screen. Each notch
highlights a type of adjustment that can
be made, several of which, such as flaps,
are irrelevant for our simple boats (I was
surprised to find that spoilers and bomb
bay doors didn’t make the list—I guess
Spektrum is saving them for the DX8i).
Each time you roll to a new notch
those items scroll up from the bottom
of the screen, sequentially becoming
highlighted one at a time. e first and
last items on the list when highlighted
disconcertingly appear alone, but in
between those extremes three items ap-
pear at a time, the middle one of which
is highlighted. e 9th and last item on
the adjust list is setup list. Click on
it by depressing the roller.
at takes you to the second menu
of things you can do (see Panel 3).
is setup list works exactly like the
adjust list, except that the roller can
now select from 13 active notches, the
majority of which, such as thro cut,
you will never use (“thro” stands for
throttle, not throat—no, the setup list
does not include a way to exact revenge
on the person who dreamed up this
programming scheme). At the left end
of these 13 notches “Main” is high-
lighted as before, and at the right end
the highlight is on setup list . Cute. As
you have guessed by now, clicking on
any of the highlighted items on either
list (other than Main, adjust list and
setup list) drills down to the next level
of the menus. In the next section we’ll
deal with the specific items a 914er
needs to program in that lower menu
tier, but I strongly recommend that you
practice working with these menus until
you feel you can cope with them first.
From here on it gets easier.
Programming a CR 914
Step 1. Model #, type, & name
a. Number – e Main screen should
say mdl 1 if your CR 914 is the first boat
you program. If not, go to the adjust
list at the bottom of which you will
find the model select menu from
which you can select a number (1-10)
for the “model” you want to program.
b. Type – en from the initial setup
list screen, highlight model type.
Click on it, then click on the icon of
an airplane (labeled acro rather than,
say, apln or airp—perhaps RC avia-
tors have acrophobia, or maybe that’s
an acronym). e DX6i will beep to
impress you with how clever it is while it
records that your sailboat will be stored
in its memory as an acro, and then with
the roller shift the highlight to List.
c. Name – Click the roller to return
to setup list, then rotate the roller
one notch to highlight model name
and click on it. Rotate one notch to
shift the highlight from List to a blank
below the line that identifies the model
number. Click the roller, then rotate
it to select the characters you want to
‘type’ (something like “CR914” might be
nice). en rotate over to highlight the
word
ok! (I love that exclamation point:
some geek has a sense of humor), click
on it, then click again to return to the
model name screen and click on the
highlighted word List to return to the
setup list screen.
Panel 2
Panel 3
Step 2. “Wing tail mix”
at’s what the DX6i calls a function
that simply will not translate into our
native tongue but must be set correctly
(don’t worry about the “why,” just trust
me). From the setup list screen ro-
tate the roller 6 notches to the right to
highlight wing tail mix, then depress
the roller to bring up the wing tail mix
screen. Be sure that all three items on
that screen show inh to indicate that
they are “inhibited.” Click the roller to
return to the setup list.
Step 3. Servo direction
Now rotate the roller 2 notches to the
left to highlight
reverse, then depress
the roller to bring up the reverse screen
shown in Panel 5. Be sure the “aile”
control is set to “N” for Normal. If you
want your sail joystick to trim in the
sheets when you pull it toward you, the
way most sailors do, then scroll to high-
light the “N” next to “thro” (“throttle”
controls the sheets), click on it and then
rotate the roller one notch to change the
“N” to “R” (which will also change the
little switch icon so its handle points
up—see Panel 5). Click once to make
the DX6i remember your selection, then
scroll back to highlight List (ignore the
other four controls on this screen) and
click to return to the setup list screen.
Step 4. Rudder adjustments
a. Travel – Remember: the DX6i
thinks you turn your boat right or
left with ailerons, not the rudder. So
when you program the rudder joystick
ignore things that say rudd and work
with aile instead! Now, with your boat
electronics turned on and the transmit-
Panel 4
Panel 5
 Loading...