issue 65:10
the CRONICLE
Spring 2010
ter communicating with the receiver
(wiggle your rudder joystick to be sure
it is), adjust the boat’s rudder servo horn
and linkage if necessary so the rudder is
fairly parallel with the keel. en, from
the DX6i setup list screen, rotate the
roller until adjust list is highlighted
in the middle of the screen. Click once
and then scroll three clicks to highlight
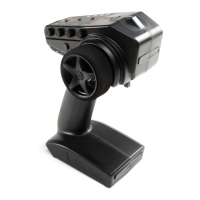
travel adj. Click once to bring up the
travel adj screen shown in Panel 6.
function won’t trim fins that will prevent
your boat from diving like a submarine
at times; instead, it electronically adjusts
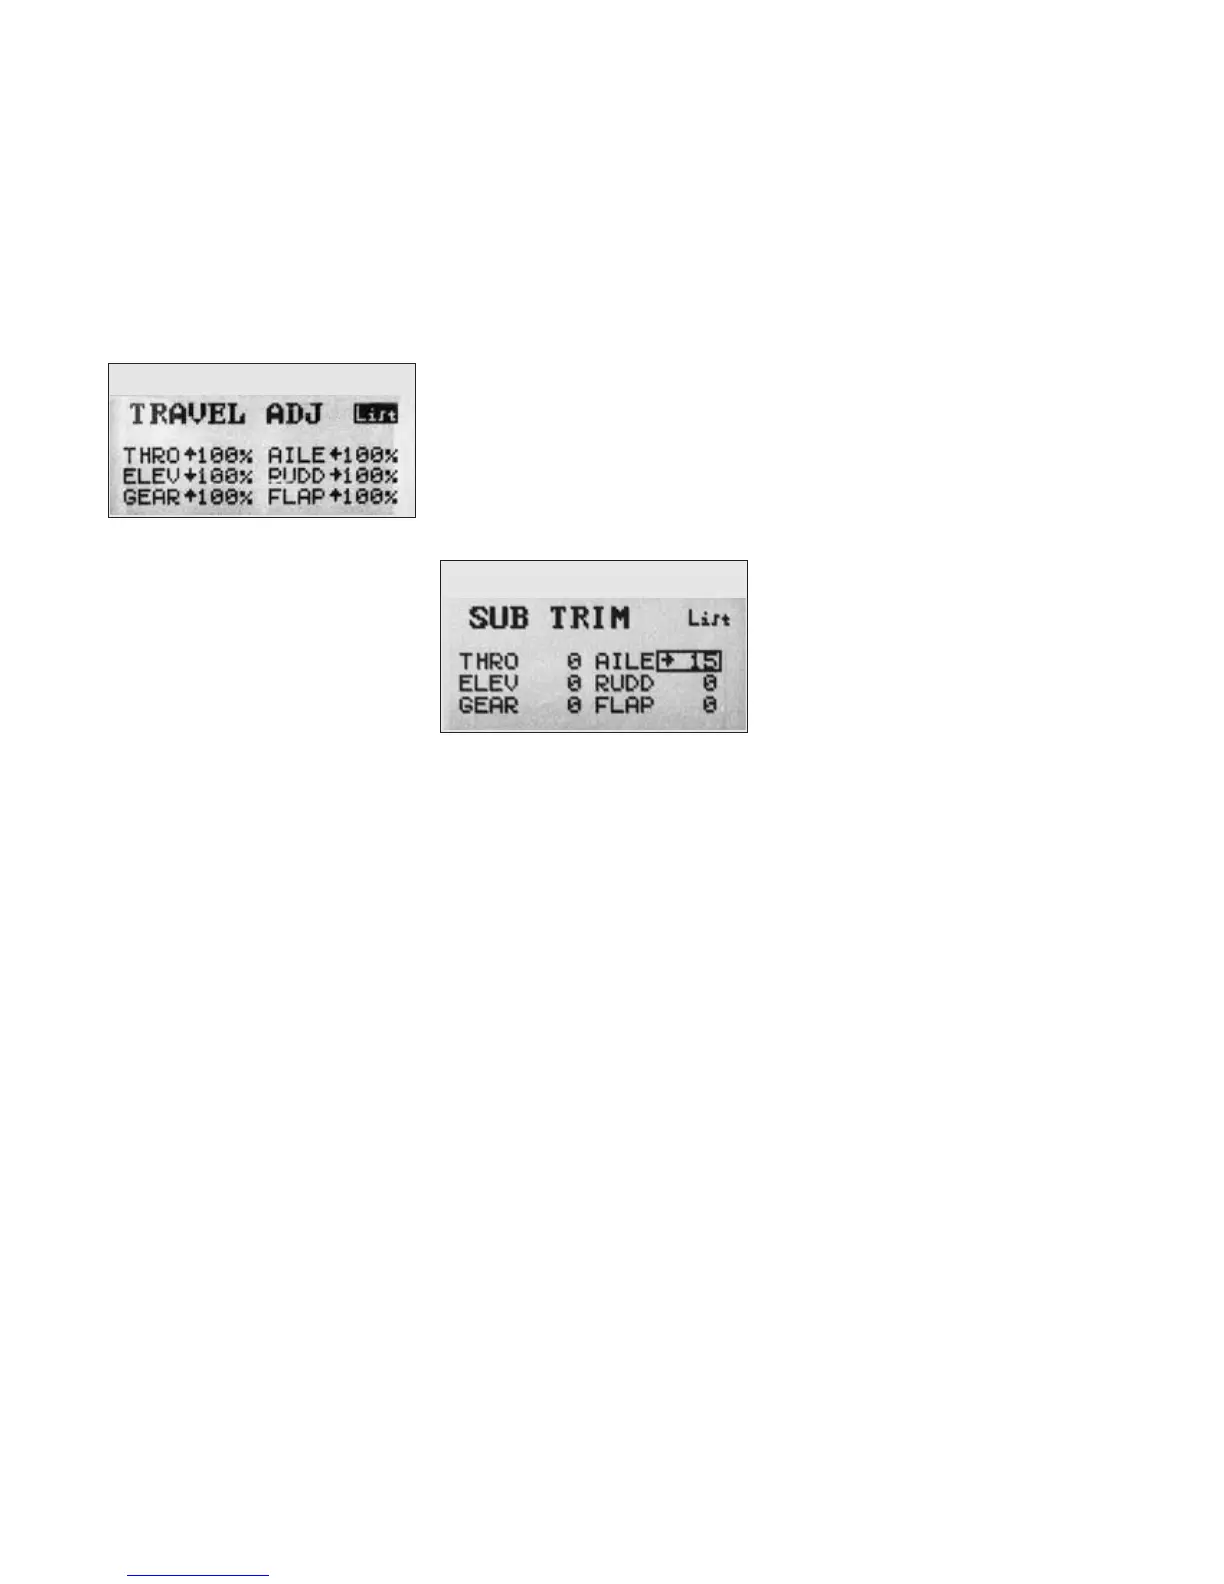
the centering of your servos. Click the
roller to call up the sub trim screen
shown in Panel 7. All the controls
should show zeros. If you need to tweak
your rudder to get it perfectly centered,
proceed as follows. Scroll to highlight
the zero after aile, click on it, and then
rotate the roller until your rudder is per-
fectly centered. (is adjustment moves
the rudder in very tiny increments; I
had to roll the roller 15 notches to the
right to correct a 1
º
deflection to the
left of center that was present after I
had programmed my rudder’s travel to
120% both ways in Step 4.b. Which is
why Panel 7 shows è 15 after aile).
‘needle’ of the sail trim gauge (the white
vertical bar at the left side of the screen)
with the black switch to the right of the
sail joystick. With the sail joystick in
the center of its range the sail servo arm
should point at roughly 9:00 relative to
the bow. If not, reposition the arm on
its shaft so that it does.
b. Sail servo travel – Now access the
adjust list screen. Scroll until travel
adj is highlighted, then click on it to
access the travel adj screen shown in
Panel 6. Scroll until the é100% next
to thro is highlighted. Now, carefully
move the sail joystick to trim the sails,
all the way to its fully trimmed posi-
tion if the mainsheet does not become
taught and the sail servo begin to hum.
(If necessary, reposition the servo arm
on its shaft and readjust the attach-
ment of the common sheet to the
cockpit floor so that, with the joystick
in the fully trimmed position, the sail
servo arm is pointing at around 11:00
relative to the bow, the knot connecting
the common sheet to the main and jib
sheets is about 1/2 inch forward of the
turning block on the aft port deck, and
the mainsheet is not quite taught. Now,
with the joystick still fully trimmed in,
rotate the DX6i roller control clock-
wise (to the right) until the mainsheet
just becomes tense. e sail servo arm
should now point somewhere around
11:30 and the common sheet knot
should be 1/8 inch or so forward of its
turning block. If not, tinker with the
position of the servo arm on its shaft
and the common sheet adjustment until
those conditions are met. With my boat,
on the travel adj screen thro reads
ê125% when I finish this process.
Next, with the sails fully trimmed in
and the main boom essentially on the
center line of the hull, check to be sure
that the jib boom points roughly at the
aft shroud—where the jib is trimmed
properly for a beat. Now carefully push
the sail joystick to the other (fully out)
end of its range. e servo arm should
point somewhere between 7:30 and
8:30 at this point and you should be
able to push the main boom forward
until it is touching the shrouds. I like to
have my jib boom about 5-10 degrees
forward of perpendicular to the hull
Panel 6
Panel 7
Scroll until the è100% next to aile
(not rudd, remember) is highlighted.
Move the rudder joystick to the extreme
right and left ends of its range and see
how far your rudder moves; if you want
more rudder travel, with the joystick
pushed to the right rotate the roller to
the right to deflect the rudder further
rightward until you like the way it looks
(I set mine at 120%). Now push and
hold the rudder joystick to the left (you
will see the number return to 100%)
and holding the joystick there rotate the
roller until the same number as your
rightward deflection (e.g., in my case
120%) appears. en click the roller to
implant these adjustments in memory
and scroll back to List, and then click to
return to the adjust list screen. (Don’t
worry if the rudder now seems to be
deflected slightly when its joystick is
centered; you’ll fix that in the next step).
b. Centering – Before proceeding
with this step, be sure you haven’t ac-
cidentally moved the rudder trim switch
located below the rudder joystick.
Return to the Main screen and, with
the rudder joystick centered, look at
the rudder trim gauge (the horizontal
bar below the airplane icon). Its ‘needle’
should be in the dead center of that bar
(the needle is white when it is centered
and turns black when the trim switch
moves it to either side). Tweak the rud-
der trim switch if necessary to make
its needle turn white. Next, bring up
the adjust list screen and scroll to
highlight sub trim. Unfortunately this
c. Dual rate and Exponential – I
played with these ways of customizing
my rudder motion with my old DX6
and found them, and the transmitter
switch that says your choices are “0” and
“1,” more distracting than useful. If you
want to try them, now that you are well
on your way to becoming a DX6i Jedi
Master you will have no trouble under-
standing and following the instructions
on pp. 62-63 of the manual.
Step 5. Sail control adjustments
us far you have not touched the
sail joystick, which should have been
roughly centered when you first turned
on the transmitter. Note that it may be
possible to over trim the sails before you
have adjusted the sail (
thro) control.
Over trimming, particularly if it occurs
suddenly (for example, if the sails are
out but the sail joystick is in the fully-
trimmed position before you turn on the
transmitter) can create a force sufficient
to break something. Be careful when
you trim in with the sail joystick.
a. Sail servo position – Access the
Main screen (that should be a piece of
cake by now) and, if necessary center the

 Loading...